• Remove the protective plastic film from the filter cartridge prior to
installation. Carefully align the cartridge within the filter housing,
ensuring it is seated evenly within the designated grooves. Secure the
housing lid by screwing it on gently to avoid compromising the
integrity of the filter.
• The drain outlet pipe must be fitted to the drain outlet fitting on the
ice-maker. Use a cable tie to secure it once fitted to prevent leakage.
• This appliance utilizes a gravity-fed drainage system. Therefore, the
drainage outlet pipe must be positioned a minimum of 100mm below
the level of the appliance's drain pipe hole, ensuring a downward
trajectory for effective water flow.
• The water pressure must be between 2 and 4 bar.
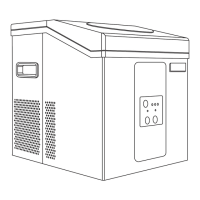
• Plug the power cord into a dedicated power source, then press the
on/off switch to start the ice-making process. The green “run” light
will be lit, and the ice-maker will start to operate.
• The operation of the ice-maker is completely automatic.
• If the storage container is full with ice, the “ice full” indicator on the
display panel will be lit up, and the ice-maker will stop automatically.
• Remove the ice from the storage container and then the ice-maker
will restart automatically after a short while.
• Should the water supply to the appliance be insufficient, the
“water low” light indicator will light up. The ice-maker will
stop automatically.
• When the water supply is restored, the ice-maker will restart
automatically again after a short while.
09