Operation Instructions
Quick Start
After putting a battery in the light and tightening the parts together, the light should quickly blink once
to confirm it has power and is now operational. After that, basic usage is simple:
Click to turn the light on or another click to turn it off.
- Hold the button to change brightness.
- Release and hold again to change brightness the other way.
That is all the user needs to know for basic use, but there are many more modes and features
available for people who want more.
Before reading the rest of this manual, it is recommended that users look at the Anduril UI diagram(s),
which should be provided along with the flashlight.
Button presses
Button presses are abbreviated using a simple notation:
- 1C: One click. Press and then quickly release the button.
- 1H: Hold. Press the button, but keep holding it.
- 2C: Two clicks. Press and release quickly, twice.
- 2H: Click, hold. Click two times, but hold the second press.
- 3C: Three clicks. Press and release quickly, three times.
- 3H: Click, click, hold. Click three times, but hold the final press.
The same pattern is used with higher numbers too. For example, 10C means ten clicks... and 10H
means ten clicks but hold the final press.
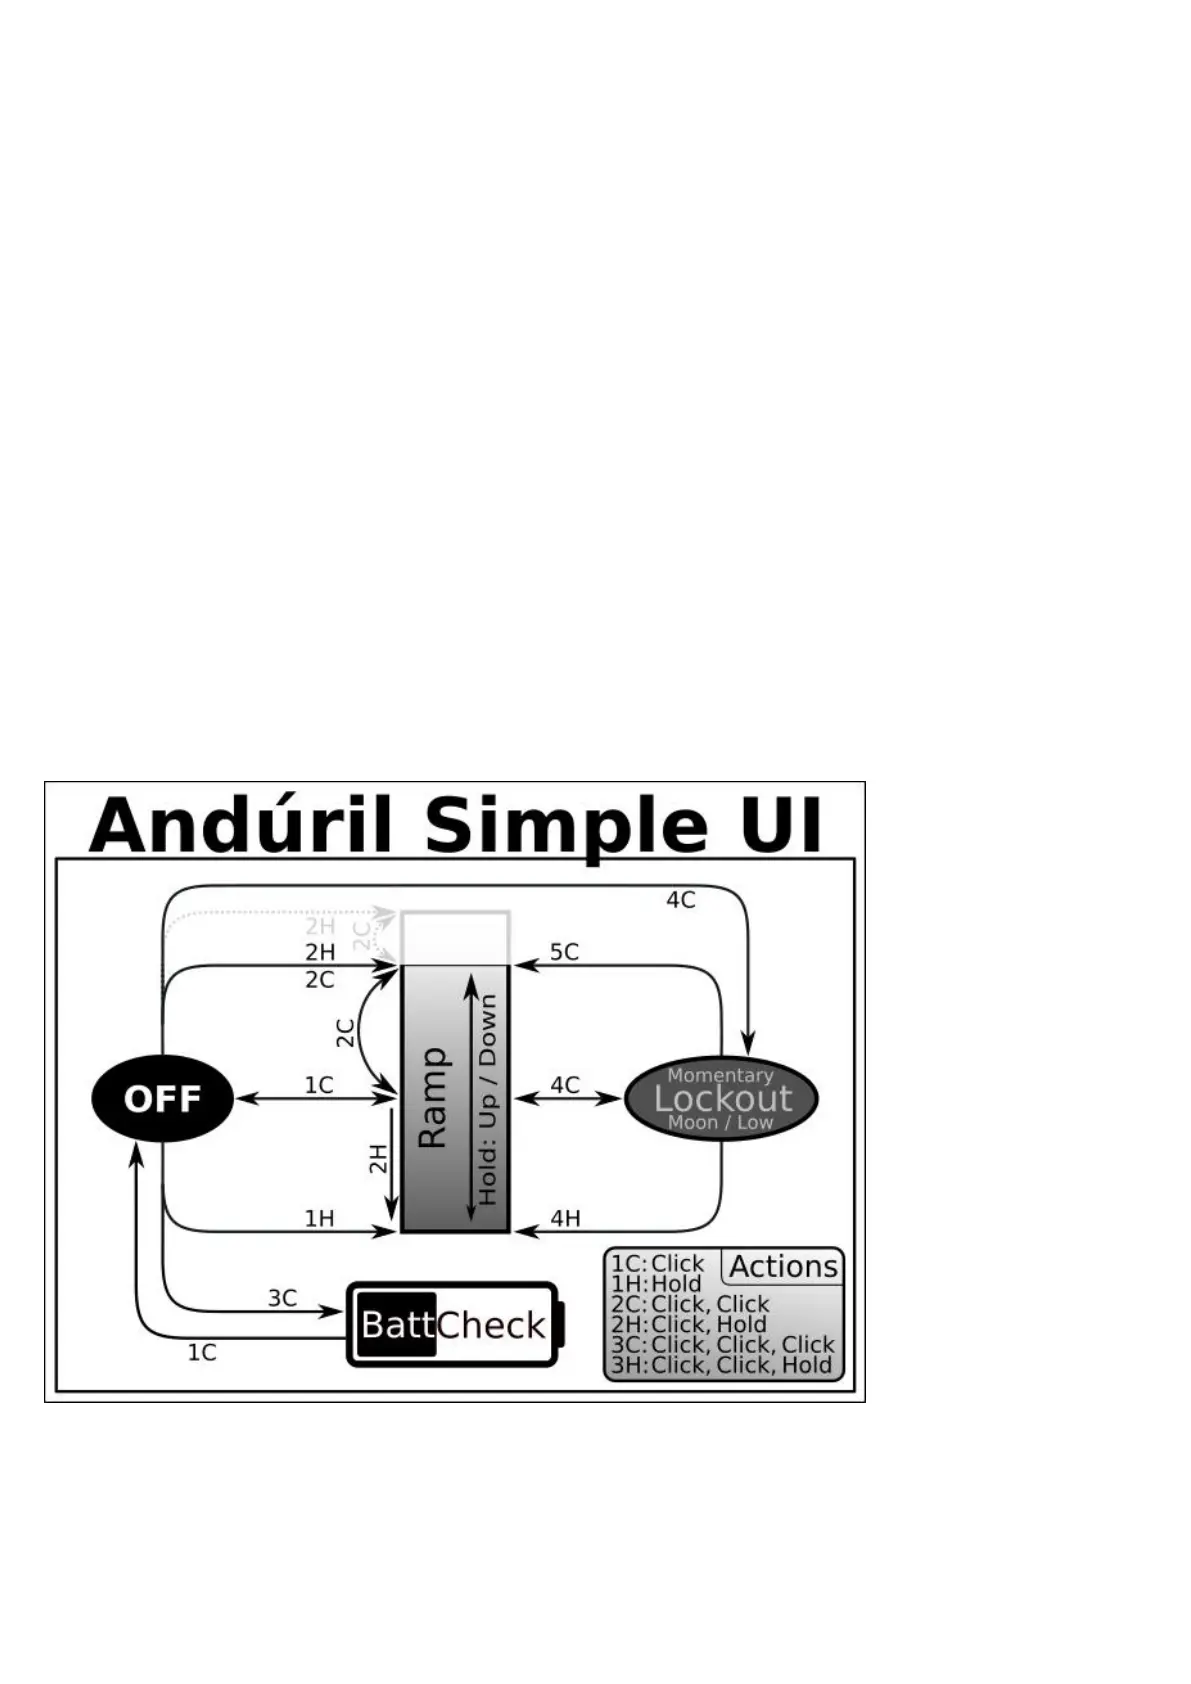
Simple UI Diagram Not everything is covered in the diagram, please read the text.
Simple UI
By default, the light uses a simple UI. This is useful if you lend the light to someone else, or if you just
don't want to bother with any crazy disco modes.
Simple UI has all the basic functions needed to work as a flashlight, but the minimum and
maximum brightness are limited to make it safer, and any complex or advanced functions are blocked.
Functions available in Simple UI include:
- 1C: On / off