Version 6.2, February 2025
SolarEdge Solution Connection and Configuration Guide for Australia 3
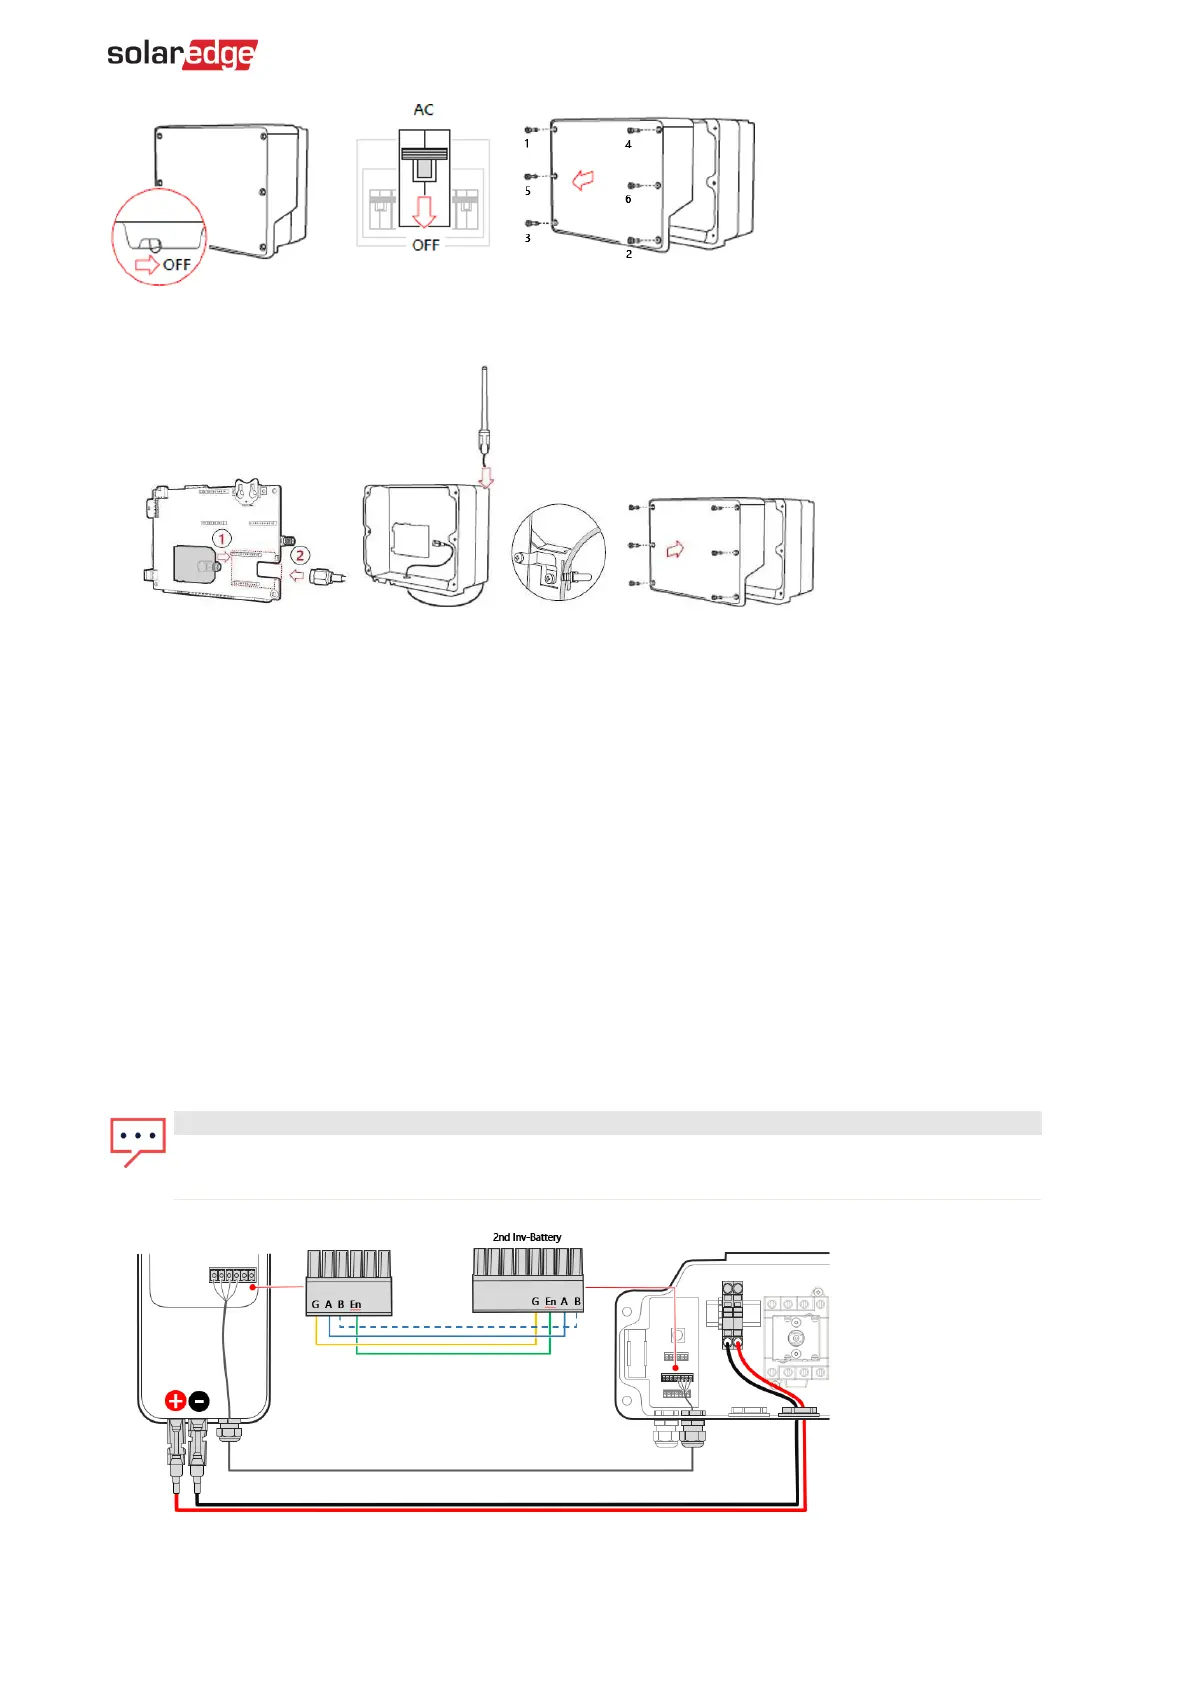
6. Connect the SolarEdge Home Network plug into the socket on the communication board.
7. Connect the antenna and pass the antenna cable through the communication gland.
8. Clip the antenna (supplied) to the heatsink fin.
9. Tie the antenna cable to the communication board bracket with a plastic tie (supplied).
10. Replace the inverter cover and Connection Unit cover (DCD).
11. Tighten screws to 8.4N·m.
12. Restart the inverter and verify the device in SetApp.
13. Select Status > Communication > Home Network OK.
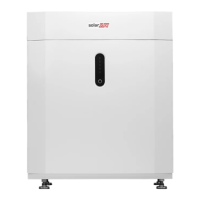
To connect communication between the inverter and SolarEdge Home Battery via RS485:
1. Connect the communication cable to the battery's RS485 connector, as displayed below.
2. Open Communication Gland 2 at the bottom of the inverter's Connection Unit.
3. Feed the other end of the communication cable through one of the gland openings.
4. Remove the connector from the port labeled 2nd Inv-Battery on the communication board.
5. Connect the communication cable to the connector, as displayed below.
6. If 2 or more batteries are being connected, daisy chain the connections between each battery.
7. Close Communication Gland 2 with a torque of 5 N·m.
NOTE
When connecting the SolarEdge Home Battery to an HD Wave or Genesis
, the EN line connection