Version 6.2, February 2025
SolarEdge Solution Connection and Configuration Guide for Australia 2
Mitigation of nuisance tripping .............................................................................................................................. 49
Installation and selection of an external RCD device ..................................................................................... 49
Overview
This connection and configuration guide describes how to connect the SolarEdge Home Battery to a
SolarEdge inverter, directly or through a DC Combiner. This document describes the wiring process
for the SolarEdge Backup Interface and the configuration steps using SetApp after commissioning.
Connect battery communication and DC
To set up communication between the battery and the inverter, SolarEdge strongly recommends
using the SolarEdge Home Network. On the Home Hub inverter, if the SolarEdge Home Network
cannot be used, you can set up communication using an RS485 port, as described in this section. On
the 3Ph Booster (AUB) inverter, the RS485 connection is not possible, but on the SolarEdge Home
Network it can be used. If x3 batteries are installed on a single inverter, the DC Combiner or SolarEdge
Branch Connectors can be used. Use the following cable types:
DC - 6mm - 10mm CSA 600V insulated depending on route length.
Communication - CAT6
ead all handling and safety instructions in the installation guides that come with the battery and
inverter cover must be opened only after switching the inverter
located at the
bottom of the inverter to OFF
. This disables the DC voltage inside the inverter. Wait five minutes
before opening the cover.
that the correct battery polarity is always observed. Turning on the battery with reverse
polarity may permanently damage the battery.
connecting the battery to the inverter, ensure the battery power is off.
SolarEdge
Home Battery
1. Toggle off the battery
.
2. Turn off the battery circuit breaker.
Single Phase Home Hub Inverter
ead all handling and safety instructions in the installation guides that come with the SolarEdge
Home Network card and the inverter.
To connect communication via SolarEdge Home Network:
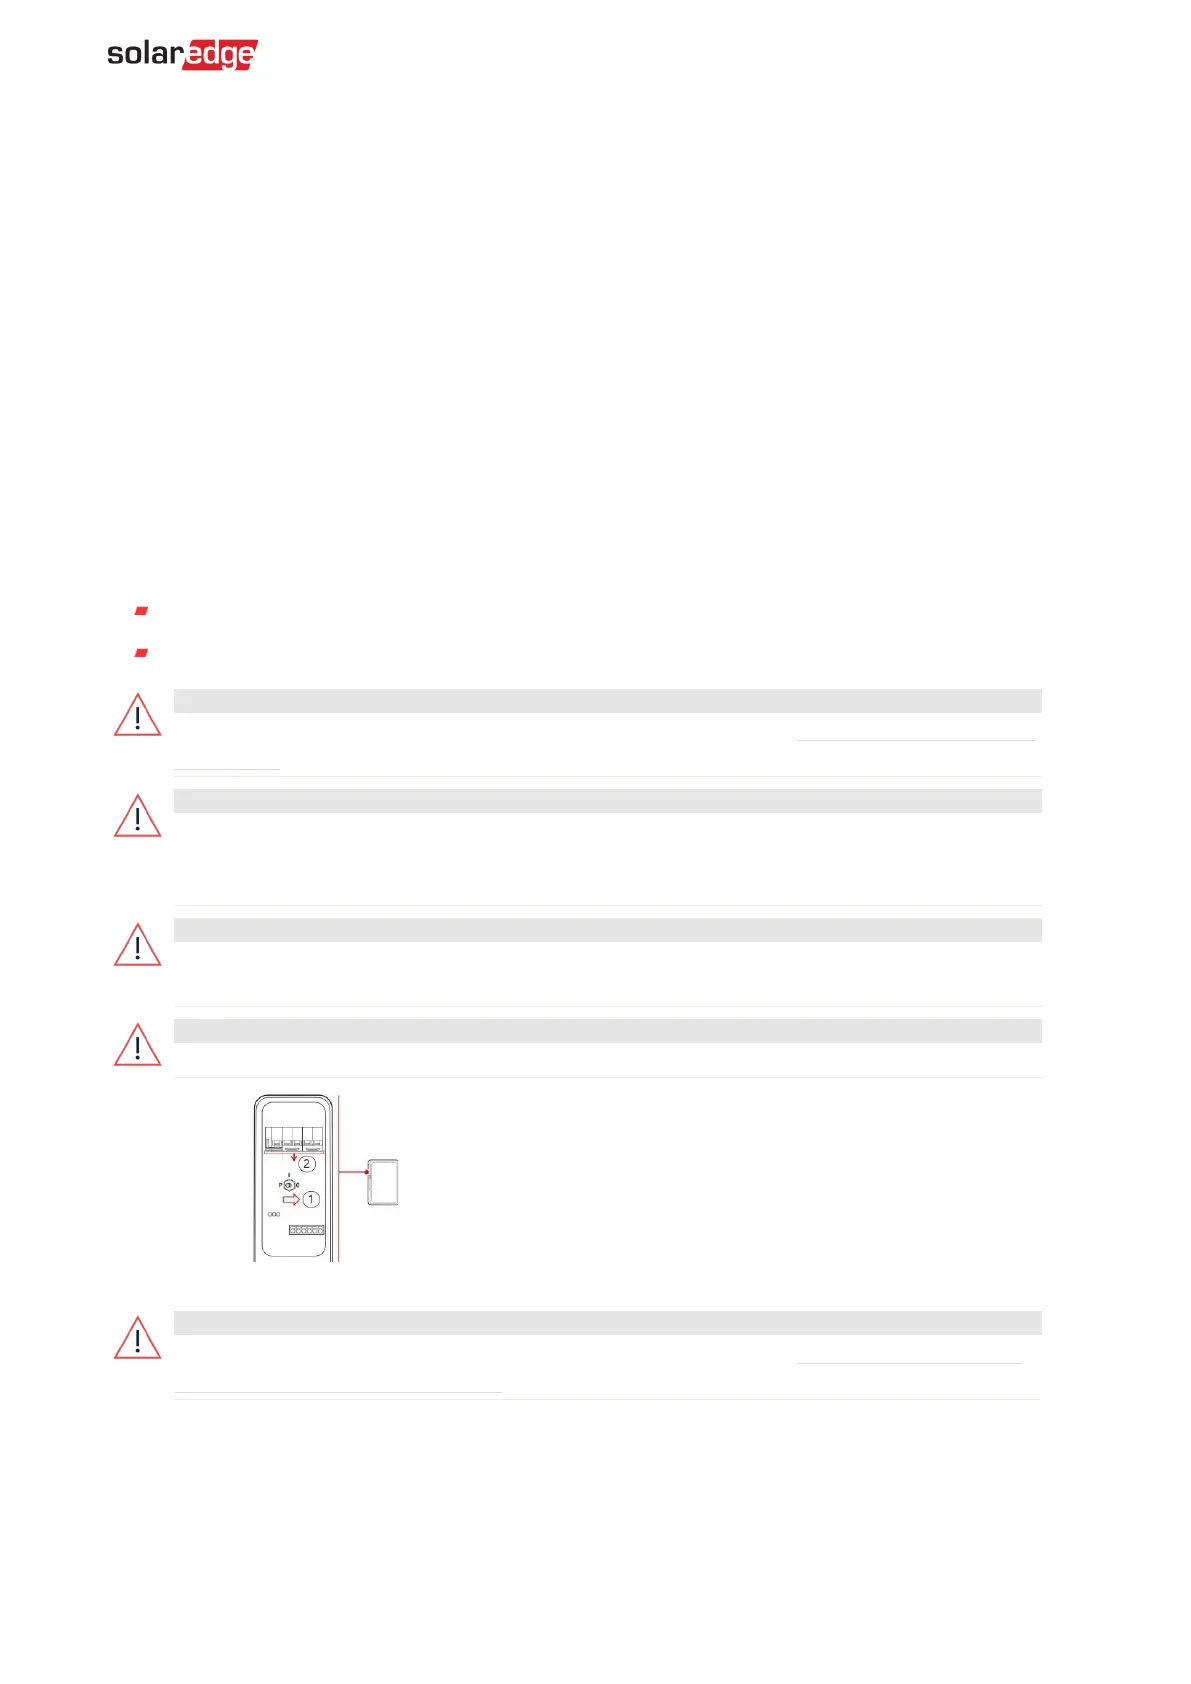
1. Remove the inverter cover.
2. Switch off the inverter P/1/0 switch and wait 5 minutes for the internal capacitors to discharge.
3. Switch off the AC circuit breaker on the main distribution panel.
4. Open the Allen screws of the inverter cover and pull the cover horizontally before lowering it.
5. Open the inverter cover as displayed below.