EasyManuals Logo

SolarEdge SE10k User Manual

SolarEdge SE10k
114 pages
To Next Page IconTo Next Page
To Previous Page IconTo Previous Page
Page #31 background imageLoading...
Page #31 background image
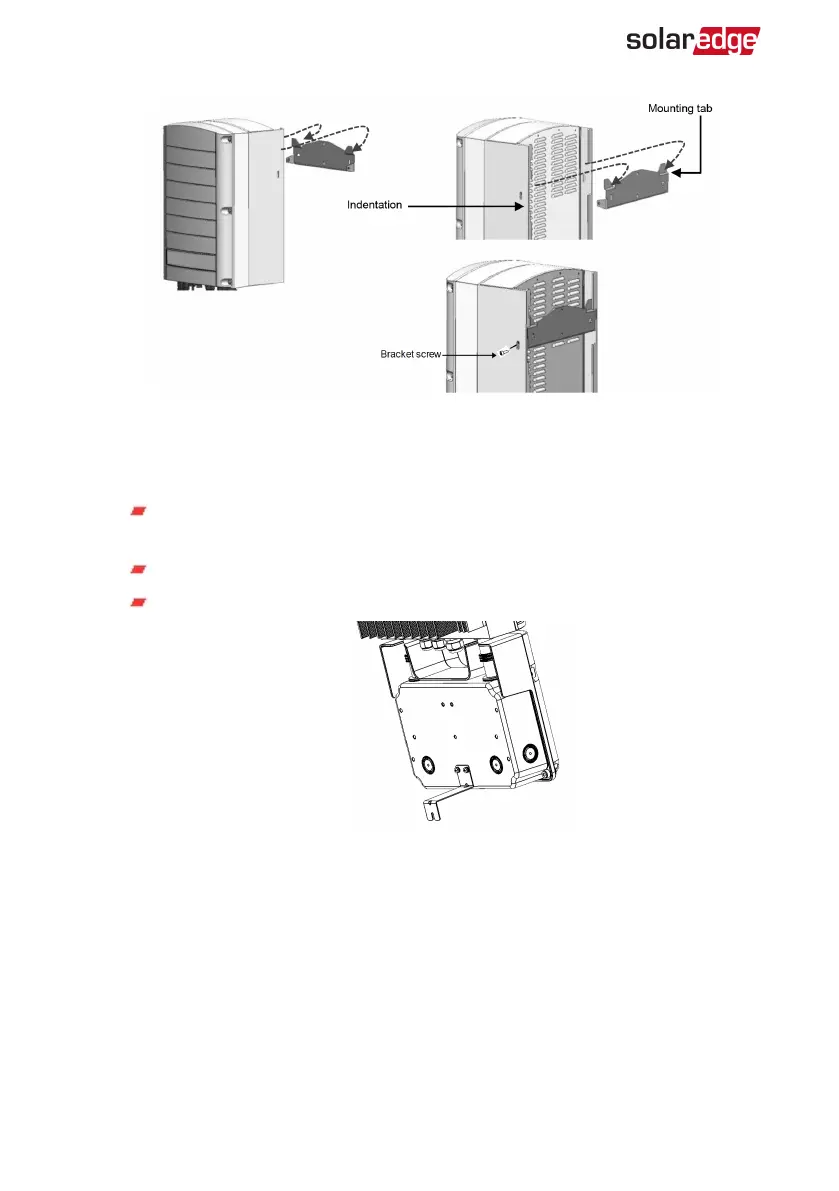
Figure 10: Hanging the inverter on the bracket
7. Secure the Connection Unit bracket to the wall:
8. For inverters with Connection Unit - secure the Connection Unit bracket to the wall:
Mark the location of the bracket screw for the DC Safety Unit and drill the
hole.
Fasten the bracket using a standard bolt.
Verify that the bracket is firmly attached to the mounting surface.
Figure 11: DC Safety Unit bracket
9. Insert the two supplied screws through the outer heat sink fin on both sides of the
inverter and into the bracket (see
Figure 10
). Tighten the screws with a torque of 4.0
N*m / 2.9 lb.*ft.
-Three Phase System Installation Guide MAN-01-00057-4.1
30 Mounting the Inverter

Table of Contents

Questions and Answers:

Question and Answer IconNeed help?

Do you have a question about the SolarEdge SE10k and is the answer not in the manual?

SolarEdge SE10k Specifications

General IconGeneral
AC Output Power10000 W
Maximum Efficiency98.3%
CoolingNatural Convection
Protection RatingIP65
Rated AC Power10000 W
Max. DC Power13500 W
CEC Weighted Efficiency97.5%
TopologyTransformerless
Number of MPP Trackers2
Warranty12 years
Operating Temperature Range-25°C to 60°C
Communication InterfacesRS485, Ethernet
DC Overvoltage ProtectionType 2

Related product manuals