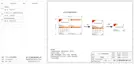
EasyManuals Logo

SolaX Power X1 Series User Manual

SolaX Power X1 Series
63 pages
To Next Page IconTo Next Page
To Previous Page IconTo Previous Page
Page #38 background imageLoading...
Page #38 background image
Hexagon keys
Torque: 1.5±0.2N·m
Electrical Connection
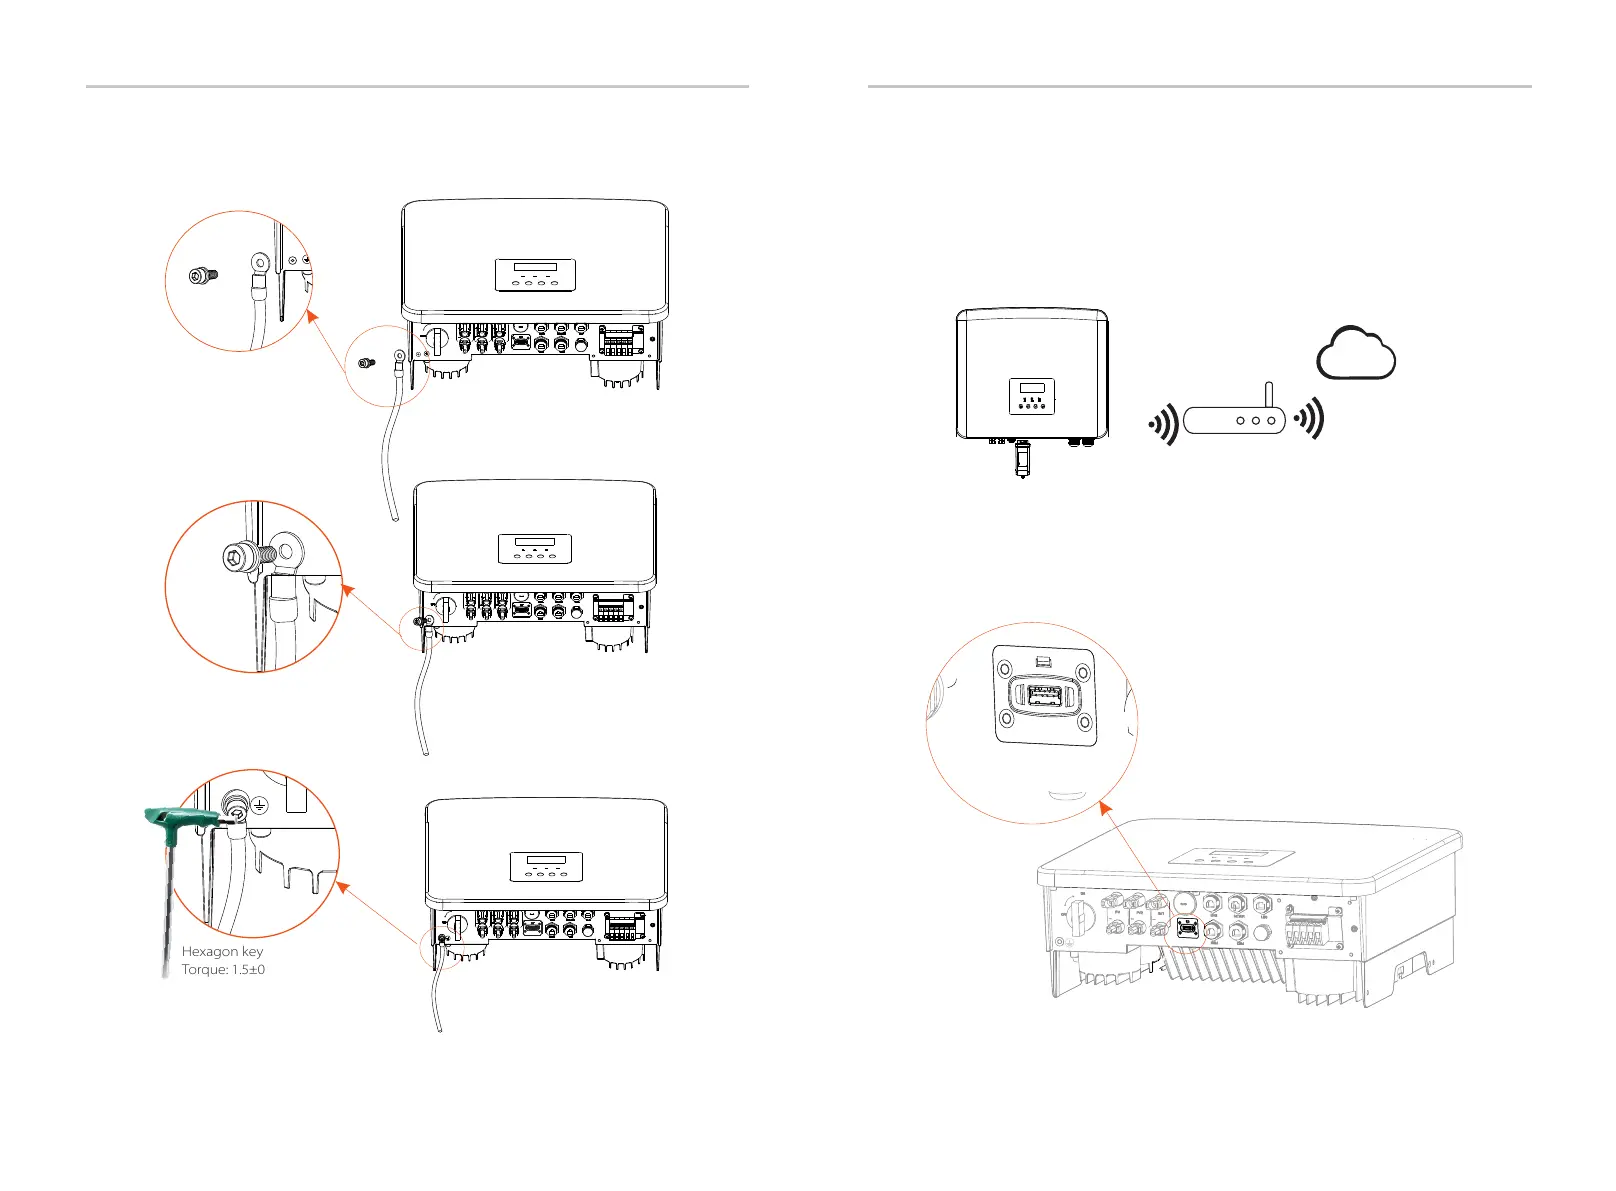
Ø WiFi connection diagram
Router
Ø Wireless monitoring accessories connection steps
Cloud
6.7 Monitoring Connection (Accessories)
Upgrade/Dongle
Upgrade/Dongle
Upgrade/Dongle
Upgrade/
Dongle
Step 1. First find the DONGLE port of the inverter.
70
71
Step 4. Find the ground connection port on the inverter, and screw the
ground wire on the inverter with an M5 Hexagon keys.
The inverter provides a DONGLE port, which can transmit data of the
inverter to the monitoring website via WiFi Plus Dongle, 4G Dongle,
GPRS Dongle, and LAN Dongle. (If necessary, purchase products from us)
U
p
g
r
a
d
e
/
D
o
n
g
l
e
U
p
g
r
a
d
e
/
D
o
n
g
l
e

Other manuals for SolaX Power X1 Series

Questions and Answers:

Question and Answer IconNeed help?

Do you have a question about the SolaX Power X1 Series and is the answer not in the manual?

SolaX Power X1 Series Specifications

General IconGeneral
Protection RatingIP65
AC Voltage Range180V-280V
THDi<3%
Warranty5 years
MPPT Voltage Range520V
Number of MPPTs1
Nominal AC Voltage230V
Power Factor0.8 leading to 0.8 lagging
European Efficiency97%
ProtectionDC Reverse-Polarity Protection, AC Short-Circuit Protection
Operating Temperature Range-25°C to +60°C
CoolingNatural
CommunicationWiFi, Ethernet, GPRS
Frequency50Hz / 60Hz

Related product manuals