Firmware Upgrading
Update:
For ARM file:update \ARM\618.xxxxx.00_HYB_1P_ARM_Vx.xx_xxxxxxxx.usb”;
For DSP file:update\DSP\618.xxxxx.00_HYB_1P_DSP_Vx.xx_xxxxxxxx.usb”;
Long press for 5
seconds
Ø Upgrade steps
Upgrade(ARM)
Cancel
>OK
Upgrade Selection
>ARM
DSP
Update(ARM) Update
Update(ARM)
>618.xxxxx.00_HYB_
1P_ARM_Vx.xx_
xxxxxxxx.usb
(a) (b)
(c)
>ARM
DSP
(e)
Upgrading---------25%
(d)
U Disk
Firmware Upgrading
Upgrade/Dongle
/
Dongle
BAT
76
77
2) Please contact our service support to obtain the firmware, and store the
firmware in the U disk according to the following path.
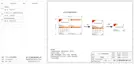
Step 1. Please save the "Upgrade" firmware in your U disk first, and press the
"Enter" button on the inverter screen for 5 seconds to enter the OFF mode.
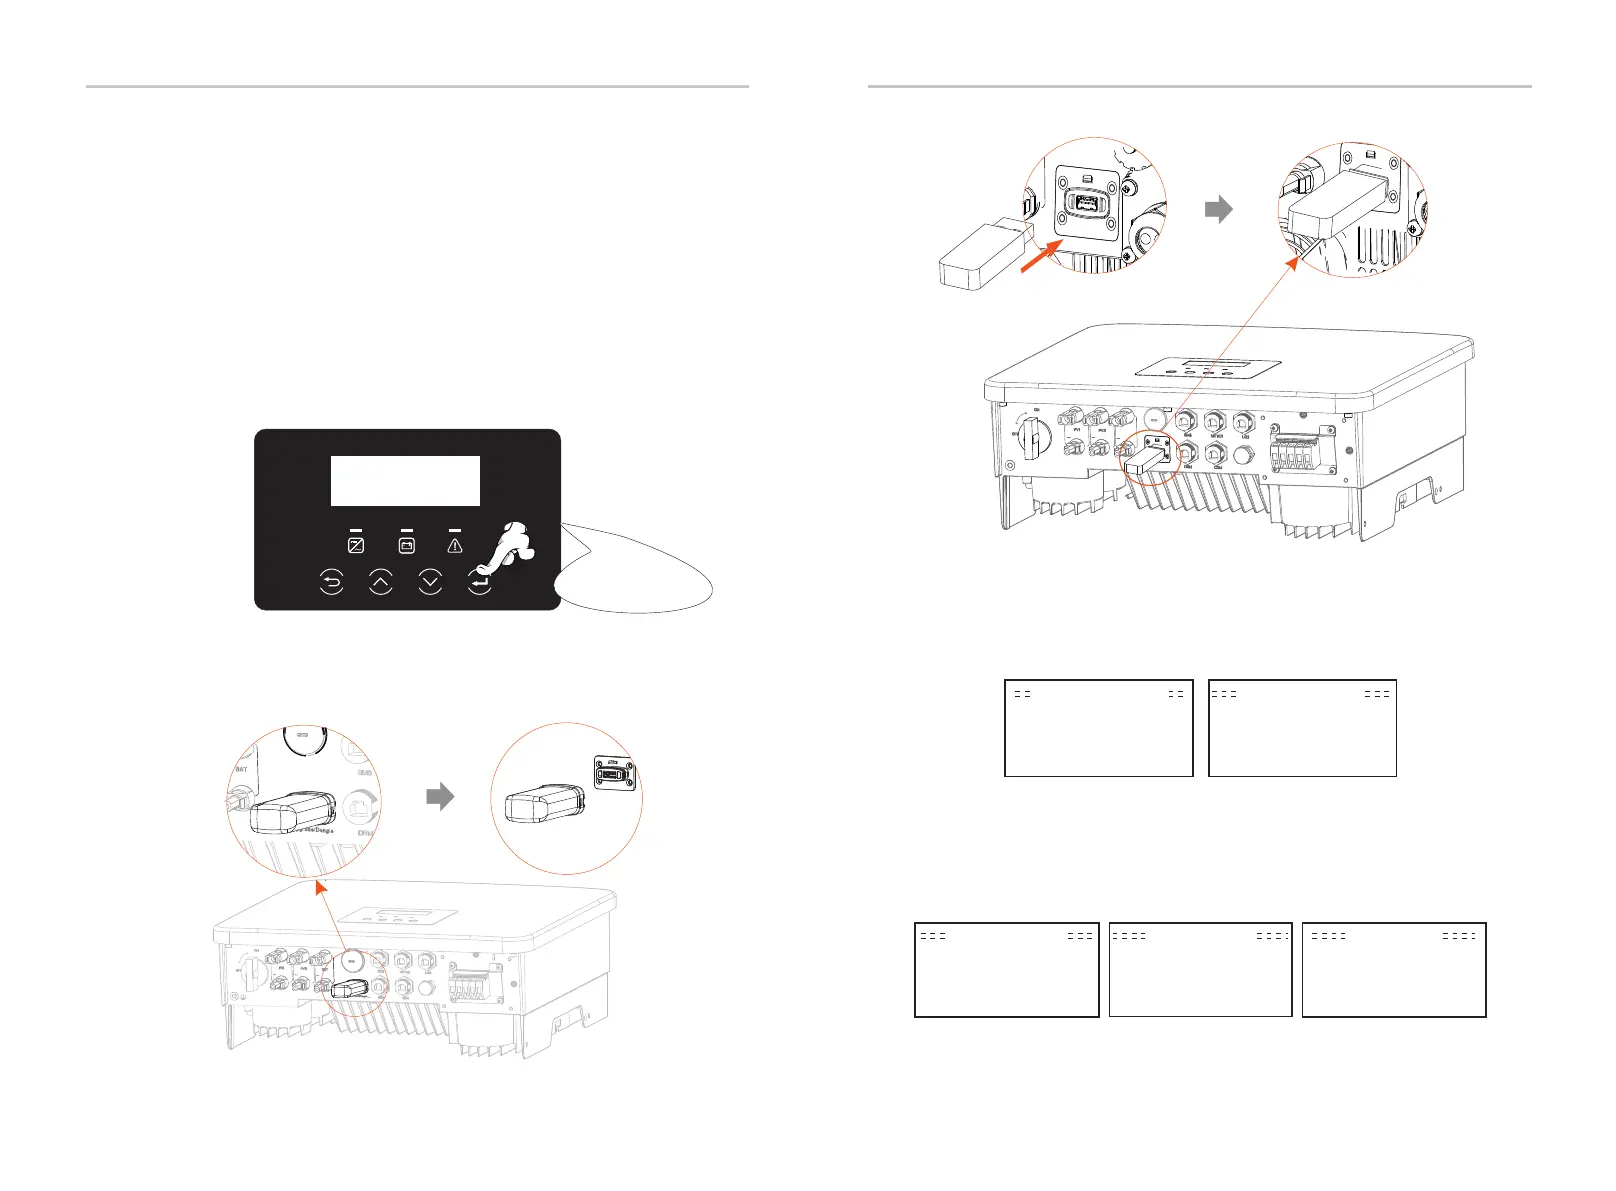
Step 2. Find the "Upgrade" port of the inverter, unplug the monitoring
module (WiFi Dongle/LAN Dongle/4G Dongle) by hand, and insert the USB
flash drive.
Step 3. LCD operation, enter the upgrade interface "update", as shown
below(a): Please press the up and down keys to select ARM, then press
down to set "OK", press the enter key to enter the software version
interface;
Step 4. Please confirm the new firmware version again and select the
firmware to upgrade. The upgrade takes about 20 seconds.
(d) When it is completed, the LCD screen returns to the "Update" page.
/
D
o
n
g
l
e
Note: Vx.xx is version number, xxxxxxxx is file completion date.

 Loading...