EasyManua.ls Logo

Sony DCR-TRV255E User Manual

Sony DCR-TRV255E
78 pages
To Next Page IconTo Next Page
Page #1 background imageLoading...
Page #1 background image
SERVICE MANUAL
•For ADJUSTMENTS (SECTION 6), refer to SERVICE MANUAL, ADJ (987629251.pdf).
•For INSTRUCTION MANUAL, refer to SERVICE MANUAL, LEVEL 1 (987629241.pdf).
•For MECHANISM ADJUSTMENTS, refer to the “8mm Video MECHANICAL ADJUSTMENT MANUAL IX
M2000 MECHANISM ” (9-929-861-11).
Reference No. search on printed wiring boards is available.
•Table for differences of function of each model.
•TO TAKE OUT A CASSETTE WHEN NOT EJECT (FORCE EJECT)
•When the machine needs to be repaired, make sure to follow the items of “LCD TYPE CHECK”.
Changing the data is needs when IC4501 is replaced, make sure to follow the items of “CHANGE OF IC4501”.
HELP: Sheet attachment positions and procedures of processing the flexible boards/harnesses are shown.
Link
SERVICE NOTE
DISASSEMBLY
BLOCK DIAGRAMS
FRAME SCHEMATIC DIAGRAMS
SCHEMATIC DIAGRAMS
PRINTED WIRING BOARDS
REPAIR PARTS LIST
SPECIFICATIONS
SERVICE NOTE
DISASSEMBLY
BLOCK DIAGRAMS
FRAME SCHEMATIC DIAGRAMS
SCHEMATIC DIAGRAMS
PRINTED WIRING BOARDS
REPAIR PARTS LIST
SPECIFICATIONS
Link
Revision History
Revision History
Ver 1.0 2003. 11
NTSC MODEL: DCR-TRV260/TRV265
PAL MODEL: DCR-TRV255E/TRV265E
M2200 MECHANISM
How to use
Acrobat Reader
How to use
Acrobat Reader
Photo: DCR-TRV265
DCR-TRV255E/TRV260/TRV265/TRV265E
RMT-830
VIDEO CAMERA RECORDER
US Model
Canadian Model
DCR-TRV260
AEP Model
UK Model
East European Model
North European Model
DCR-TRV255E/TRV265E
E Model
DCR-TRV260/TRV265/TRV265E
Australian Model
DCR-TRV265E
Tourist Model
DCR-TRV265/TRV265E
Question and Answer IconNeed help?

Do you have a question about the Sony DCR-TRV255E and is the answer not in the manual?

Sony DCR-TRV255E Specifications

General IconGeneral
Image Sensor1/6" CCD
Optical Zoom20x
Digital Zoom800x
LCD Screen Size2.5"
MicrophoneStereo
USB InterfaceYes
FireWire InterfaceYes
TypeDigital
Recording MediaMiniDV
Weight0.8 kg

Summary

Service Notes and Precautions

Self-Diagnosis Function Overview

Explanation of the self-diagnosis function and its displays.

Block Diagrams

Overall Block Diagram (1/5)

High-level system overview showing interconnected components.

Overall Block Diagram (2/5)

Continuation of the overall system overview.

Overall Block Diagram (3/5)

Continuation of the overall system overview.

Overall Block Diagram (4/5)

Continuation of the overall system overview.

Overall Block Diagram (5/5)

Final part of the overall system overview.

Power Block Diagram (1/2)

Diagram illustrating the power supply and distribution system.

Power Block Diagram (2/2)

Continuation of the power supply and distribution diagram.

Schematic Diagrams and Printed Wiring Boards

CD-471 Board Schematic

Schematic for the CD-471 board (CCD imager).

VC-344 Board Schematic Overview

Overview of VC-344 board schematics (1/10).
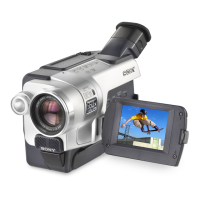
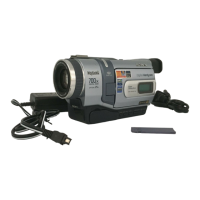
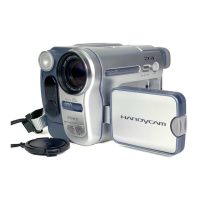
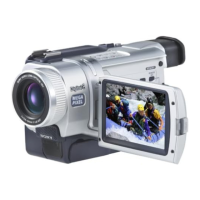
Repair Parts List

Related product manuals