12
Automation Operation
Automation Operation
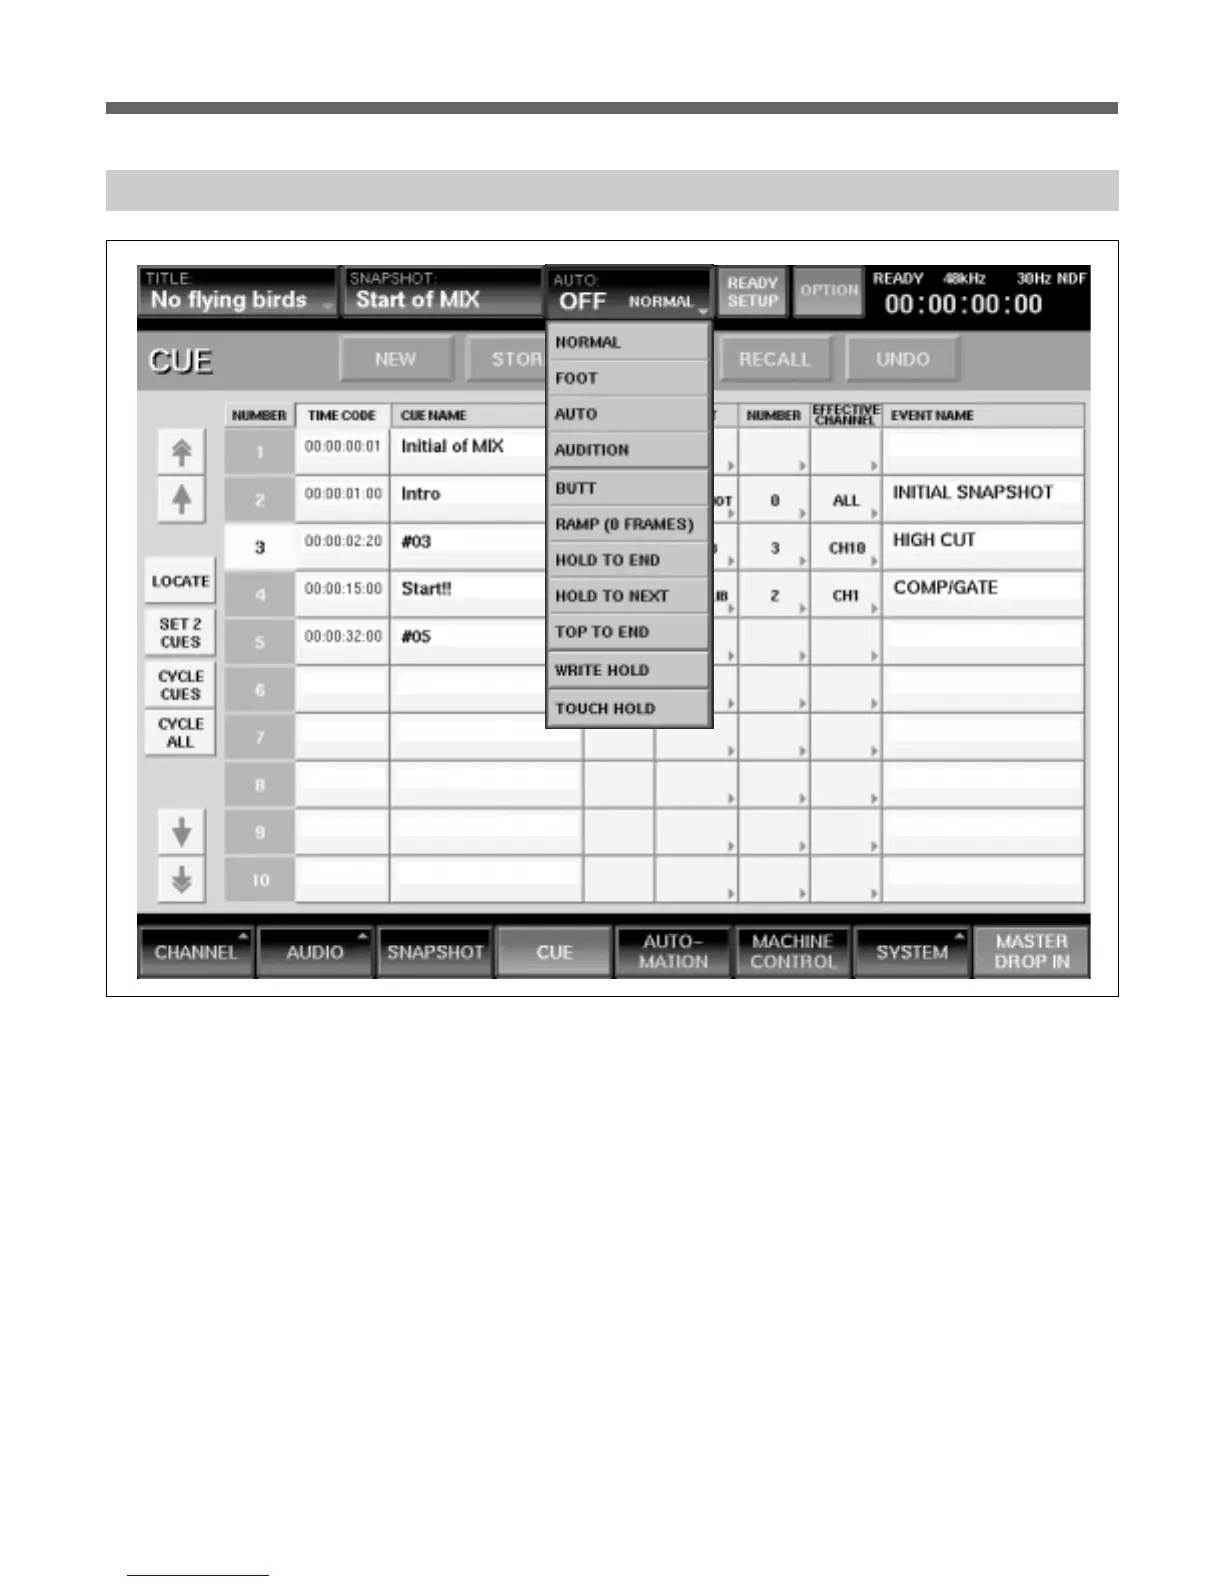
AUTO button
The button in the centre at the top of the GUI (with
AUTO legend at top left) displays the current
automation status. It is crucial to keep an eye on this
area during automation operations.
To the lower left of this button is a larger legend which
reflects the settings of the {ABS}, {TRIM} and {OFF}
buttons.
Touch AUTO legend for a pop-down of automation
options; what follows is a brief explanation of each.
They will be described with practical examples later in
this supplement.
Operational modes
The upper four operational modes inter-cancel with
each other and are displayed in the lower right corner
of the AUTO button:
GUI Options for Automation
NORMAL
This option is the fire-up default and is the setting for
the majority of automation operations.
FOOT
This option allows the automation record drop-in and
drop-out to be operated via a foot switch plugged into
the rear of the mixer. This mode can also be activated
in the AUTOMATION GUI by touching {FOOTSW}.
AUTO
This option allows controls that are set ready to write
automation data, to have their settings recorded
between specified timecode points. This mode can
also be activated in the AUTOMATION GUI by
touching {AUTO}.
 Loading...