2-2
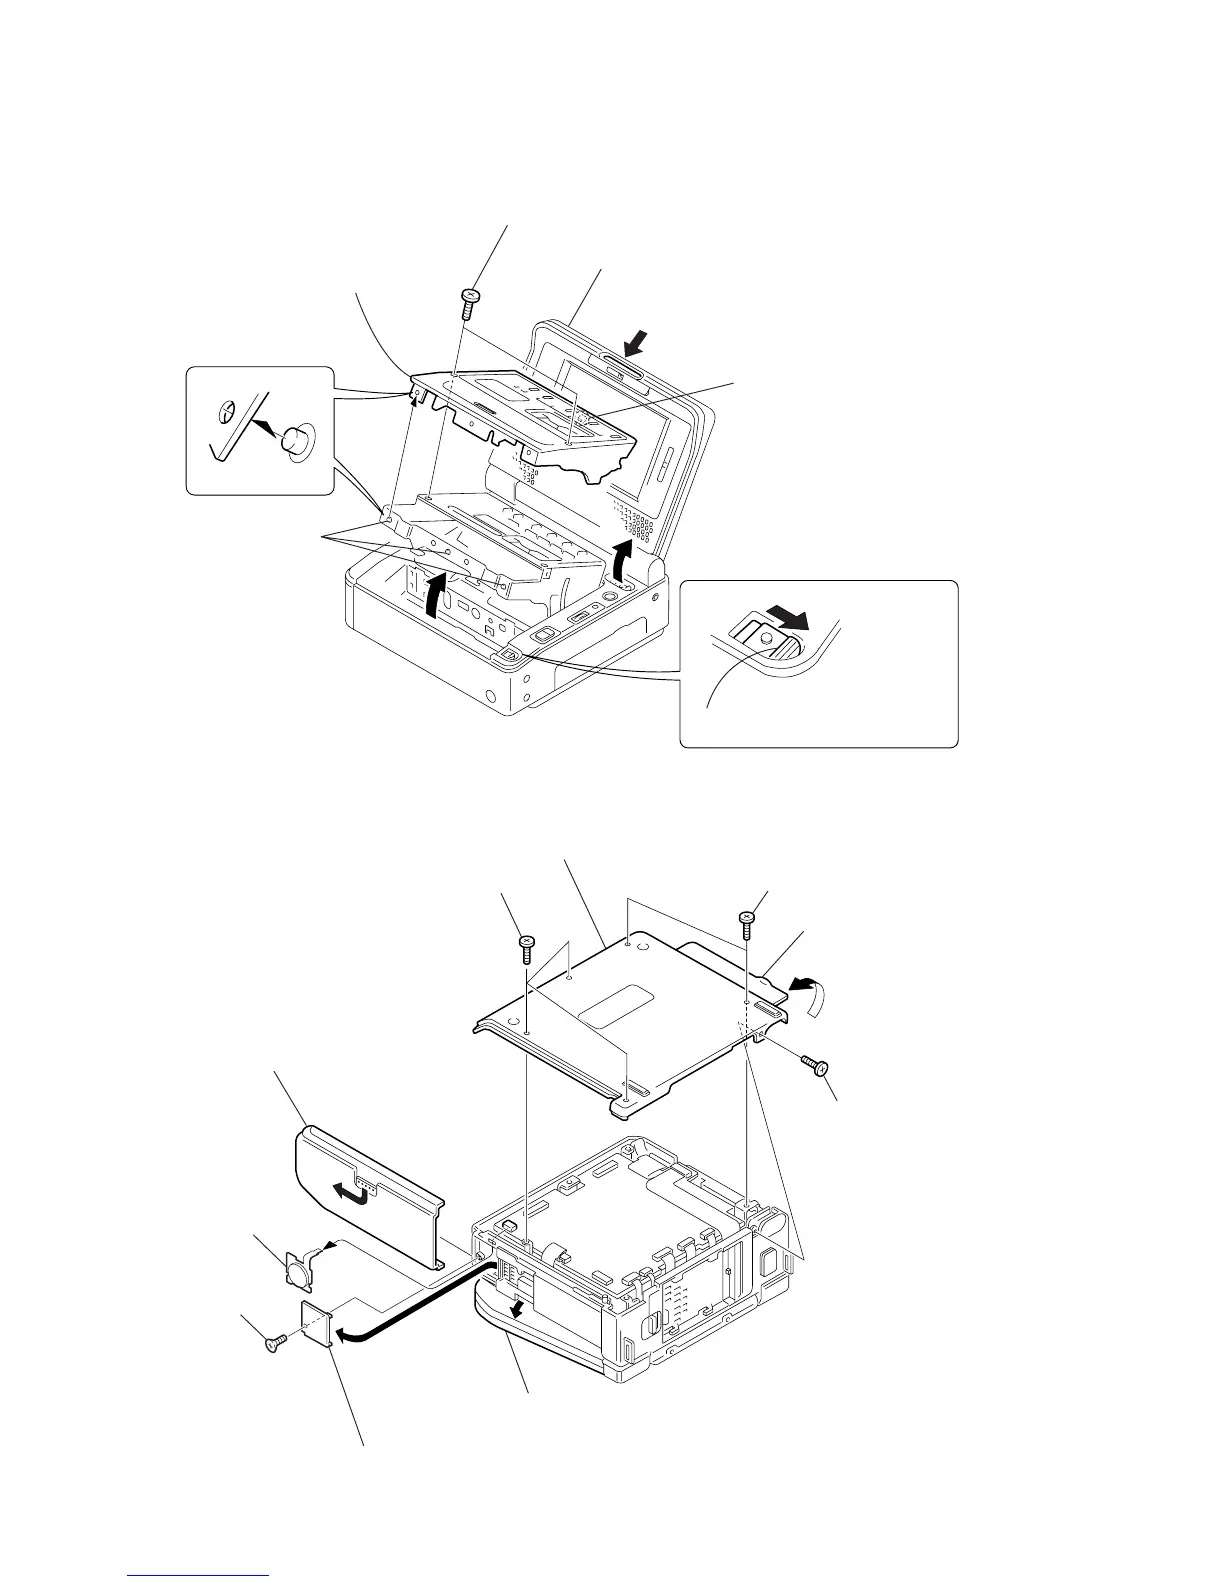
NOTE: Follow the disassembly procedure in the numerical order given.
2-1. CASSETTE LID ASSEMBLY
2-2. BOTTOM CABINET ASSEMBLY, FP-571 FLEXIBLE BOARD (LITHIUM BATTERY)
2
Two screws (M2
×
4),
lock ace, p2
5
Claw
6
Cassette lid
assembly
A
3
Press the cassette EJECT knob to
open the cassette compartment.
Push
1
Open the LCD panel in the
direction of the arrow
A
.
(GV-D800/D800E model)
4
Three dowels
VC-250
Board
6
Open the jack lid assembly
in the direction of the arrow
B
.
4
Two screws (M2
×
4),
lock ace, p2
7
Bottom cabinet assembly
5
Screw (M2
×
4),
lock ace, p2
3
Three screws (M2
×
4),
lock ace, p2
8
Tapping screw
(+k 2
×
5)
0
FP-571 flexible board
(4P)
9
Remove the lithium lid in the
direction of the arrow
C
.
B
2
Press the release button to remove
the cabinet lid assembly in the
direction of the arrow
A
.
1
Open the LCD panel little.
(GV-D800/D800E model)
C
A



 To Next Page