18
2 Select the filter setting according to the lighting
conditions.
Press the filter select UP or DOWN button while holding
the FILTER LOCAL button depressed.
Each press of the UP or DOWN button switches the
available optical filters in sequence.
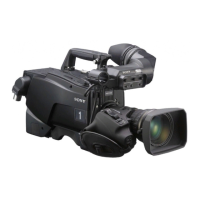
3 Place a white pattern in the same lighting conditions
as the subject, and zoom in on it so that a white area
is obtained in the screen to satisfy the positional and
quantitative requirements illustrated below.
A white object (white cloth, a white wall, etc.) near the
subject may be used in place of a white pattern.
Note
Be careful not to have any spots of high illumination in the
rectangle.
4 Adjust the lens iris opening.
With a manually adjusted lens: Set the opening to an
appropriate value.
With a lens which has automatic iris control: Set the
lens’ automatic/manual iris control switch to
automatic.
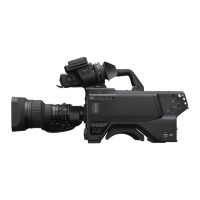
5 Push the AUTO W/B BAL switch to WHT and release
the switch.
The switch will return to the center position, and adjustment
will be performed.
During adjustment, the message “AWB: EXECUTING” will be
displayed on the viewfinder screen.
A message like the one in the figure below will be displayed,
and the adjustment process will complete. The adjusted value
will be automatically stored in the memory (A or B) selected in
step 1.
Note
When using a zoom lens with automatic iris control capability,
hunting
1)
may occur. Adjust the lens’ iris gain control (labeled
IG, IS, S, etc.).
1)
Hunting: The automatic iris responds over and over, and the image
repeatedly darkens and lightens.
For more information, refer to the lens’ operation manual.
When automatic white balance adjustment fails
If the white balance adjustment process does not end
successfully, the error message “AWB: NG” will be displayed
on the viewfinder screen for approximately three seconds.
If this error message is displayed, try white balance
adjustment again.
If the error message continues to be displayed after several
attempts, the camera requires internal inspection.
When there is no time to adjust the white balance
Set the WHITE BAL switch to PRST. The white balance will be
set automatically according to the filter settings.
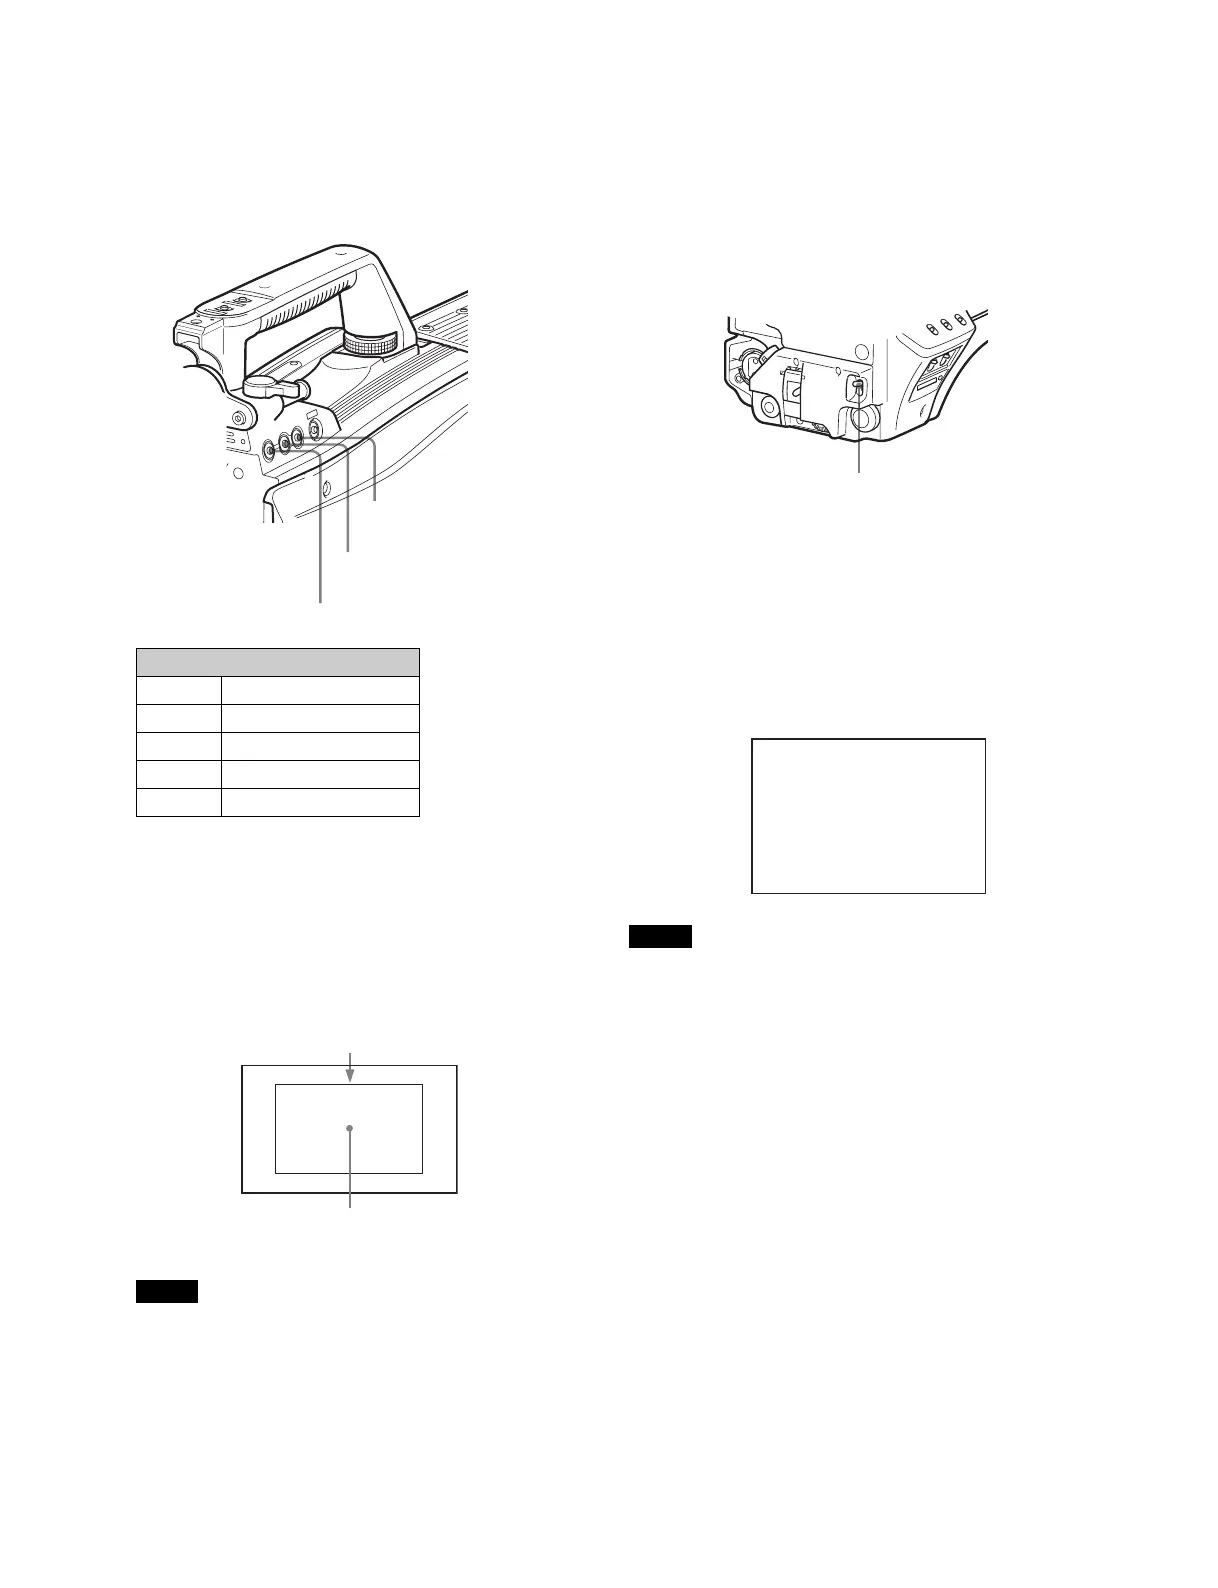
Optical filter
1 clear
21/4 ND
3 1/16 ND
4 1/64 ND
5cross
FILTER LOCAL button
Filter select UP button
Filter select DOWN button
A rectangle centered in the screen. The length of the sides
must be at least 70% of the height and width of the screen.
Within this rectangle, there must be an area of white greater
than 10% of the entire screen.
AUTO W/B BAL switch
AWB:OK