Do you have a question about the Sony HDC1700 and is the answer not in the manual?
Features 2/3-type progressive IT CCD, 16-bit AD converter for optimal quality.
Magnifies viewfinder picture center to twice its size, preventing F-drop.
Utilizes ALAC 2.0 for automatic compensation of chromatic aberration.
Enables optical digital signal transmission between camera and HDCU1700.
Includes adaptive-matrix, multimatrix color correction, and knee saturation.
Compensates saturation in low-key zones for better color reproduction.
Offers standard and hyper gamma tables for cinemalike image creation.
Skin-tone detail, natural skin detail, detail boost-frequency, H/V ratio, white/black limiter.
VF detail and focus assist indicator facilitate focusing.
Provides a focusing level indicator on the viewfinder screen for guidance.
Adds VF contrast signal to viewfinder for easier focusing in challenging light.
Displays various options like messages, zebra, safety-zone, and center markers.
Allows quick and easy settings for viewfinder display items via setup menus.
Displays camera roll on the viewfinder for stable shooting.
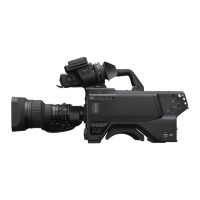
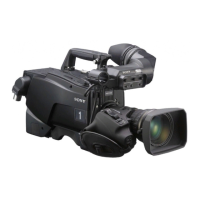
Stylish, low-slung design for better balance, especially with large lens adaptors.
Provides stable holding and optimized viewfinder balance for shoulder shooting.
Allows adjustment for stable shooting based on operator build or shooting style.
Side panel switches can be assigned to desired functions for flexible operation.
Connects USB drive for saving/loading settings and data.
Shuts off power supply if connection is unsafe.
Information on adding functions and compatibility with optional accessories.
Illustrates the connection of various peripherals and devices for the camera system.
Details on various attachment points and their functions on the camera.
Identifies and explains front-right controls and connectors.
RET 1 and RET 2 buttons for monitoring return video signals.
Buttons for selecting built-in optical filters.
Switches for AUTO W/B BAL and GAIN adjustments.
Switches for OUTPUT/AUTO KNEE and WHITE BAL memory selection.
DISPLAY switch for controlling viewfinder information display.
STATUS/CANCEL switch and MENU SEL knob/ENTER button for menu navigation.
Switches viewfinder picture to selected return video signal.
MIC 1 IN connector and MIC power switch for microphone connectivity.
SHUTTER switch and INTERCOM LEVEL control for camera settings.
CAMERA POWER switch, Tally lamp, and CCU connector.
Activates red tally lamp on RCP/MSU for operator calls.
PGM1/2 controls, LEVEL/MIC switch, and INCOM level control for intercom.
Selects intercom line and illuminates the operation panel.
RET 1 and RET 2 buttons with select switches for monitoring return video.
Controls for intercom lines (ENG, PROD) and program audio (PGM1, PGM2).
TRACKER control and MIC LINE switches for intercom setup.
LEVEL switch for audio adjustment and RET 1/2 buttons.
Panel illumination switch and details of various connectors.
CRANE, USB, TRACKER, RET CTRL connectors for external connections.
DC IN/OUT, INTERCOM, EARPHONE, AUDIO IN connectors.
PROMPTER/GENLOCK, TEST OUT, SDI-MONI connectors for video signals.
AUDIO IN CH1/CH2 selectors and microphone power switches.
Step-by-step guide for mounting a lens onto the camera.
Steps to ensure sharp focus at all zoom ranges by adjusting flange focal length.
Instructions for securely attaching a viewfinder to the camera.
Procedures for adjusting viewfinder position for optimal viewing.
Steps on how to safely remove the viewfinder from the camera.
Using a bracket to prevent viewfinder leg from hitting user's leg.
Detailed steps for attaching the BKW-401 rotation mechanism assembly.
Procedure for attaching the cable clamp belt to secure the camera cable.
Shifting the shoulder pad for optimal balance during shooting.
Instructions for mounting the camera to a tripod using a VCT-14 attachment.
Attaching tripod mount and sliding camera onto it until it clicks.
Steps to safely detach the camera from the tripod attachment.
Importance of setting black and white balance for high picture quality.
When and why black balance adjustment is needed.
Readjust white balance when lighting conditions change.
Messages displayed during and after black/white balance adjustment.
Procedure to adjust black balance using the AUTO W/B BAL switch.
Procedure to adjust white balance using the WHITE BAL switch.
Using filter select buttons to choose built-in optical filters.
Preparing a white pattern for accurate white balance adjustment.
Setting the lens iris for white balance adjustment.
Pushing the AUTO W/B BAL switch to WHT to start adjustment.
Details on storing up to five adjusted values in memories A and B.
Explains shutter modes (Standard, ECS) and speeds.
Enhancing sharp edges in viewfinder for easier focusing.
Setting VF DETAIL to ON and adjusting signal characteristics.
Converting VF detail to specified color for easier checking.
Extracting subject irregularities to show focus condition.
Setting INDICATOR to ON to display the level indicator on the viewfinder.
Setting AREA MARKER to ON to display the detection area of focus.
Setting FOCUS POSITION METER to ON to display the meter on the viewfinder.
Setting DYNAMIC CONTRAST to ON to add contrast signal for focusing.
Registering markers using VF OUT switch settings.
Specifying camera picture output as HD-SDI, SD-SDI, or VBS.
Outputting signals supplied to the camera control unit.
Obtaining a signal that includes viewfinder display information.
Items displayed on the upper and lower edges of the screen.
Changing status view by pressing CANCEL/STATUS switch.
Procedures for displaying menu pages and the TOP MENU screen.
Shows light-receiving levels in segments for CAM and CCU.
Brief description of each major menu category.
How to navigate and select pages from a CONTENTS page.
Procedure to switch between pages on a displayed screen.
Returns to the TOP MENU from a sub-menu page.
How to enter characters for items like file IDs.
Resets a menu item to its default factory setting.
How to exit the menu display.
Steps to add specific items to a USER menu page.
Continues the process of adding items to a USER menu page.
Procedure to remove items from a USER menu page.
Reordering items within a USER menu page.
Adding a blank line to a USER menu page.
Adding a new page to the USER menu customization.
Continues the process of adding a page to the USER menu.
Cancels the addition of a page before final confirmation.
Procedure to remove a page from the USER menu.
Reordering pages within the USER menu customization.
Shows menus displayed on the viewfinder screen in tables.
Lists items within the OPERATION menu structure.
Continues listing items within the OPERATION menu structure.
Notes on laser beams, shocks, environment, condensation, and CCD phenomena.
Explains smear (vertical tails) and aliasing (jagged patterns).
Recommendations for using portable communication devices near the camera.
Displays warning messages for operational problems and their meanings.
Power, temperature, mass, dimensions.
Sensitivity, S/N, resolution, distortion, spectral system, filters.
Details on various camera connectors for signals and power.
Lists included accessories and optional/related equipment.
| Brand | Sony |
|---|---|
| Model | HDC1700 |
| Category | Security Camera |
| Language | English |