Getting Started
19
GB
Before connecting the AC power cord (mains
lead) to a wall outlet (mains), connect all the
other equipment and TV to the system.
• After connecting the AC power cord (mains lead),
wait about 15 seconds before turning on the power by
pressing ?/1 on the top panel.
• Connect the system to an easily accessible AC outlet
(mains). Should you notice an abnormality in the
system, disconnect the main plug from the AC outlet
(mains) immediately.
By connecting Sony equipment compatible with
“BRAVIA” Sync via an HDMI cable (not
supplied), you can operate other equipment
using only one remote control.
To use “BRAVIA” Sync, set the Control for
HDMI function to on for the connected
equipment.
When you use a Sony TV which has a Control
for HDMI function, setting the Control for
HDMI function on TV will set the Control for
HDMI function of the system and other
connected equipment simultaneously.
1 Make sure that the system is connected
to the TV and the connected equipment
via HDMI cables (not supplied).
2 Turn on the system, the TV and the
connected equipment.
3 Select the input of the system and the
HDMI input of the TV (BD/DVD, GAME,
or SAT/CATV), so that an image from a
connected equipment is displayed.
4 Display the list of the HDMI equipment
on the TV menu, and set the Control for
HDMI function to on for the connected
equipment.
The Control for HDMI function for the
system and the connected equipment are
simultaneously set to on.
After you finish the setting, “COMPLETE”
appears on the front panel display.
• For details on setting the TV and the connected
equipment, refer to their operating instructions.
Connecting the AC power
cord (mains lead)
Notes
Preparing for “BRAVIA”
Sync
Note
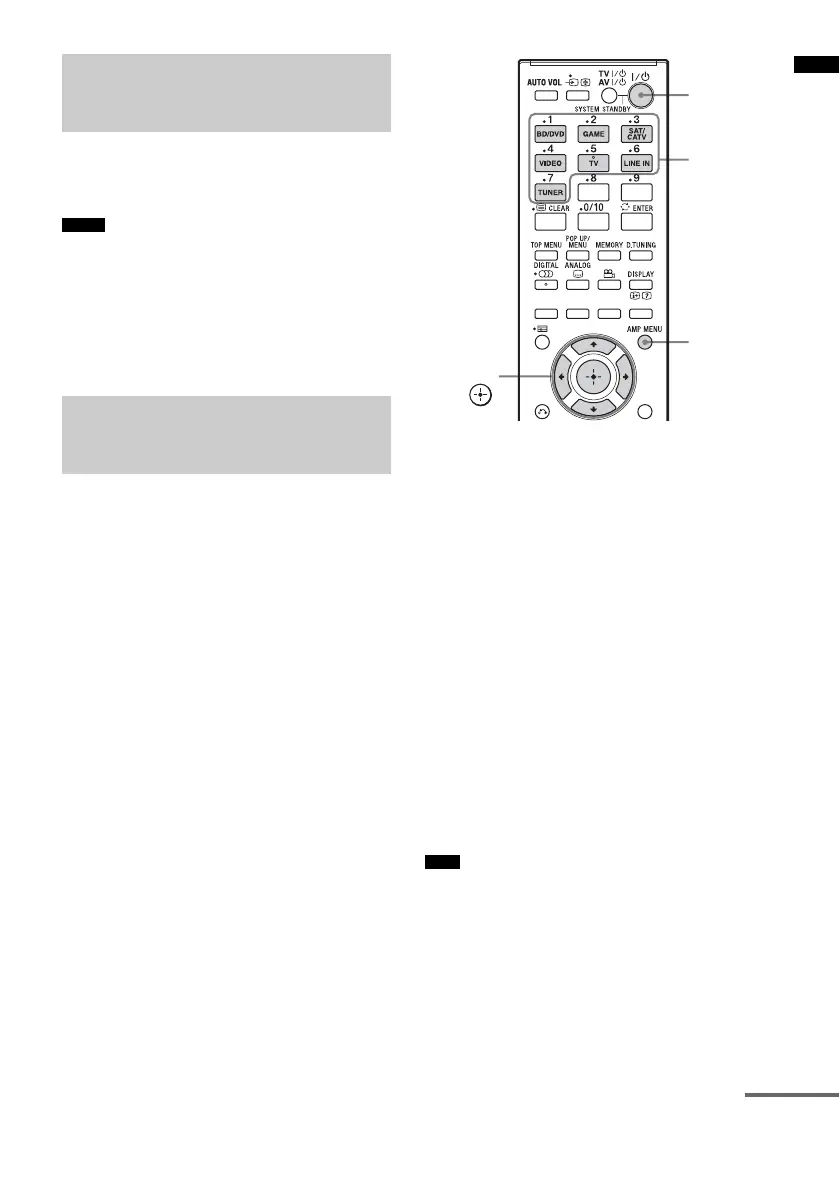
?/1
AMP
MENU
C, X, x, c,
Input
buttons
continued