— 15 —
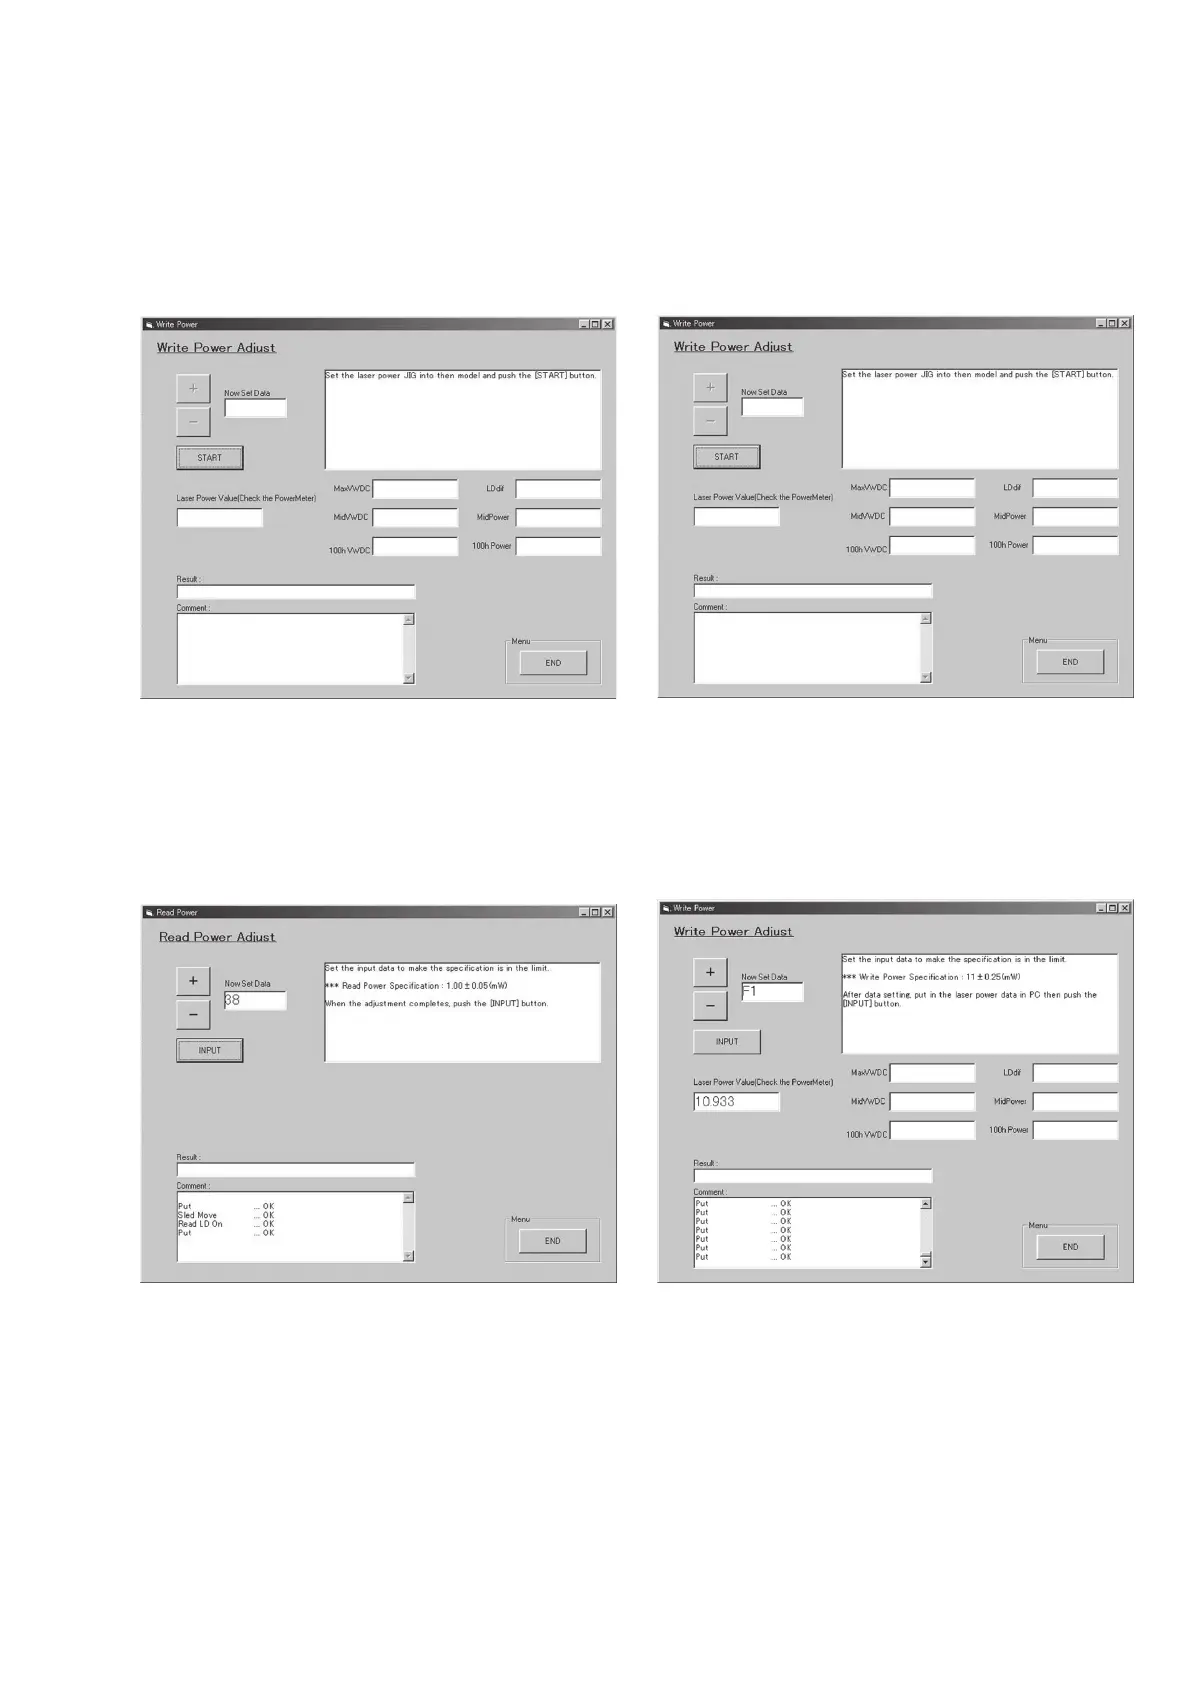
[Read Power Adjustment]
12) Confirm that the Read Power Adjust screen appears. (Fig.6-3-
3)
13) Calibrate the optical power meter. Then, attach the optical
sensor to the BU adjustment jig.
(Refer to section “4-1. Optical Power Meter of “4. Connecting
the equipment.)
14) Click the [START] button..
Fig.6-3-3
15) Check the read power specification value that is displayed on
screen. (Fig.6-3-4)
Specification: 1.00 ± 0.05 mW
16) Click the [+], [–] buttons until the read power becomes the
specification value.
17) Click the [INPUT] button.
Fig.6-3-4
[Write Power Adjustment]
18) Confirm that the Write Power Adjust screen is displayed. (Fig.6-
3-5)
19) Click the [START] button..
20) Confirm the maximum write power specification value that is
displayed on the screen. (Fig.6-3-6)
Specification: 11.00 ± 0.25 mW
Fig.6-3-5
21) Click the [+], [–] buttons until the write power becomes the
specification value.
22) Take reading of the optical power meter indication value and
type it in the Laser Power Value column.
Example: 10.933
23) Click the [INPUT] button.
Fig.6-3-6