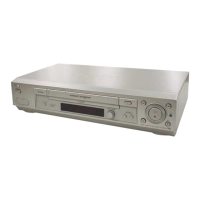
Why doesn't the on/standby switch function on my Sony VCR?
- OOlivia NavarroSep 5, 2025
If the on/standby switch on your Sony VCR isn't functioning, ensure the mains lead is securely connected to the mains.

Why doesn't the on/standby switch function on my Sony VCR?
If the on/standby switch on your Sony VCR isn't functioning, ensure the mains lead is securely connected to the mains.
What to do if the timer does not operate on my Sony SLV-SE230?
If the timer on your Sony VCR isn't working, verify these points: * Ensure the clock is properly set. * Confirm a tape is inserted. * Check that the safety tab on the tape hasn't been removed. * Make sure the tape isn't at its end. * Verify a program has been set for timer recording and that your timer settings are past the current time. * Check that the decoder and satellite tuner are turned on. Note that the clock will stop if the VCR is disconnected from the mains, requiring you to reset the clock and timer. As a last resort, turn the power off and unplug the mains lead.
What to do if nothing happens when I press REC on my Sony VCR?
If nothing happens when you press REC on your Sony VCR, ensure that the tape is not at its end.
What to do if the tape is ejected when I press REC on my Sony SLV-SE230 VCR?
If the tape is ejected when you press REC on your Sony VCR, it's likely that the safety tab has been removed. To record on this tape, cover the tab hole.
What to do if my Sony SLV-SE230 tape starts playing as soon as it is inserted?
If your Sony VCR tape starts playing immediately upon insertion, the safety tab has likely been removed. To enable recording on this tape, cover the tab hole.
How to fix the Sony VCR when the sound from a recorded tape is not in stereo?
If the sound from a tape recorded with your Sony VCR is not in stereo, or if the STEREO indicator in the display window is flashing, try adjusting the tracking. Additionally, the video heads may be dirty, so clean them using a Sony video head cleaning cassette.
Why does my Sony SLV-SE230 have no sound?
If your Sony VCR picture has no sound, the tape may be defective. If you're using A/V connections, check the audio cable connection.
How to fix a picture that is not clear on my Sony SLV-SE230 VCR?
If the picture on your Sony VCR isn't clear, try these steps: * Reset the RF channel output of your VCR, as existing broadcasts may be interfering. * Adjust the tracking using the PROGRAM +/- buttons on the VCR. * Clean the video heads using a Sony video head cleaning cassette. If a Sony cleaning cassette is not available, have the heads cleaned at your nearest Sony service facility. Avoid using commercially available liquid-type cleaning cassettes other than Sony’s, as they may damage the video heads. The video heads may need replacement; consult your local Sony service facility for more information.
What to do if my Sony SLV-SE230 VCR is plugged in but the display window remains dark?
If the display window on your Sony VCR remains dark even when plugged in, set the POWER SAVE option in the USER SET menu to OFF.
What to do if the playback picture does not appear on the TV screen with my Sony SLV-SE230 VCR?
If you're not seeing a playback picture from your Sony VCR on the TV screen, make sure the TV is set to the correct video channel. If you're using a monitor, set it to video input. If the VCR is connected to the TV with a Scart cable, ensure the VIDEO indicator is lit in the display window by pressing the TV/VIDEO button on the remote.
| Type | VCR |
|---|---|
| Video Format | VHS |
| Recording Speed | SP, LP, EP |
| Playback Speed | SP, LP, EP |
| Tuner | Yes |
| Heads | 4 |
| Remote Control | Yes |
| Clock | Yes |
| Timer | Yes |
| Audio Output | Mono |
| Power Consumption | 18W |
| Connections | RF output |
| Dimensions | 360 x 265 x 90 mm |
Addresses problems related to the VCR's power supply and clock functionality.
Solutions for issues encountered during tape playback, such as picture or sound problems.
Troubleshooting steps for recording failures, timer malfunctions, and program setting errors.
Resolves miscellaneous issues including remote control, display, cleaning, and specific feature malfunctions.
Overview of functional blocks on the Main PCB for component and conductor sides.
Schematic diagram for the Switch Mode Power Supply (SMPS) of the Main A model.
Schematic diagram for the Switch Mode Power Supply (SMPS) of the Main B model.
Schematic diagram detailing the power drive block for the Main A model.
Schematic diagram detailing the power drive block for the Main B model.
Schematic for system control and servo functions in the Main A model.
Schematic for system control and servo functions in the Main B model.
Schematic diagram illustrating the audio and video signal paths.
 Loading...