Do you have a question about the Sony SRW-5800 and is the answer not in the manual?
Details the key features and capabilities of the SRW-5800 unit.
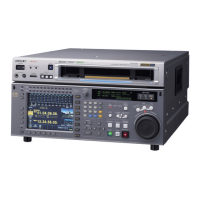
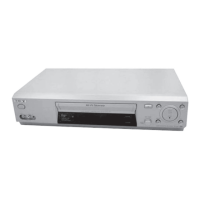
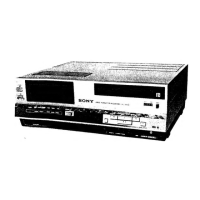
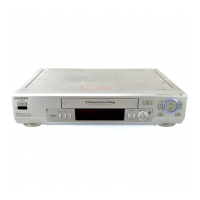
Provides a comprehensive overview of the SRW-5800's high-definition digital videocassette recording capabilities.
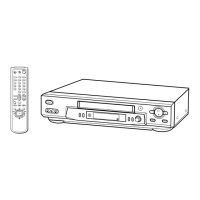
Explains the functions and operation of the SRW-5800's control panel, including menu screens and buttons.
Lists and describes optional accessories compatible with the SRW-5800 unit, such as processor boards and interface boards.
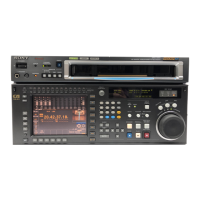
Details the layout and functions of the upper, lower, and system setup panels of the control interface.
Describes the power switch, indicators, eject button, format indicators, and remote buttons on the upper control panel.
Explains the menu control section, monitor buttons, multi-control knob, display, function buttons, and other controls on the lower panel.
Outlines the access and components of the system setup panel, including memory card slots and access indicators.
Details the various input/output sections, including analog, digital, remote, and power supply connectors.
Provides examples and procedures for making HD digital connections between VTR units.
Illustrates HD digital connections between SRW-5000/5500 and SRW-5800 units for recording.
Demonstrates NTSC/PAL digital connections between an SRW-5800 and a DVW-2000 VTR.
Explains how to connect multiple SRW-series VTRs for simultaneous recording via cascade connection.
Describes how reference signals for video output are selected and synchronized.
Details how video output signals can be synchronized based on VTR settings and input signals.
Provides guidance on making reference signal connections for recording and playback requirements.
Details recommended cassette types for recording and playback, including maximum recording times.
Lists recommended HDCAM-SR cassettes and their maximum recording times based on system frequency.
Provides step-by-step instructions for inserting and ejecting cassettes, including slack removal.
Explains how to use the record-protect plug to prevent accidental erasure of recorded material.
Details how to insert, remove, and use Memory Sticks for storing and sharing file data among VTRs.
Provides important notes and precautions regarding the usage of Memory Sticks with the VTR.
Explains how to set VTR operating conditions using menu operations and store settings to memory banks or Memory Sticks.
Describes the two types of menus: VTR SETUP menu list and PF ASSIGN menu list.
Guides users on how to activate and change settings within different menu screens using function buttons.
Details the process of registering frequently used menu items to function buttons for quicker access.
Explains the provision of eight VTR memory banks for storing menu settings and their network/Memory Stick capabilities.
Provides instructions on storing menu settings and cue point data to a Memory Stick for recall.
Describes how to store and recall VTR memory bank contents and cue point lists via a network connection.
Discusses data compatibility between VTRs with different optional equipment when using Memory Sticks.
Explains how to automatically recall saved settings from a VTR bank upon powering on the system.
Details how to change factory default values and save them on a bank for VTR SETUP menu items.
Guides on saving and recalling default settings through a network connection using VTR banks.
Explains how to save and recall default settings directly to and from a Memory Stick.
Describes how to recall VTR bank data from an SRW-5000/5500 stored on a Memory Stick to the SRW-5800.
Sets basic VTR operation conditions for recording, playback, and editing, including mode and time code information.
Explains how to select audio/video output signals for monitoring and line outputs using the PB/EE button.
Details how to select and enable the record inhibit mode to prevent recording operations.
Guides on selecting assemble or insert edit modes and specific insert edit channels for operations.
Explains how to output a frozen still picture by pressing the FREEZE buttons and selecting freeze modes.
Describes how to set the preroll time for cueing up tape to an edit point, with recommended values.
Explains DMC playback mode for variable speed editing and its use in sports broadcasts and tape editing.
Details how to select stop code detection modes and adjust the stop position when a stop code is detected.
Allows setting various time code-related items, including time data types, generator sources, and modes.
Explains how to set and display various types of time data, including time code, CTL, and user bits.
Details how to select the time code to be read by the time code reader during playback.
Describes methods to record time codes using internal or external generators and their synchronization.
Explains how to select the time code running mode, choosing between free run and record run.
Details how to select the drop frame or non-drop frame mode for CTL counter and time code generator.
Allows selection of content for the second time code display area, such as time data or warning messages.
Explains how to select a 12-hour or 24-hour clock format for the CTL display.
Guides on presetting pulldown time code for 23.98PsF/24PsF modes when HKSR-5001 is installed.
Details the procedure for setting time code conversion settings using the TC CONVERT menu.
Explains how to display the pulldown time code when the HKSR-5001 is installed.
Describes superimposing character information like time code and operation mode onto output signals.
Explains how to register, delete, and manage cue points across multiple pages and up to 100 points.
Details the two multi-cue modes: PAGE mode for page-based access and EXTEND mode for consecutive registration.
Guides on saving Tele-File data to a Memory Stick in tfw or csv format, and writing it to the Tele-File label.
Explains two methods for registering cue points: direct entry via ENTRY button or numeric input.
Provides instructions on how to erase individual cue points or all cue point data.
Details how to select the preroll time and cue up the tape to a specific edit point.
Details procedures to change cue points into IN, OUT, AUDIO IN, or AUDIO OUT edit points.
Describes operations for reading, entering, or changing cassette information using the Tele-File menu.
Covers adjustment of video signals, including master, Y/PB/PR, setup levels, and sync phase.
Explains how to select the reference signal for VTR operations, choosing from external, input, or auto modes.
Details how to adjust various output video signal parameters like master level, Y/PB/PR, and sync phase.
Describes how to use the FC LUT function to convert FC output according to LUT files stored on Memory Sticks.
Allows for audio signal adjustments, input selections, and output configurations for various channels.
Guides on selecting audio input signals for channels 1 to 12, covering SDI, AES/EBU, and sampling frequency options.
Explains source track selection for digital audio output signals multiplexed with HD SDI and AES/EBU.
Details source track selection for digital audio output signals multiplexed with SD SDI.
Covers replacing channel settings for audio edit preset commands received from external devices.
Explains replacing channel settings for digital audio edit preset commands from external devices.
Details replacing channel settings for analog audio edit preset commands from external devices.
Enables storing/recalling menu settings, registering items, and setting panel operations for the VTR.
Provides access to all menu items for setting VTR operating conditions, organized by category.
Used to set the operation conditions of the upper and lower control panels, including screen savers and key sounds.
Details the necessary switch and menu settings before initiating a recording operation.
Specifies the required switch and menu settings before starting recording, referencing relevant pages.
Describes how to select audio signals for input and monitoring, covering input types and channel assignments.
Explains how to set the sampling frequency for digital audio input/output signals to 96 kHz.
Details how to adjust the recording level for each audio channel, including reference and manual settings.
Explains how to simultaneously check audio and video signals currently being recorded.
Describes how the audio level meter display changes based on the cassette type used.
Provides the procedure to start and stop recording operations on the VTR.
Outlines the switches and menus to set before starting a playback operation.
Specifies the switches and menus that need to be set before initiating playback.
Details how to adjust the audio playback level for each channel using manual or preset settings.
Explains how to select HD-SD conversion modes like edge crop, letter box, and squeeze.
Covers various playback modes including normal speed, jog, shuttle, variable, capstan override, and DMC playback.
Provides the procedure for playing back a cassette at normal speed, including stopping playback.
Details playback speed adjustments in jog, shuttle, and variable modes, including speed ranges and dial functions.
Explains how to adjust playback phases for synchronizing two VTRs using search dial or +/- buttons.
Details DMC playback for controlling variable playback speed and storing speeds in memory for later use.
Describes how non-audio data recorded on a tape is automatically detected and played back.
Explains automatic editing modes (assemble, insert) and the steps involved in performing basic automatic edits.
Provides an overview of automatic editing modes, including assemble and insert editing, and interpolation of time codes.
Specifies the required switch and menu settings before performing editing operations.
Guides on selecting between assemble or insert edit modes for automatic editing.
Explains how to select video for editing in 3D systems, applicable only when the edit mode is set to insert.
Describes how to set edit points (IN and OUT points) for video and audio, including split editing techniques.
Provides guidance on editing non-audio data, noting potential noise issues during the process.
Explains how to display the duration between various edit points for confirmation.
Details procedures for cueing up tape to an edit point or prerolling the tape prior to an edit.
Guides on previewing the edit section before performing the edit, and how to stop previewing.
Explains how to correct or move edit points, including deleting and re-setting them.
Details the process of performing automatic editing once necessary edit points are set.
Describes advanced editing methods, specifically DMC editing and animation editing techniques.
Explains DMC editing requirements and tape movement during the process, focusing on Digital Betacam/HDCAM formats.
Describes animation editing as an insert editing method for recording successive still frames easily.
Provides a step-by-step procedure for performing manual editing operations on the VTR.
Details essential maintenance procedures such as head cleaning and managing moisture condensation.
Provides instructions for cleaning video and audio heads using a cleaning cassette.
Explains moisture condensation issues and error messages like 'ERROR-10' that may occur.
Lists the technical specifications of the SRW-5800, including general, tape system, and speed details.
Provides definitions for technical terms used throughout the operation manual, covering video, editing, and time code concepts.
Lists VTR SETUP menu items related to VTR operations, detailing their functions and settings.
Details VTR SETUP menu items associated with the operation panels, including search dial and reference system settings.
Lists VTR SETUP menu items for remote interface control, including network and port settings.
Encompasses VTR SETUP menu items related to editing operations, such as edit modes, preroll, and postroll times.
Lists VTR SETUP menu items concerning preroll operations, including function modes and offset settings.
Details VTR SETUP menu items for recording protection, such as still timers and tape protection modes.
Covers VTR SETUP menu items for time code management, including DF/NDF modes, timer settings, and TCR selection.
Lists VTR SETUP menu items for controlling video output signals, including levels, sync phase, and format conversion.
Encompasses VTR SETUP menu items for audio control, such as input/output signal selection and monitor settings.
Details VTR SETUP menu items for digital processing, including freeze modes and down-converter settings.
Covers VTR SETUP menu items for pulldown control, such as preset frame modes and external reference lock.
Lists VTR SETUP menu items specific to the HKSR-5804 Network Interface Board, detailing I/O and monitor control settings.
Includes miscellaneous VTR SETUP menu items, such as auto repeat mode and internal test signal generators.