EasyManua.ls Logo

Sony TC-730 - Page 33

Sony TC-730
75 pages
Print Icon
To Next Page IconTo Next Page
To Previous Page IconTo Previous Page
Loading...
Procedures
(1)
Play
back
the
Ist
tone
(400
Hz)
of
SONY
alignment
tape
(J-19-F2).
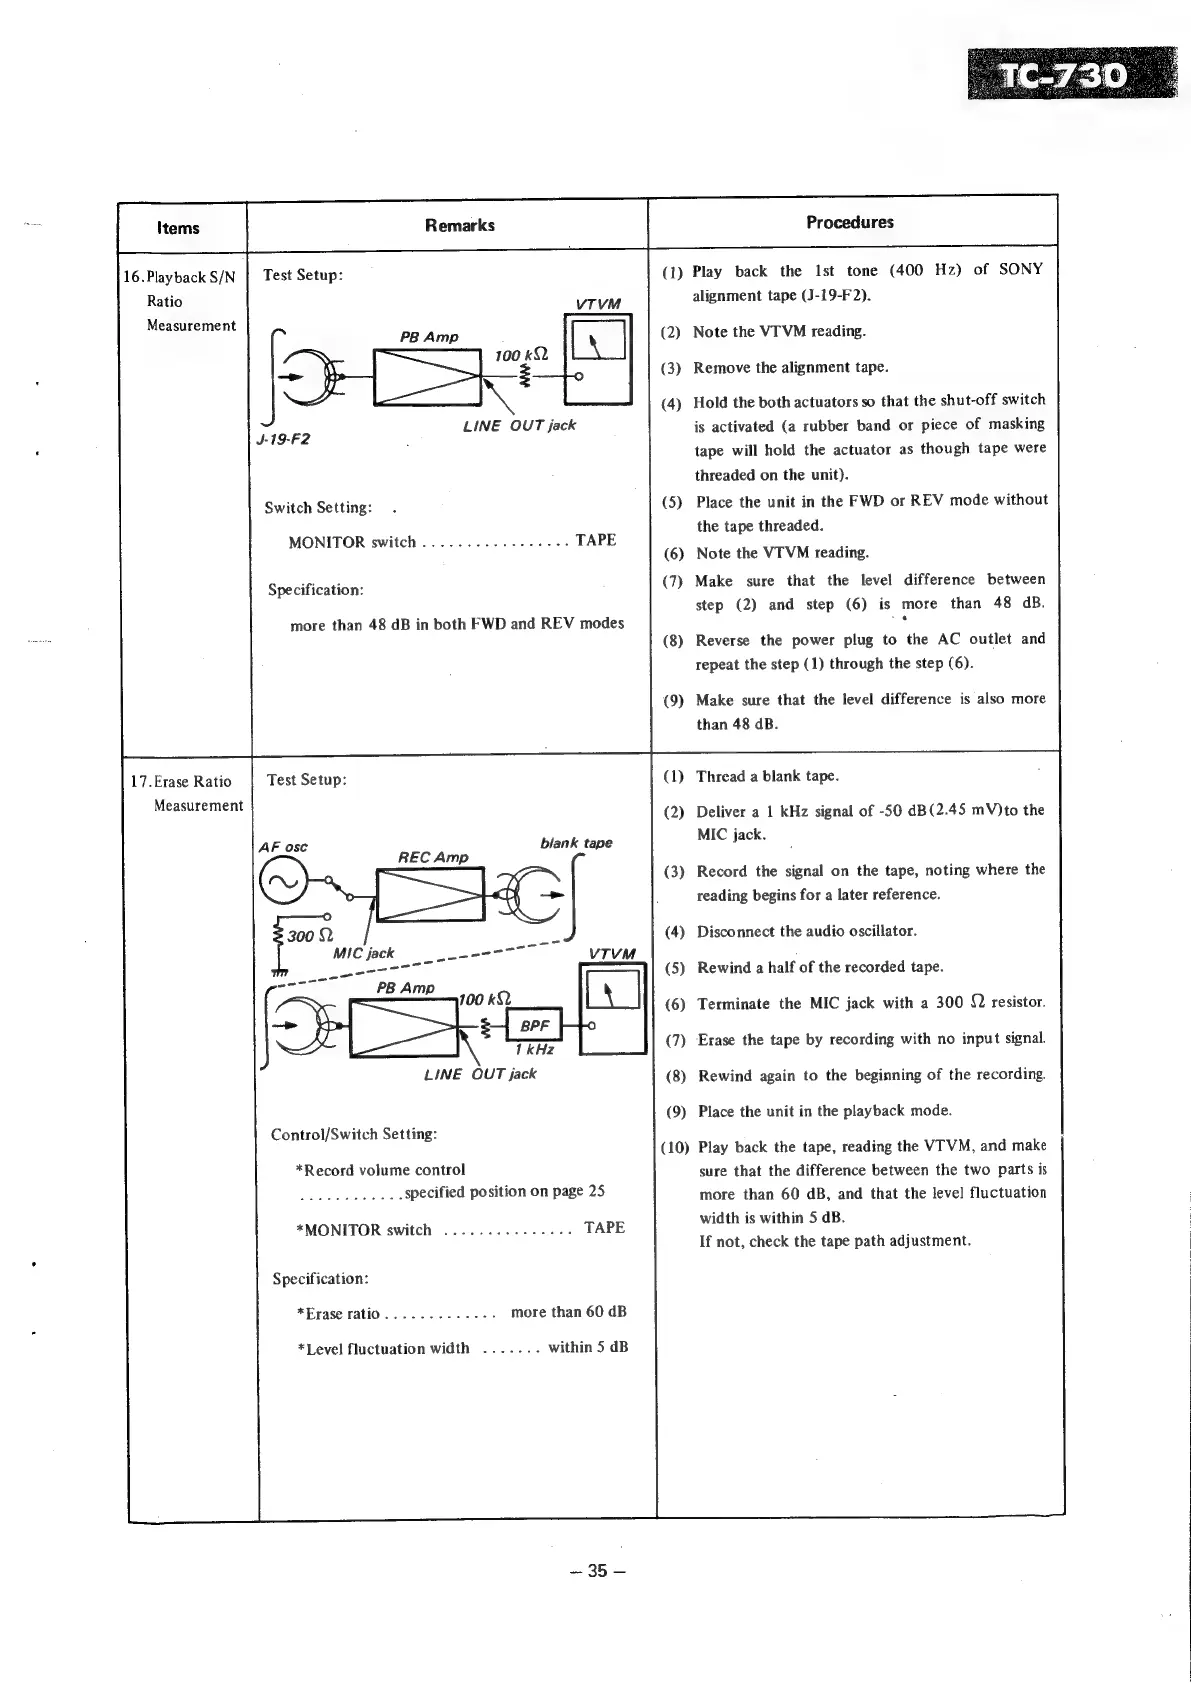
Test
Setup:
x
LINE
OUT
jack
16.Playback
S/N
Ratio
Measurement
(2)
Note
the
VTVM
reading.
(3)
Remove
the
alignment
tape.
(4)
Hold
the
both
actuators
so
that
the
shut-off
switch
J-19-F2
is
activated
(a
rubber
band
or
piece
of
masking
tape
will
hold
the
actuator
as
though
tape
were
threaded
on
the
unit).
(5)
Place
the
unit
in
the
FWD
or
REV
mode
without
the
tape
threaded.
(6)
Note
the
VTVM
reading.
(7)
Make
sure
that
the
level
difference
between
step
(2)
and
step
(6)
is
more
than
48
dB.
Switch
Setting:
MONITOR
switch
.............5-6.
Specification:
more
than
48
dB
in
both
FWD
and
REV
modes
(8)
Reverse
the
power
plug
to
the
AC
outlet
and
repeat
the
step
(1)
through
the
step
(6).
Make
sure
that
the
level
difference
is
also
more
than
48
dB.
17.Erase
Ratio
Measurement
Test
Setup:
Thread
a
blank
tape.
Deliver
a
1
kHz
signal
of
-50
dB(2.45
mV)to
the
MIC
jack.
AF
osc
blank
tape
REC
Amp
(3)
Record
the
signal
on
the
tape,
noting
where
the
reading
begins
for
a
later
reference.
Disconnect
the
audio
oscillator.
MIC
jack
eee
aa
antT
Rewind
a
half
of
the
recorded
tape.
Terminate
the
MIC
jack
with
a
300
22
resistor.
Erase
the
tape
by
recording
with
no
input
signal.
LINE
OUT
jack
(8)
Rewind
again
to
the
beginning
of
the
recording.
Place
the
unit
in
the
playback
mode.
Control/Switch
Setting:
Play
back
the
tape,
reading
the
VTVM,
and
make
sure
that
the
difference
between
the
two
parts
is
more
than
60
dB,
and
that
the
level
fluctuation
width
is
within
5
dB.
If
not,
check
the
tape
path
adjustment.
*Record
volume
control
specified
position
on
page
25
*MONITOR
switch
...............
Specification:
*Erase
ratio.......-.----
more
than
60
dB
*Level
fluctuation
width
.......
within
5
dB
—
35
—