— 20 —
KV-32FS10/32FV15/32XBR250/34FV10/34FV15/34FV15C/34FX250C/34FV15K
34FV15T/36FS10/36FV15/36XBR250/38FX250/38FX250C/38FX250T/38FV15K
7. Adjust screen VR until the screen is just cut off, or
scarcely lights up. A signal cannot be seen when the
brightness of the raster is high.
8. Push the JUMP again to release the cut off.
3-5. WHITE BALANCE ADJUSTMENTS
NO. Disp. Item All Models
24 RDRV Red Drive 31
25 GDRV Green Drive 31
26 BDRV Blue Drive 31
27 RCUT Red Cut-off 7
28 GCUT Green Cut-off 7
29 BCUT Blue Cut-off 7
38 SBRT Sub Bright 7
1. Set program palette to "STANDARD" and push
"RESET.
2. Input an entire white signal.
3. Set to Service adjustment Mode.
4. Set the PICTURE and BRIGHT to minimum.
5. Adjust with SBRT if necessary.
6. Set RCUT to "14".
7. Select GCUT and BCUT with 1 and 4.
8. Adjust with 3 and 6 for the best white balance.
9. Set the PICTURE and BRIGHT to maximum.
10. Select GDRV and BDRV with 1 and 4.
11. Adjust with 3 and 6 for the best white balance.
12. Write into the memory by pressing then
**.
NOTE:
White Balance should be adjusted after Sub Contrast
because RDRV is also used in Sub Contrast adjustment.
(See page 29)
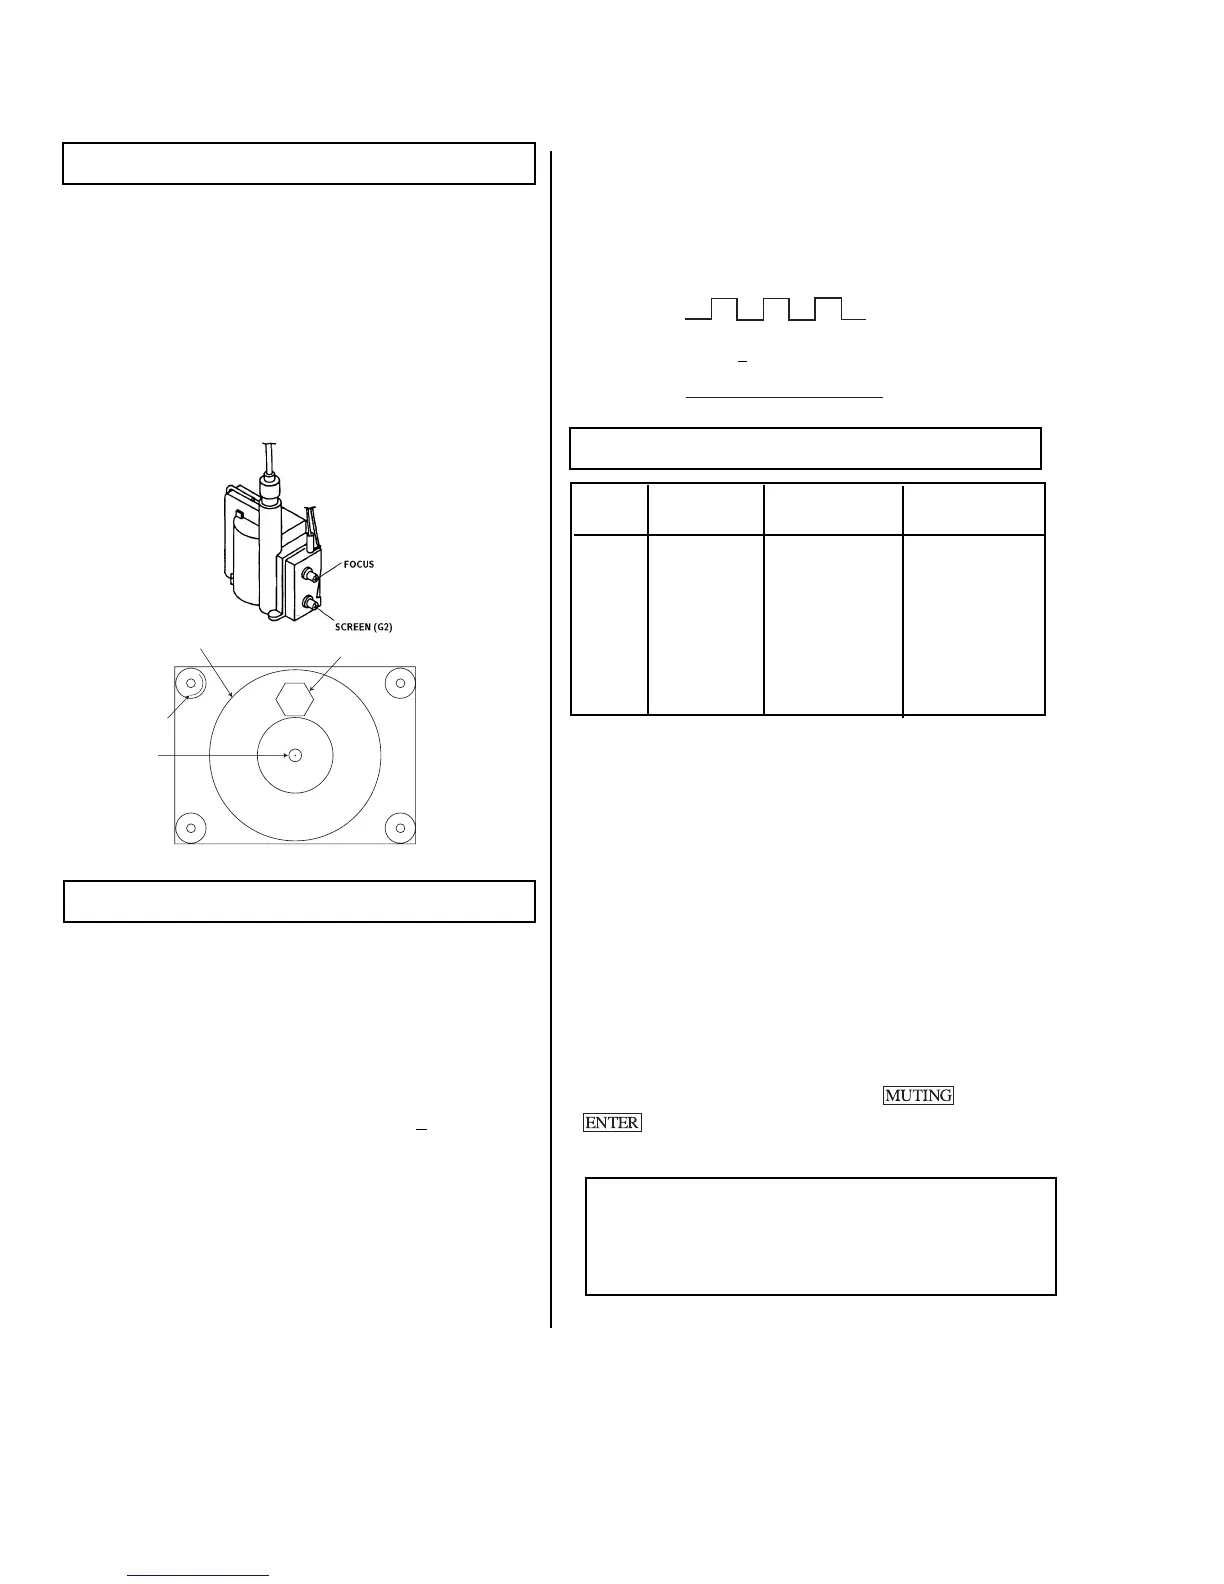
3-3. FOCUS
1. Input Monoscope signal.
2. Set user controls to normal.
3. Set Video mode to STANDARD.
4. Set the PICTURE to maximum.
5. Adjust FOCUS control for best picture at center
circle.
6. Then receive an entire white signal. Make sure
Magenta Ring is at acceptable level
3-4. SCREEN (G2)
1. Input signal from the pattern generator.
2. Set the user controls to NORMAL.
3. Attach the G2-Jig to the C Board.
4. Adjust RCUT, GCUT, BCUT, and SBRT in service
mode with an oscilloscope so that voltages on the
red, green, and blue cathodes are 170 + 2 V DC.
5. Observe the screen and adjust SCREEN (G2) VR to
obtain the fairly visible background of dot signal.
6. Push the TEST +JUMP (+ Channel) to cut off the
signal, then the screen is bright or dark. Brightness
of raster must be increased when adjusting.
325 MARK
CENTER
CIRCLE
35 MARK
35
325
170 + 2 Vdc



 To Next Page