6
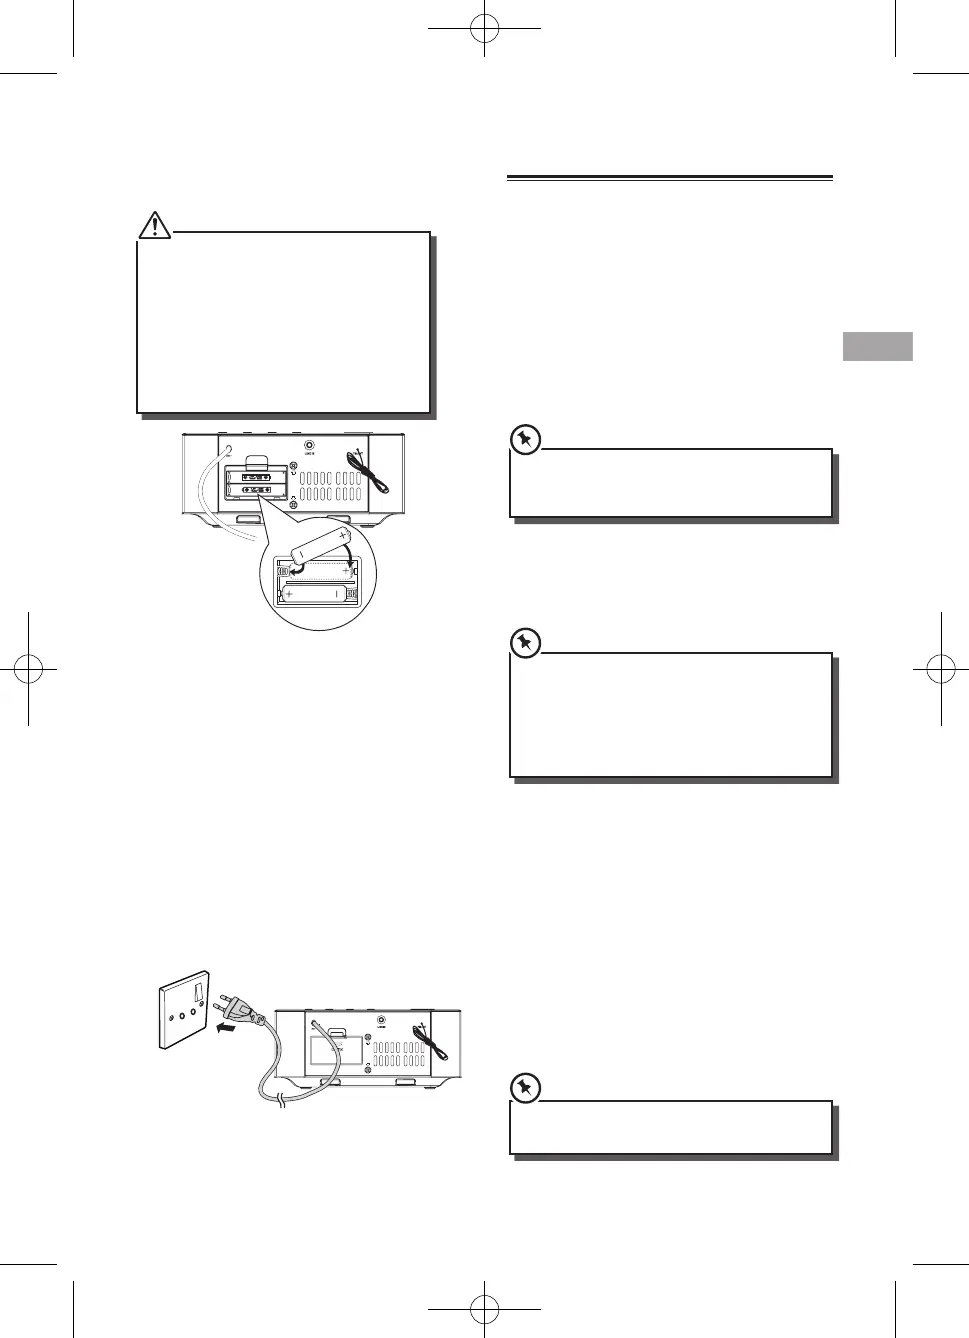
Install Batteries
Note:
• YoucanonlyuseACpoweraspowersupply.
Batteries ( not supplied ) are for backup
purpose.
• Ifthesystemisunpluggedorifapower
failure occurs, all setups of the unit will be
erased unless there are batteries in the unit
and don’t change them at this time. Once
setups had be erased, please resetup all items
( tuner stations; Source... ) which you desire.
1 Open the batteries compartment.
2 Install two AAA batteries(not supplied) with
correct polarity and the install steps as
indicated.
3
Close the battery compartment.
Connect Power
Caution:
- Risk of product damage! Ensure that the
power supply voltage corresponds to the
voltage printed on the back or the underside
of the unit.
- Before connecting the AC power cord, ensure
you have completed all other connections.
Connect the AC power cord to the wall socket.
General Operation
Power
Youcanuseallthefunctionsonthetopofthe
unit or the remote control after connecting to
power supply (called Standby Mode).
Turn On
Press ON/OFF button to turn the system on from
standby mode.
Press ON/OFF/SOURCE to select dierent
functions.
• Whenturningthesystemon,thesystemwill
continue in the mode it was in when it was
turned o last time.
Turn O
Press and hold ON/OFF button on the unit or
press the button on the remote control again to
turn the system o and go to standby mode.
• IfthereisnosignalundertheDOCK,LINEINand
BT mode, the unit will automatically switch o
within 15 minutes.
• Besuretounplugthepowercordfromthe
outlet when the system is not in use for an
extended period of time.
Set Time
The built-in clock shows the correct time in the
display.
1 Press and hold the CLOCK button on remote
or SNOOZE button on main unit for seconds,
hour indicator will blink.
2 Set the hour with
/
on remote or
H
/
G
on main unit.
3 Press CLOCK button on remote or SNOOZE
button on main unit to conrm.
4 Repeat steps 2-3 to set the minutes, day,
month and year.
• DuringTimeSetuppressthe
BF
button to
select 12/24 hour format.