English
24
Installing the UHF
Module into the
Receiver
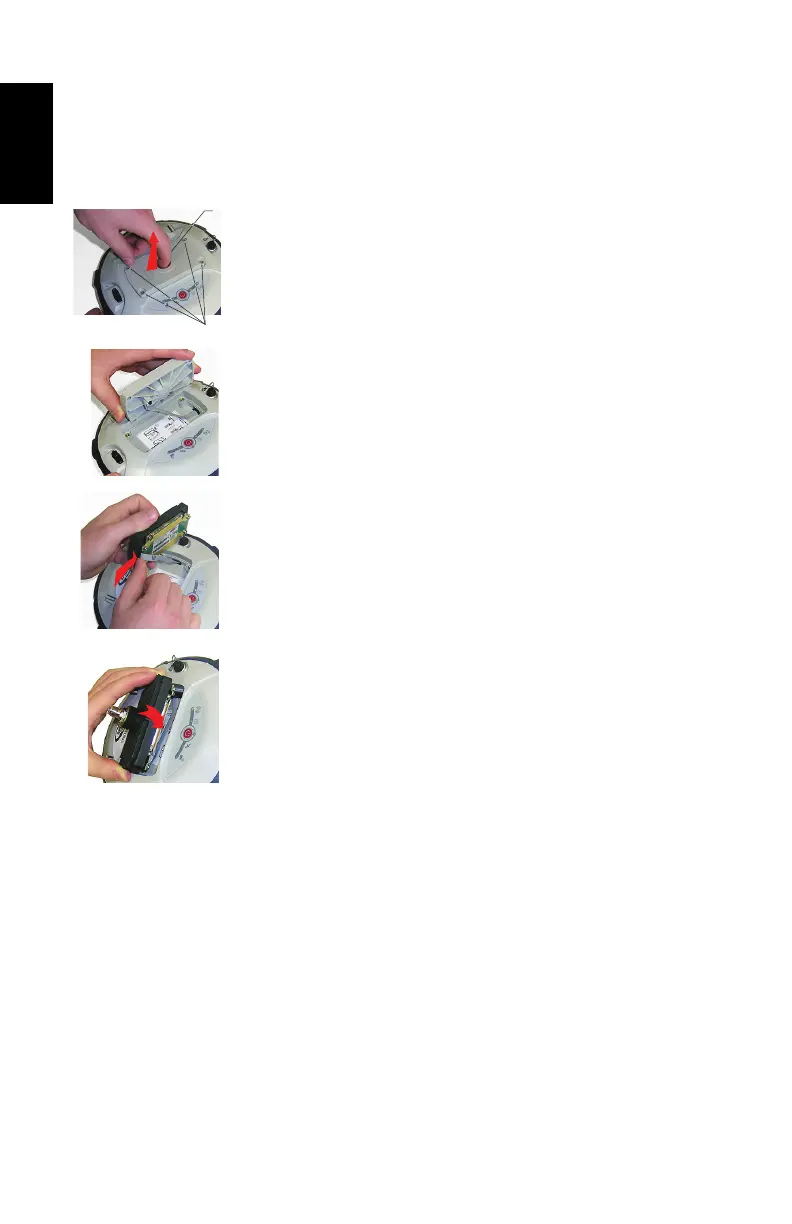
• Power off the SP60 and turn it upside down.
• Use the L-shaped Torx screwdriver provided in the SP60
UHF kit to loosen and remove the four screws ([1])
securing the 5/8” threaded insert plate.
• Insert a finger into the 5/8” threaded hole ([2]), then
gently pull the plate out of the receiver, making sure you
free the ribbon cable anchored to the plate without
damaging it ([3]).
• Put away the 5/8” threaded insert plate in a safe place,
possibly for subsequent use.
• Take a look at the instructions printed on the label located
in the bottom of the recess.
• Connect the end of the ribbon cable (a 12-contact flat
connector) to the UHF module ([4]) as instructed on the
label (point 1).
• Insert the UHF module into the recess ([5]) as instructed
on the label (point 2).
• Re-use the four screws and Torx screwdriver to secure the
UHF module onto the receiver. Tighten the screws to
preserve receiver watertightness (torque meter: 3 N.m).
IMPORTANT: After installing (or removing) the internal
radio, you must reset the receiver (through hard reset or
via field software).
NOTE: The insertion of the UHF module DOES NOT modify
the ARP (Antenna Reference Point) of the GNSS antenna.