ENGLISH - 20
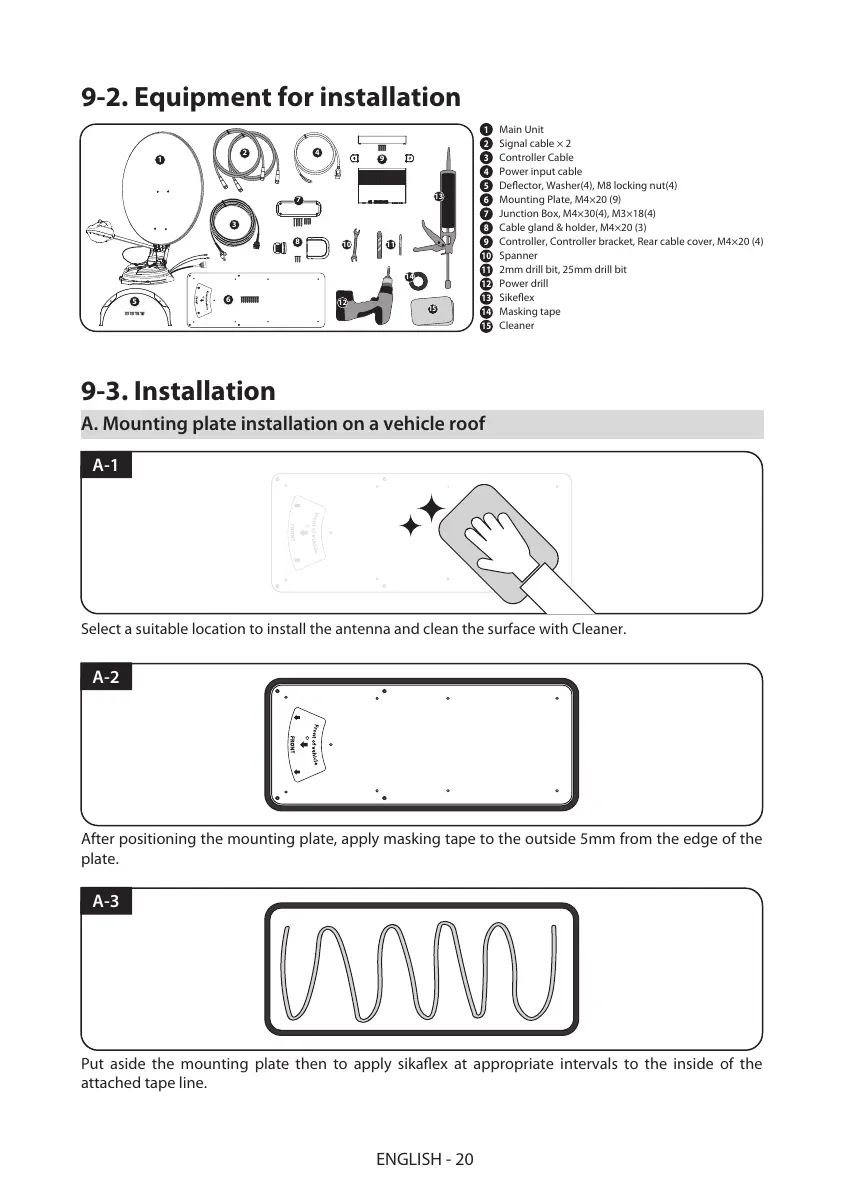
Main Unit
Signal cable × 2
Controller Cable
Power input cable
Deflector, Washer(4), M8 locking nut(4)
Mounting Plate, M4×20 (9)
Junction Box, M4×30(4), M3×18(4)
Cable gland & holder, M4×20 (3)
Controller, Controller bracket, Rear cable cover, M4×20 (4)
Spanner
2mm drill bit, 25mm drill bit
Power drill
Sikeflex
Masking tape
Cleaner
13
1
10
2
14
15
1
2
3
4
5
6
7
8
9
10
11
12
13
14
15
5
12
11
8
6
3
4
9
7
9-2. Equipment for installation
9-3. Installation
A. Mounting plate installation on a vehicle roof
After positioning the mounting plate, apply masking tape to the outside 5mm from the edge of the
plate.
A-2
Put aside the mounting plate then to apply sikaflex at appropriate intervals to the inside of the
attached tape line.
A-3
Select a suitable location to install the antenna and clean the surface with Cleaner.
A-1
More information https://www.caravansplus.com.au