3
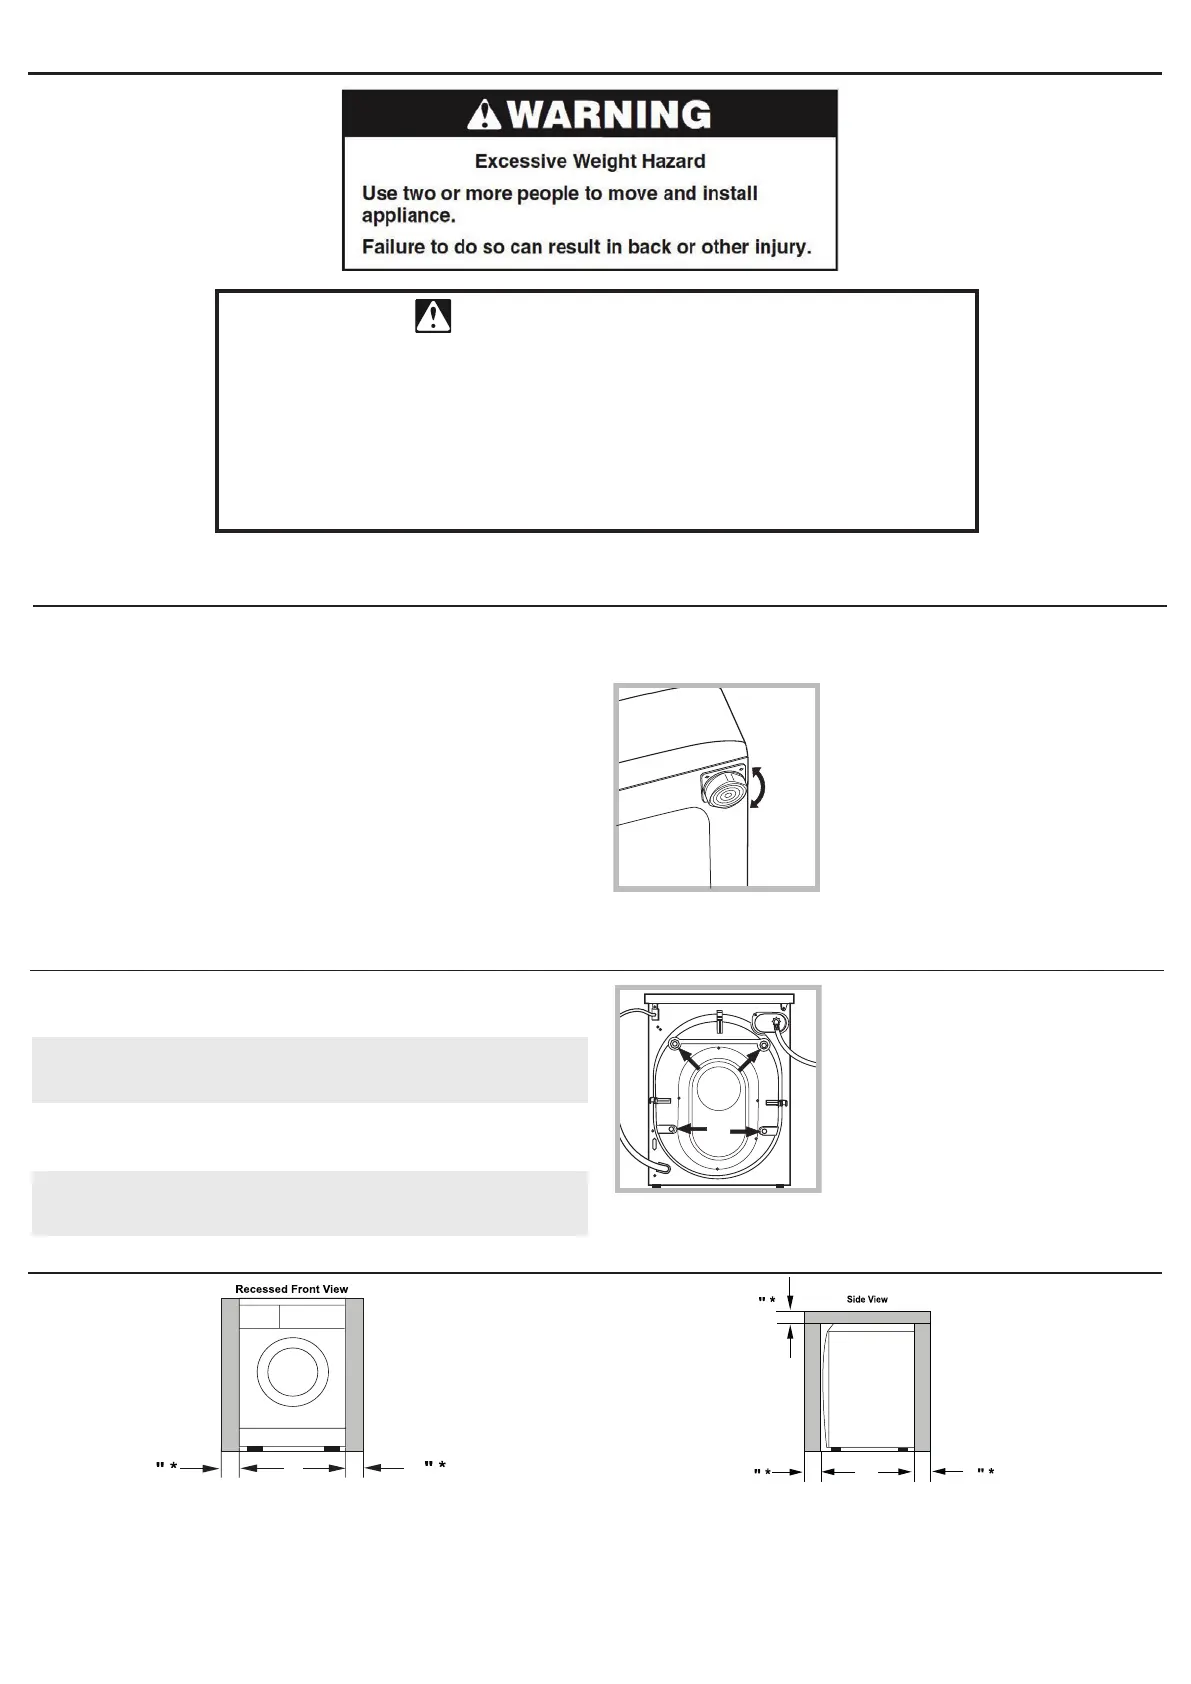
MINIMUM INSTALLATION SPACING
INSTALLATION INSTRUCTIONS
This machine may be installed free standing as well as in a recessed area, closet,
or alcove. The installation spacing is in inches and is the minimum acceptable.
*Additional spacing should be considered for easy installation, servicing
and compliance with local codes and ordinances. Installations must
conform with the minimum dimensions indicated.
Floor must support 280 lbs. and be a solid level surface. To avoid damage
to the ooring, do not install on carpet.
RV/Marine lnstallations - When locating the appliance in a towable trailer
or watercraft
, position the machine over the axles or mid-ship where
movement is at a minimum.
Unpacking
1. Remove the washer-dryer from its packaging.
2. Make sure that the washer-dryer has not been damaged during the
transportation process. If it has been damaged, contact the retailer and do
not proceed any further with the installation process.
Dispose of/recycle all packaging materials.
UNPACKING AND LEVELING
Leveling
1. Install the washer-dryer on a at sturdy oor, without resting it up
against walls, furniture cabinets or anything else.
2. If the oor is not perfectly level,
compensate for any unevenness by
tightening or loosening the adjustable front
feet (see gure); the angle of inclination,
measured in relation to the worktop, must
not exceed 2°.
Leveling the machine correctly will provide it with stability, help to avoid
vibrations and excessive noise and prevent it from shifting while it is operating.
REMOVING THE TRANSIT SCREWS
If a cabinet door is installed, a min. opening of 8 sq. in. should be provided for make up air. Louvered doors with equivalent air opening are acceptable. Allow clearances
behind door(s) to avoid rubbing between back of cabinet door(s) and front control panel. Additional clearances for all, door and floor molding may be required.
For transportation, the inside of the machine is supported by screws, rubber
grommets and spacers on the back panel. Before using the washer-dryer,
these items MUST be removed.
Important: Transit screws and spacers must be removed before operating
the machine to allow proper operation of the machine and to prevent
damage to the appliance.
After positioning the washer-dryer near the installation location, remove the
four screws (see gure), with the rubber grommets and plastic spacers that are
attached to them.
Important: Retain the transit screws, spacers and rubber tubes. These items
should be reinstalled to prevent damage if or when you transport the
machine in the future.
Install the clothes washer-dryer according to the manufacturer’s instructions and local codes.
WARNING - “Risk of Fire”
- Clothes dryer installation must be performed by a qualied installer.
Install the clothes dryer according to the manufacturer’s instructions and local codes.
- Do not install a clothes dryer with exible plastic venting materials. If exible metal duct is installed,
it must be of a specic type identied by the appliance manufacturer as suitable for use with clothes
dryers. Flexible venting materials are known to collapse, be easily crushed, and trap lint. These con-
ditions will obstruct clothes dryer airow and increase risk of re.
- To reduce the risk of severe injury or death, follow all installation instructions.
- Save these instructions.