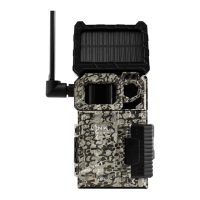
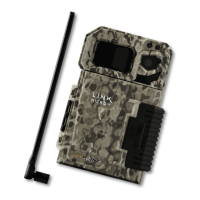
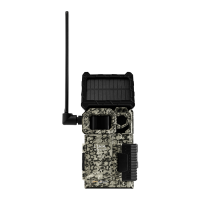
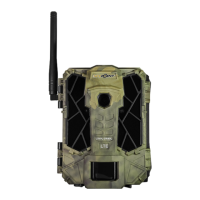
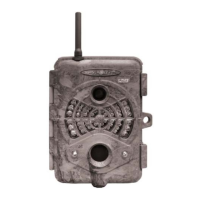
The SPYPOINT LINK-MICRO-S-LTE is a compact cellular hunting camera designed for remote monitoring and photo transfer. Its small size and camouflage coloring allow for easy concealment in outdoor environments. This camera enables users to transfer captured photos to their smartphone or tablet, view images, check device status, and program the camera remotely via a dedicated cellular application.
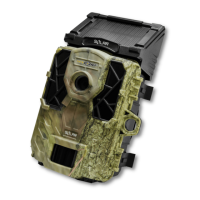
A key feature of the LINK-MICRO-S-LTE is its integrated solar panel, which contributes to extended battery life by charging the included lithium battery pack when exposed to light. This solar capability, combined with a powerful lithium battery, offers significant autonomy. The camera boasts a robust design, straightforward operation, and reliable connectivity through the LTE network, ensuring quick triggering upon motion detection.
Usage Features:
The LINK-MICRO-S-LTE operates primarily in Photo mode, capturing still images. While Video and Time-lapse modes are not available for this specific model, its photo capabilities are extensive. Users can configure various settings to optimize performance for different scenarios, such as trail monitoring or bait site surveillance.
For basic configuration, the camera allows users to set a delay between detections, ranging from instant to 30 minutes. A longer delay conserves battery life by reducing the number of photos taken, while a shorter delay maximizes surveillance but consumes more power. The multi-shot feature enables the camera to take 1 or 2 consecutive photos per detection, with a 5-second interval between shots. Detection sensitivity can be adjusted (low, medium, high) to effectively capture movement, with higher sensitivity leading to more pictures. Users can also assign a custom name to the camera for easy identification, especially useful for those managing multiple devices.
Cellular configuration options include setting the first transfer time of the day. Transfers are configured by default at four-hour intervals from the time of activation. Users can also choose the transfer frequency, ranging from 1, 2, 6, or 12 transfers per day, or opt for transfer upon each detection. A "Take a photo at the next transfer" option allows the camera to automatically capture and send a picture during the subsequent transfer.
Advanced configuration settings provide further control over the camera's operation. Users can select their preferred date and time formats (MM/DD/YYYY or DD/MM/YYYY; 12h or 24h) and temperature unit (°C or °F). The operating period can be customized for each day of the week, allowing the camera to be active only during specific hours. For 24-hour operation, both start and stop times should be set to 00:00 or 12:00.
The trigger speed can be set to "Optimal" for better image quality, though it might miss fast-moving subjects, or "Fast" to ensure capturing quick movements, potentially at the cost of image quality. Photo quality can be adjusted to "High" (10 Mpx) or "Normal" (2 Mpx) for images saved on the microSD card. The cellular mode can be activated or deactivated, with changes taking effect during the next transfer. For convenience, there is an option to reset the camera to its default settings.
Installation and Activation:
Before use, the camera must be activated. This can be done either through the SPYPOINT app (available on Google Play™ and the App Store™) or via the SPYPOINT website (www.spypoint.com). The activation code is located inside the camera's battery compartment.
To install the camera, the included strap is looped through the designated slot. It is recommended to choose a stable tree to avoid false detections caused by wind movement. The area in front of the camera should be clear of branches or twigs. The camera should be positioned at the mid-body height of the targeted animal, approximately 25 feet (7.5 meters) away. Ensuring adequate light at the installation site is crucial for the solar panel's optimal performance. For brighter night photos, reflective items in the background are beneficial.
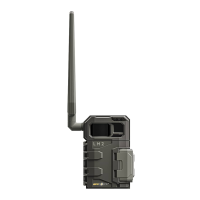
Before starting the camera, users should ensure the antenna is freed from its shipping mount, the lithium battery pack is recharged and inserted, the microSD card is formatted and inserted, and the camera is activated and securely installed.
Upon turning on the camera, the green STATUS light will flash while searching for a signal. The STATUS light will then indicate signal strength: red for insufficient, orange for acceptable, and green for optimal. A flashing red light on the top right indicates a 30-second delay before photo mode activates, allowing the user to leave the area without being photographed.
An operational validation test can be performed to confirm proper functioning. This involves opening the door, moving in front of the camera to trigger a picture (the STATUS light should illuminate), and then turning the camera off and on again to verify cellular signal strength. If everything works normally, the camera should connect to the cellular network and transmit its status and at least one photo to the app within 15 minutes.
Maintenance Features:
The camera's primary power source is the #LIT-10 lithium battery pack, which offers extended operating time. Before first use, the battery pack must be charged for about 12 hours using the supplied micro-USB cable and a 5V wall outlet charger. The red light on the battery pack turns green when fully charged. It is crucial not to insert AA batteries into the lithium battery compartment, as this can damage the camera.
The solar panel's function is to maintain or slowly charge the lithium battery. It is not an autonomous power source, and its effectiveness depends on ambient solar energy. Users should ensure the solar panel is unobstructed for optimal performance.
An optional external 12V battery (#KIT12V, sold separately) can be used as a secondary power source. When connected, it becomes the primary power source, with the lithium battery pack only being used once the 12V battery is depleted. It's important to note that neither the solar panel nor an external 12V battery recharges the lithium battery pack. Battery levels can be monitored via the SPYPOINT app, which provides notifications when the charge is low.
The camera requires a microSD card (up to 32 GB, not included) for storing photos and status files. Before insertion, the microSD card must be formatted via a computer. The camera supports continuous file recording, meaning it will overwrite the oldest files when the card is full. To remove the card, the camera must be turned OFF to prevent data loss.
Troubleshooting:
The manual provides solutions for common issues. If the camera doesn't turn on, users should check the lithium battery pack's charge level. If the camera is unresponsive, solutions include turning it off and on, reinserting the battery pack, resetting the device via the app, or performing a firmware update. If the camera isn't taking pictures, users should ensure it's on, remove any protective stickers from the detection lens, format the microSD card, verify operating periods in the app, and if necessary, reset the camera and settings.
For photo transmission issues, users should check signal strength, ensure they haven't exceeded their cellular plan's photo limit, look for messages in the app's Photo section, and note that photos older than 7 days will not be transferred. If the camera isn't receiving a cellular signal, users should verify network coverage, move the device to a location with a stronger signal, turn it off and on, ensure the antenna is securely installed, or use a long-range cellular antenna (#CA-01, sold separately).
If the battery pack drains quickly, users can adjust settings such as delay between shots, multi-shots, detection sensitivity, transfer frequency, and photo quality to less power-consuming options. If the red light flashes during installation, it indicates the 30-second delay before photo mode. For dark night photos, users should check battery charge, ensure the subject is within night lighting range (approx. 80 feet), try setting night mode to "Enhanced," ensure background elements reflect infrared LEDs, and test night lighting in a dark room. If no animals are captured, users should ensure the camera isn't pointing at sunrise or sunset, reduce camera sensitivity if the motion detector range exceeds infrared LED range, increase camera height for small animals, and ensure the installation site is stable and free of moving branches or twigs.
SPYPOINT Community and Support:
SPYPOINT offers customer support through a chat service (Monday to Friday, 8:30 a.m. to 4:30 p.m. EST) on their website (www.spypoint.com) or via email at service@spypoint.com. Additional information and support resources are available at www.spypoint.com/en/support. Users are encouraged to join the SPYPOINT community on social media platforms like Facebook, Twitter, YouTube, and Instagram.
The SPYPOINT app serves as a central hub for managing cameras and photos, allowing users to configure settings, manage accounts, verify data usage, adjust plans, and view/sort photos. SPYPOINT also offers various photo transmission plans, including a FREE 30-day package upon activation and a FREE monthly plan for up to 100 photo transfers. Users can choose plans that best suit their needs from www.spypoint.com/en/spypoint-experience/plans. An online camera and photo manager is also available at www.spypoint.com for managing devices and photos. The SPYPOINT EXPERIENCE provides additional digital features and online scouting tools to optimize trail camera use and enhance hunting success, with more details at www.spypoint.com/en/experience-spypoint.
Transferring Files to a Computer:
To transfer photos, users must turn off the camera, remove the microSD card, and insert it into a computer's microSD slot or a USB adapter. On a PC, users can access the card via "My Computer" or "This PC," navigate to "DCIM" and "100DSCIM," select desired photos, and copy them to a new folder. On a Mac, users can find the device under "Devices," access "DCIM" and "100DSCIM," select photos, and copy them to a desired location. After transfer, the device should be safely ejected.
Warranty and Repair Services:
The SPYPOINT LINK-MICRO-S-LTE comes with a 2-year warranty covering parts and workmanship from the purchase date, requiring a cash register receipt as proof. The warranty does not cover consumable parts (like batteries), damages from improper use, negligence, accidents, liquid contact, fires, earthquakes, unauthorized retailer purchases, modified products, aesthetic damages, or usage outside SPYPOINT recommendations.
For repairs, customers must obtain an RMA number by contacting SPYPOINT support. Shipping costs to send the product for repair are the customer's responsibility, while SPYPOINT covers return shipping for warranty-covered repairs. Non-warranty repairs are charged at a reasonable cost, with the customer responsible for all shipping. It is recommended to use a shipping method with a tracking number.