9
DUALDRIVE
MAINTENANCE
Technical Manual 2006
LUBRICATION
GEAR HUB
Hubs are provided with permanent
lubrication and maintenance-free under
normal conditions.
Cleaning of parts:
• All parts – except the planetary gear
carrier and the driver – can be degreased
in a cleaning bath.
• Planetary gear carrier and driver only
need to be cleaned on the outside with
a brush so as not to degrease the
bearings.
Lubrication of parts:
Use only SRAM grease (Part No. 0369135 200/
...201) and standard bicycle oil.
• To lubricate the bearing points on
the planetary gear sets, position the
planetary gear carrier pawls upside and
apply 2 – 3 drops of oil to the bearing
bolts – at the same time turning the
planetary gears so that the bearing
points are completely wet. Oil axle slot,
apply a thin coating of grease to the
outside.
• Grease the teeth of the axle (fill the
gaps).
• Apply grease to gear ring teeth but just
oil the pawls and pawl teeth.
• Oil pawl carrier pawls and pawl
bearings.
• Oil cartridge bearing.
• Regrease ball retainers, line ball
bearing running tracks with grease.
Caution:
Do not use high-pressure water when
cleaning the gear hub (e.g. strong water
jets, high-pressure cleaners etc.) –
if water penetrates it could lead to
functional problems.
LUBRICATION
REAR DERAILLEUR
• Do not use solvants or corrosive
materials to clean the components.
• Lubricate the shifting joints regularly
(Fig. 3).
• Grease any cable guides (e.g. beneath
the bottom bracket).
CABLE CHANGE
Advice:
Use only new high quality cable and
compressionless cable housing with
end caps.
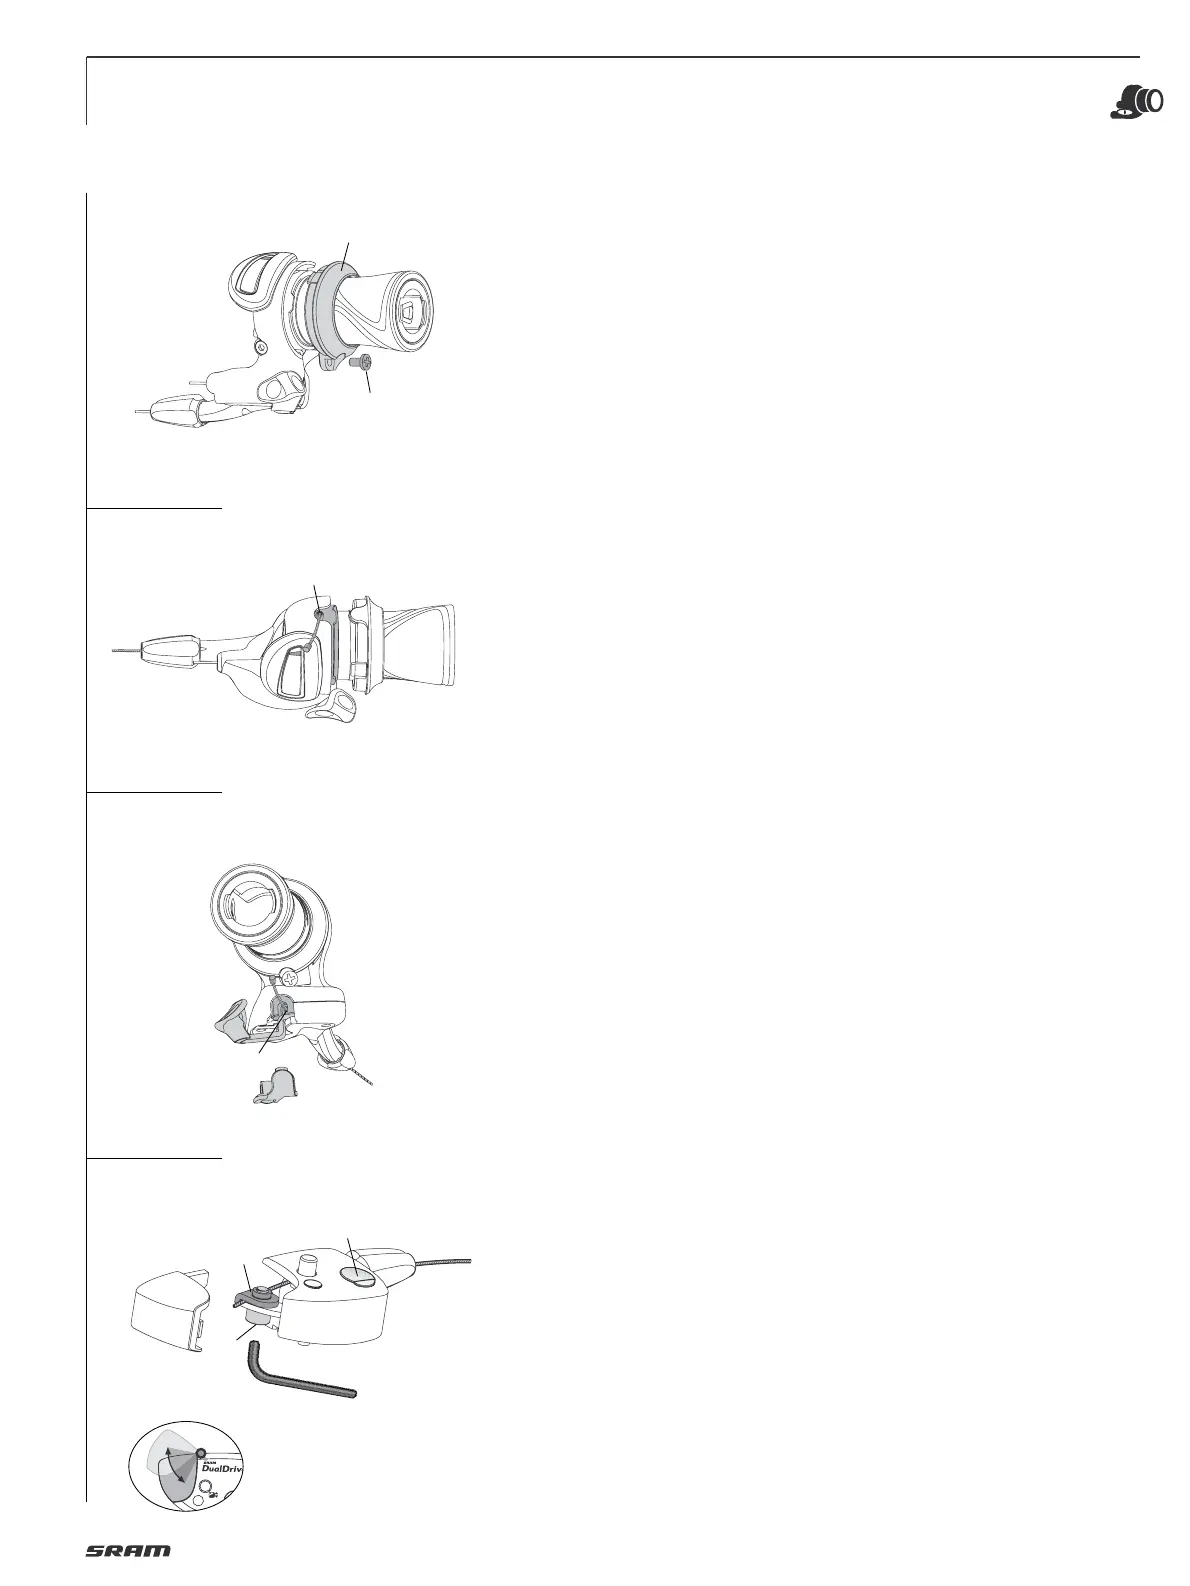
Twist shifter (rear derailleur):
• Detach the cable from the derailleur.
• Cut cable off 15 cm (6") from shifter
barrel adjuster. Discard old cable and
cable housing.
• Remove screw (1, Fig. 4) and pull open
the cable change sleeve (2).
• Rotate the shifter fully in the cable
release direction (gear position “8/9“).
• Look for cable head entry (3, Fig. 5).
• Push cable up/out of the shifter and
discard.
• Feed the new cable through the cable
entry and out the barrel adjuster (4).
• Pull cable snug.
• Install cable change sleeve (2, Fig. 4).
• Feed the cable through the new cable
housing and frame stops.
• Attach cable to the derailleur.
• Adjust indexing per derailleur instruction.
Thumb shift lever (gear hub):
• Place thumb shift lever (5, Fig. 6) in
uphill riding mode / gear position “1“.
• Remove Clickbox from the axle (see
page 8).
• Snap open Clickbox-cover (8, Fig. 7)
as shown.
• Unscrew clamping bolt (9).
• Remove the shifter escape hatch (6, Fig. 6).
• Remove and discard the old cable.
• Feed the new cable through the cable
entry (7, Fig. 6), the new calbe housing
and pull the cable snug.
• Attach the escape hatch.
• Pull the cable tight and position it under
the cable anchor washer (10, Fig. 7).
• Tighten the 4 mm hex cable anchor bolt
to 2.5 – 4 Nm (22 – 35 in.lbs.).
• Cut off cable end to 1 – 2 mm.
• Snap in Clickbox-cover (8).
• Install Clickbox (see page 6).
• Place thumb shift lever in standard
riding mode / gear position “2“.
• Match up the marks in the Clickbox
viewing window (11, Fig. 7) by turning
the barrel adjuster (12).
4
6
7
5
2
1
11
12
8
9
10
3
4
6
5
7
4 mm
2.5 – 4 Nm
22 – 35 in.lbs.