SuperMax
®
Pump Installation and User’s Guide
3
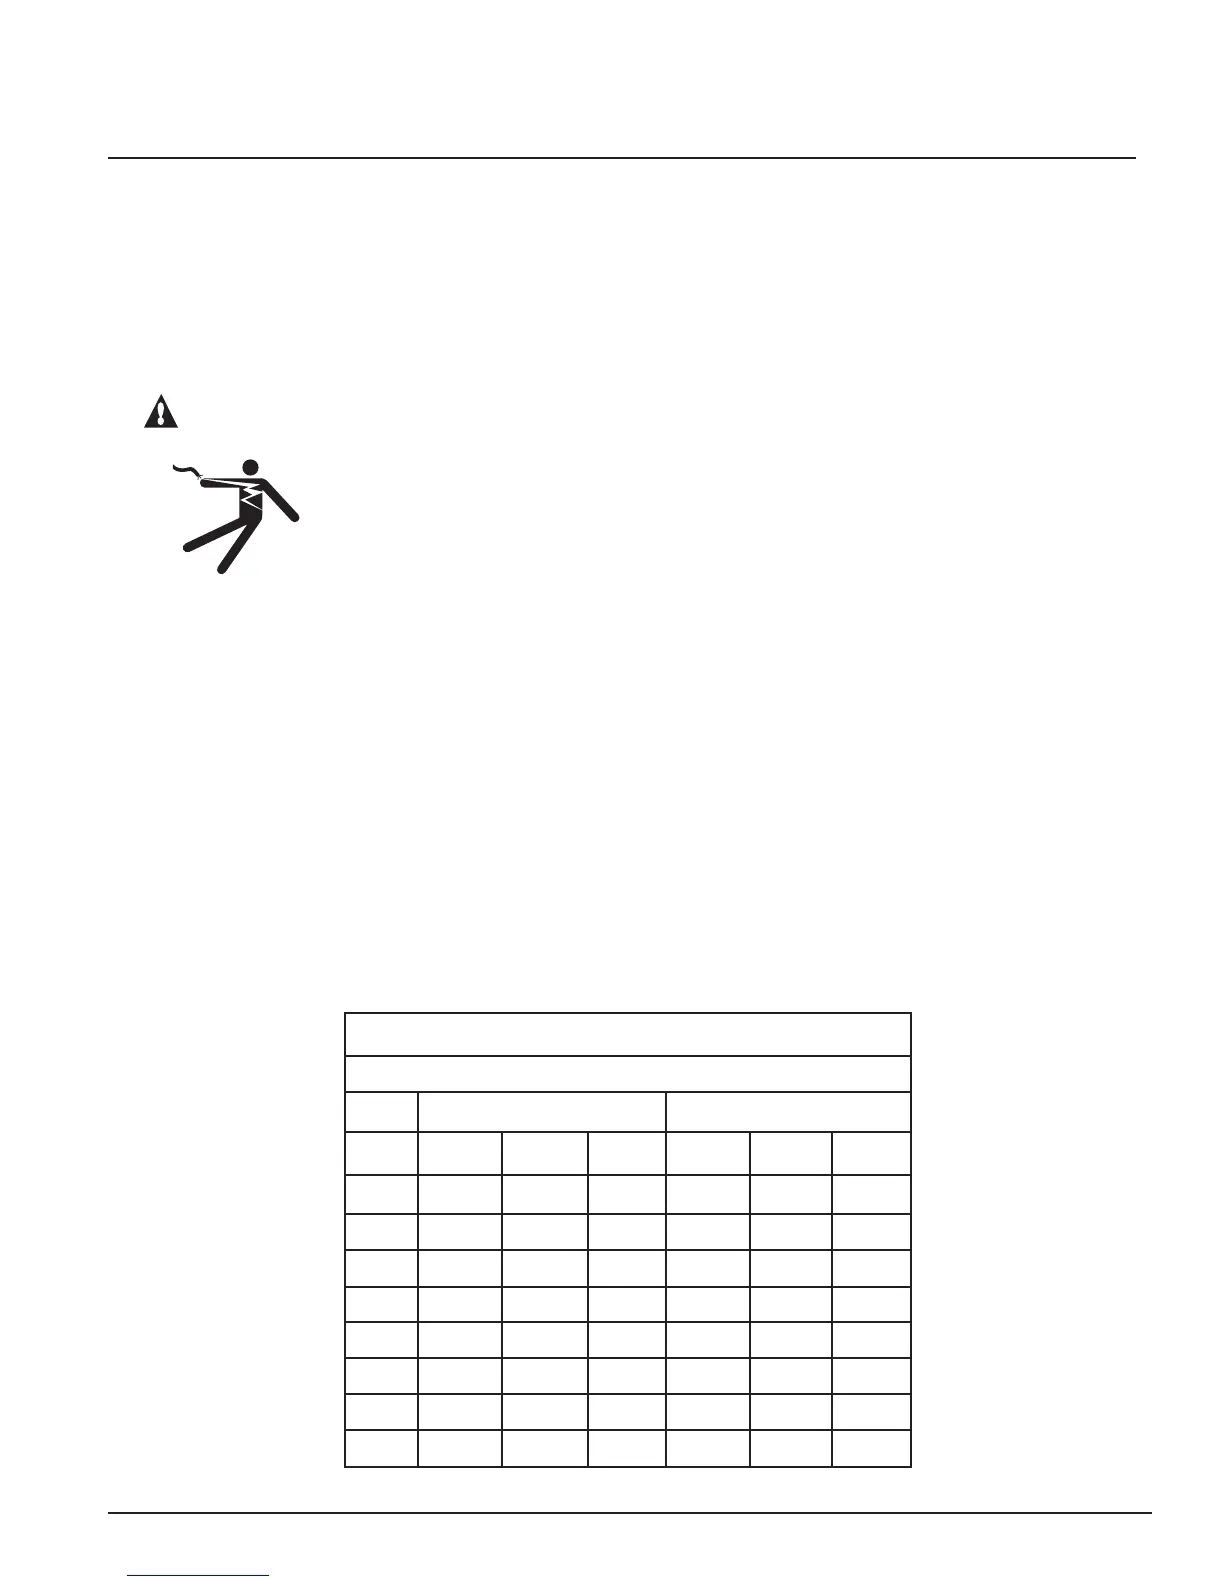
Chart 1.
Section 2
Electrical Requirements
This section describes how to wire the SuperMax
®
pump.
Note: Before installing this product, read and follow all warning notices and instructions on pages ii-vi.
Electrical Requirements and Wiring
WARNING — Risk of electrical shock or electrocution.
This pool pump must be installed by a licensed or certified electrician or a qualified pool serviceman in
accordance with the National Electrical Code and all applicable local codes and ordinances. Improper
installation will create an electrical hazard which could result in death or serious injury to pool users,
installers, or others due to electrical shock, and may also cause damage to property.
Always disconnect power to the pool pump at the circuit breaker before servicing the pump.
Failure to do so could result in death or serious injury to serviceman, pool users or others due to
electric shock.
Wiring Installation
1. Be sure all electrical breakers and switches are turned off before wiring motor.
2. Be sure that the wiring voltage matches the motor voltage (230 VAC or 115 VAC). If they do not match, the
motor can overheat.
3. Choose a wire size from the Chart 1. When in doubt use a heavier gauge (larger diameter) wire. Heavier
gauge will allow the motor to run cooler and more efcient.
4. Be sure all electrical connections are clean and tight.
5. Cut wires to the appropriate length so they do not overlap or touch when connected to the terminal board.
SUPPLY WIRE SIZES (AWG)
(Size and Length by Horsepower)
Hp 115 volts 230 volts
50 ft. 100 ft. 150 ft. 50 ft. 100 ft. 150 ft.
1/3 14 14 12 14 14 14
1/2 14 12 10 14 14 14
3/4 12 12 10 147 14 14
1 12 10 8 14 14 14
1½ 10 10 8 14 14 12
2 10 8 8 14 12 12
2½ - - - 12 12 10
3 - - - 12 12 10