Figure 5
STACK-ON
Door
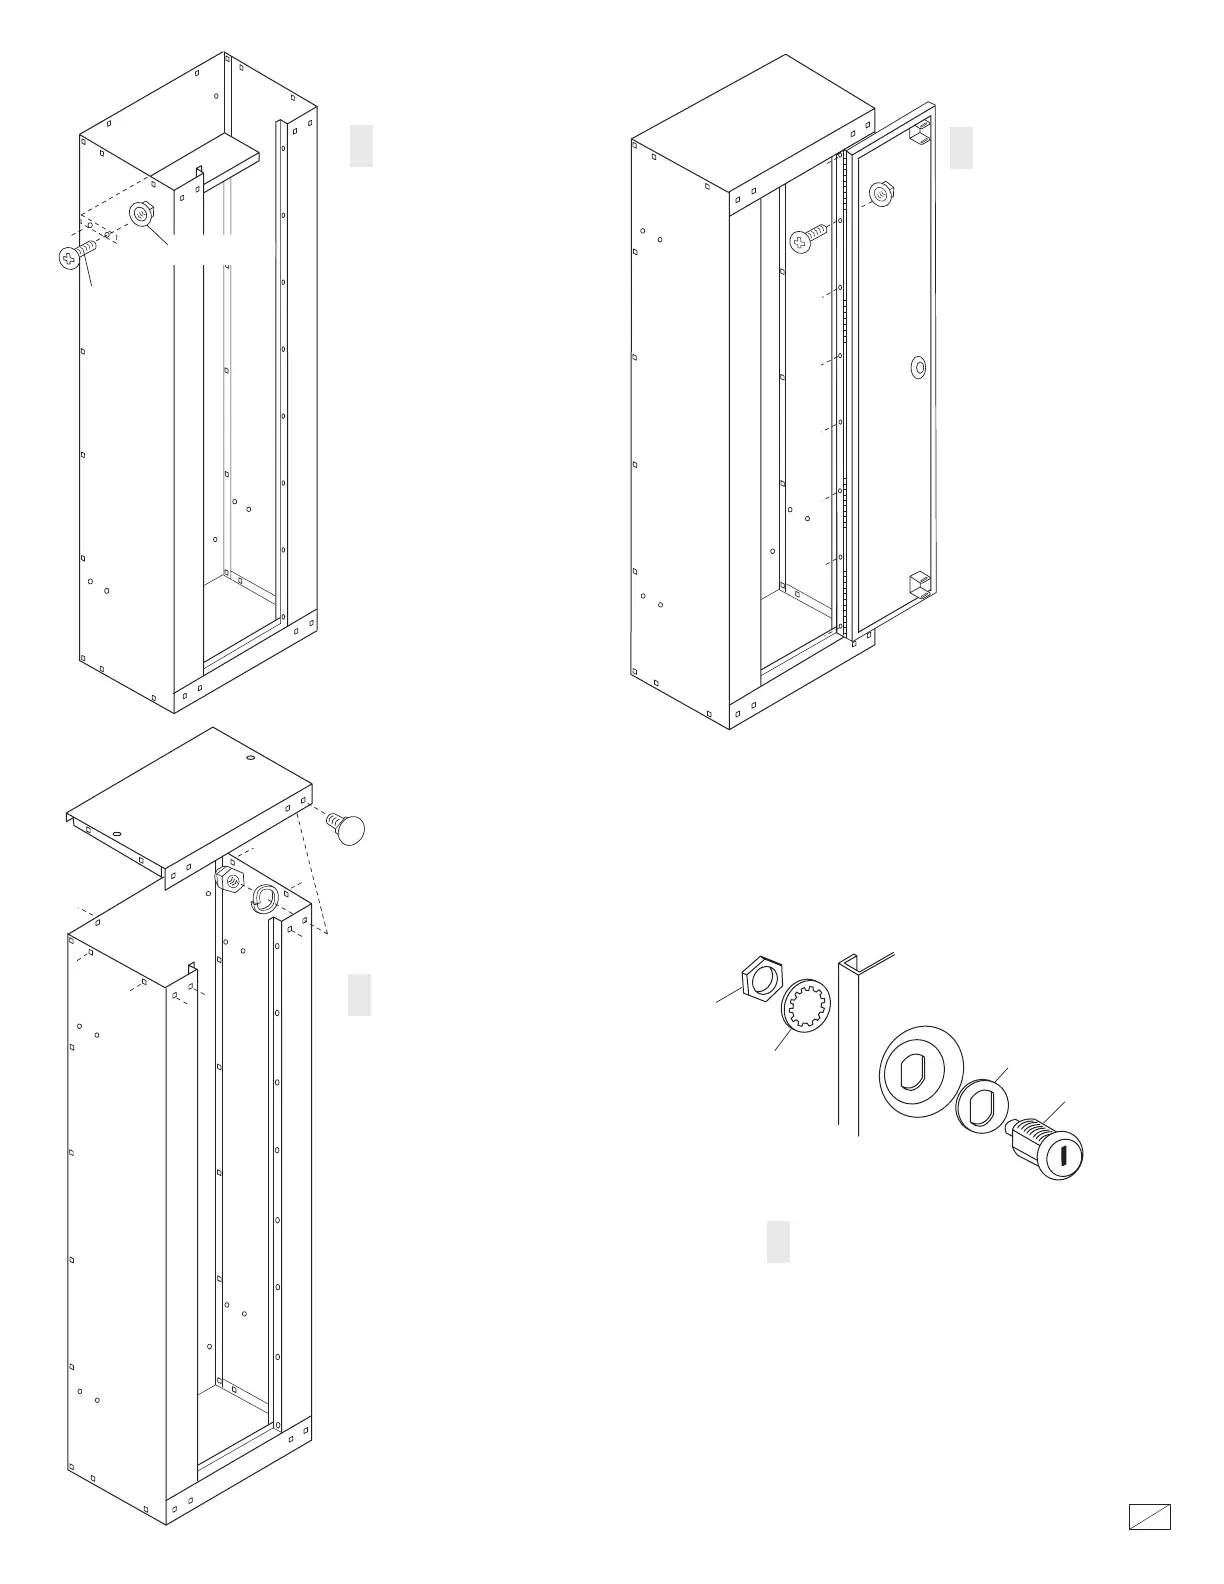
5. e door can be
assembled on the le or
right. Depending on where
you are going to place your
cabinet, you may want your
door to open in a certain
direction. Review the
section "Selecting a
Location" and determine the
opening direction before
assembling the door.
Align the door hinge holes
with the cabinet holes.
Assemble with (8) machine
screws and locking nuts.
(See gure 5)
Center the door in the
opening (from top to
boom) and tighten the
screws.
4. Assemble the top panel
(which has the name plate).
is will assemble the same as
the boom panel.
With the front and back
anges on the outside of the
cabinet and the side anges on
the inside of the cabinet,
assemble with (10) carriage
bolts, lock washers and nylon
locking nuts. (See gure 4)
Now tighten all the fasteners
in the cabinet body. Do not
over tighten.
Figure 3
Machine
screw
Shelf
Locking nut
3. Assemble the optional
storage shelf at this time. It
will be easier to align the
holes without the top on.
Use the top set of holes in
the side panels and assemble
the shelf with (4) machine
screws and locking nuts. (See
Figure 3)
Nut
Locking
washer
Ring
Lock
Figure 6
Door
6. Assemble the lock and ring
through the front of the door.
Secure the lock with the locking
washer and nut. (See gure 6)
Top panel
Figure 4
STACK-ON
4327-1309
18
2