21
The Fuel Gauge Resistance
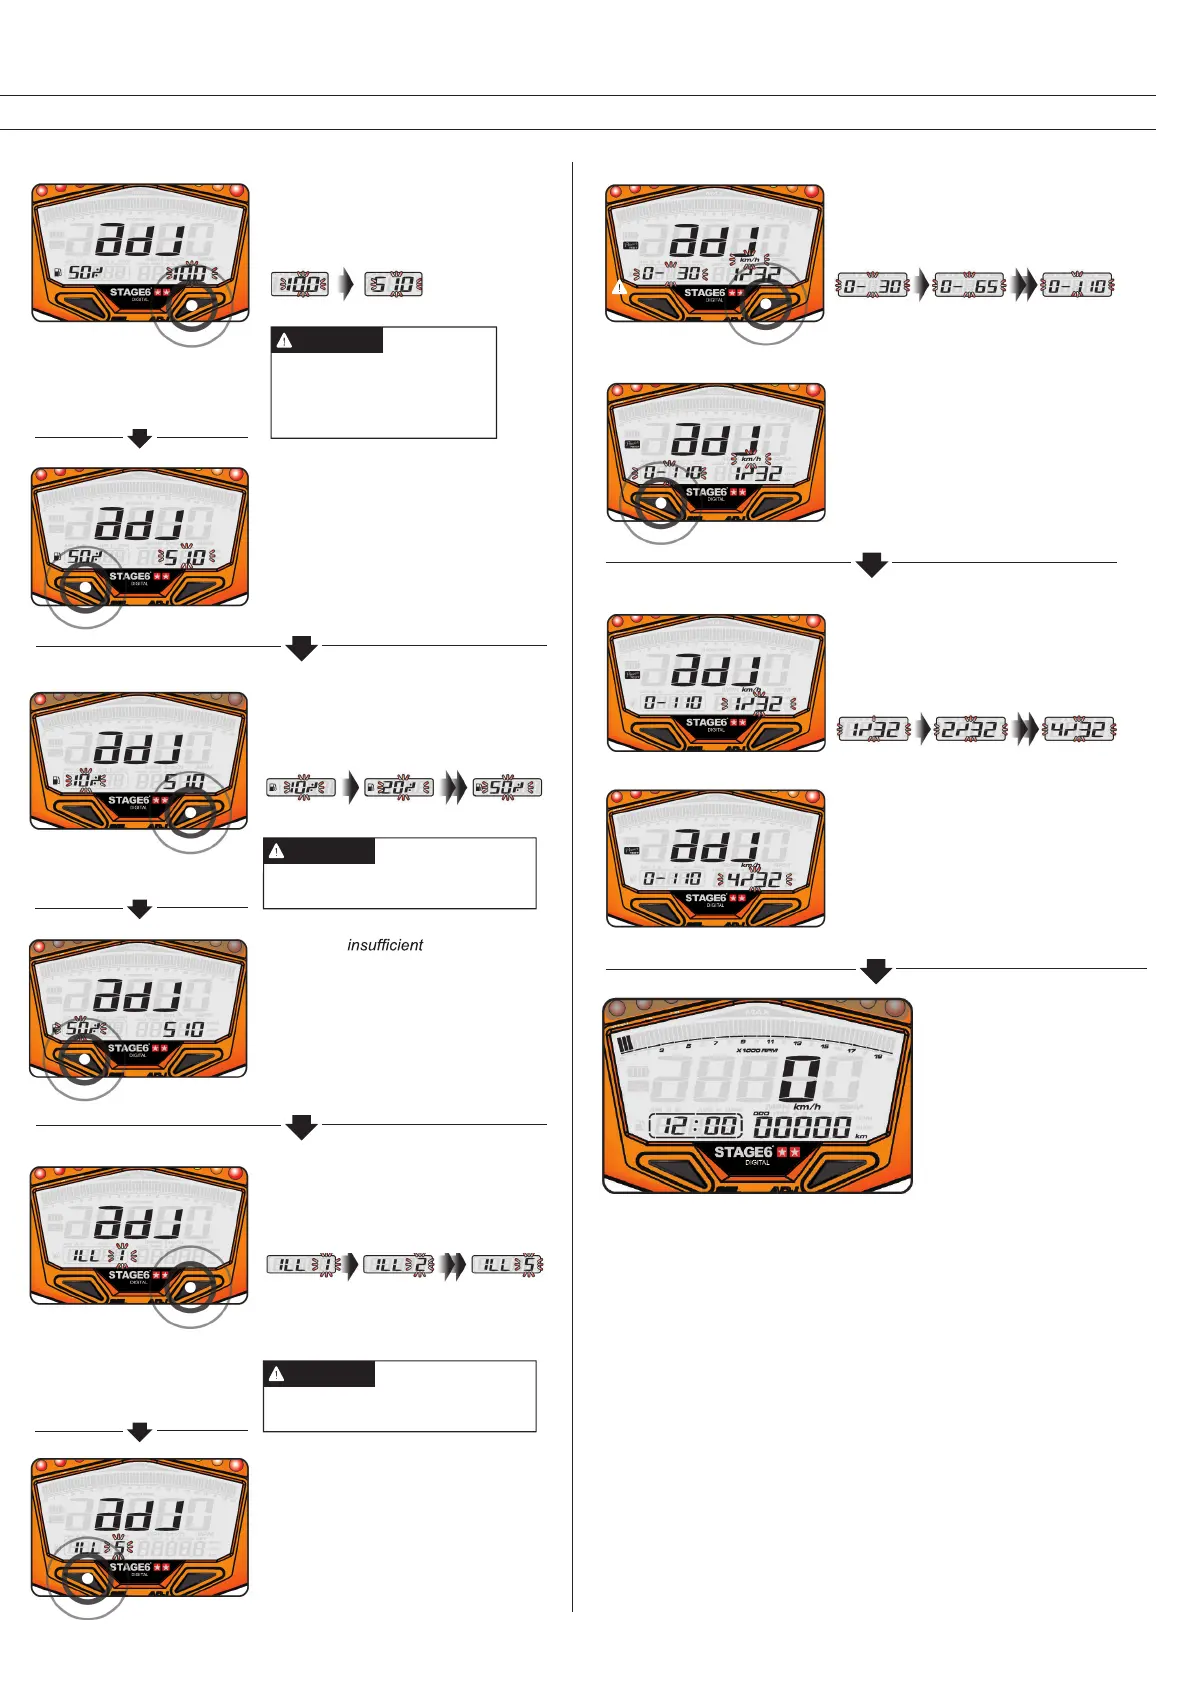
• E.g.: The fuel gauge resistance is to
be changed to 510 Ω.
• Press the Adjust Button to choose
the respective resistance.
• E.g.: The fuel gauge resistance has
been changed from 100 Ω to 510 Ω.
• Press the Select Button to get to the
setting of the low fuel level warning
light.
Alternatives: 100 or 510 .
If you don’t install the fuel
wiring, the fuel gauge will not
display.
NOTE
• E.g.: The fuel warning
has been changed from 10% to 50%.
• Press the Select Button to change
backlight brightness.
Setting range: 10–50%
NOTE
• E.g.: The low fuel level warning is to
come on at 50%.
• Press the Adjust Button to change
the setting.
Low Fuel Level Warning
• E.g.: The backlight setting has been
changed from ILL 1 to ILL 5.
• Press the Select Button to get to the
target speed timer setting.
Setting range: 1 (dark) – 5 (bright)
NOTE
• E.g.: You want to set the brightness
to 5.
• Press the Adjust Button to choose the
respective brightness.
Backlight
Target Speed Timer
• E.g.: The target speed timer setting is
to be changed to 0–110 km/h.
• Press the Adjust Button to select the
respective value.
• E.g.: The target speed timer setting
has been changed from 0–30 km/h to
0–100 km/h.
• Press the Select Button to get to the
target distance timer setting.
Target Distance Timer
• E.g.: The target distance timer setting
is to be changed to 4/32 of a mile.
• Press the Adjust Button to select the
respective value.
• E.g.: The target distance timer setting
has been changed from 1/32 to 4/32
of a mile.
• Press the Select Button to get back to
the main screen.
• You are in the main
screen again.
 Loading...