ASSEMBLY INSTRUCTIONS
12
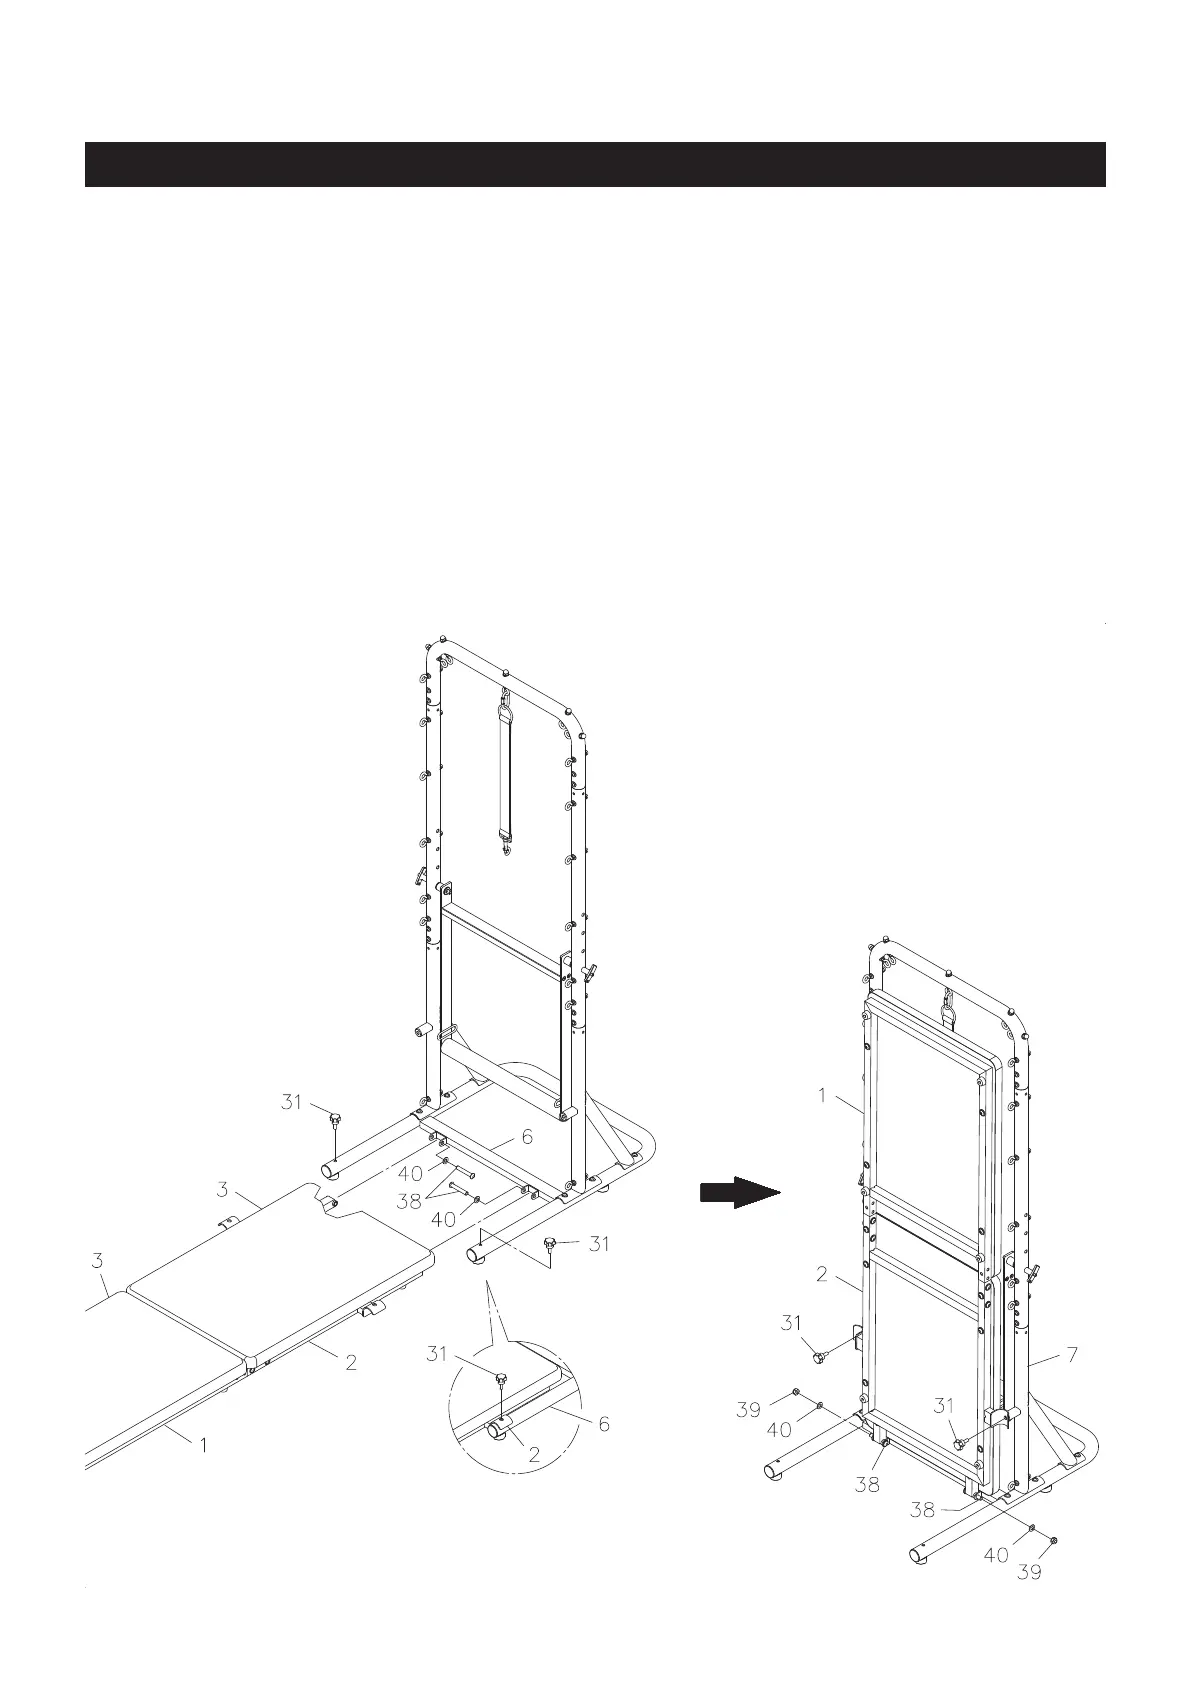
STEP 8
Refer to illustration B. Put a WASHER(M10)(40) onto each of the BUTTON HEAD BOLT(M10x1.5x60mm)
(38). Attach the REAR CUSHION FRAME(2) to the BASE FRAME(6) by inserting the BUTTON HEAD
BOLTS(M10x1.5x60mm)(38) with WASHERS(M10)(40) through the two brackets on the BASE FRAME(6)
and the REAR CUSHION FRAME(2).
STEP 9
Refer to illustration C. Fold up the CUSHION ASSEMBLY(3) and lock in position by attaching the REAR
CUSHION FRAME(2) to the LOWER UPRIGHTS(7) with the LOCKING KNOBS(31). Secure the BUTTON
HEAD BOLTS(M10x1.5x60mm)(38) with NYLOCK NUTS(M10x1.5)(39) and WASHERS(M10)(40). Do not
over tighten the NYLOCK NUTS(M10x1.5)(39) to allow the CUSHION ASSEMBLY(3) to rotate.
Remove the LOCKING KNOBS(31) to fold down the CUSHION ASSEMBLY(3). Lock the CUSHION
ASSEMBLY(3) in its normal using position by attaching the REAR CUSHION FRAME(2) to the BASE
FRAME(6) with the LOCKING KNOBS(31). Refer to detail drawing D.
C.
B.
D.