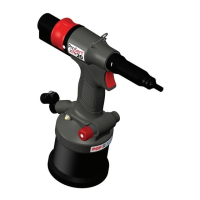
4.3.1. Stroke Adjustment (see Fig. 1A & 3).
To use this tool in stroke set operation, screw the Pressure Regulator 30 fully in to achieve full pressure then
adjust Stroke Setter to the desired stroke length:
• Open Stroke Slider 20B
• The Stroke Locking Pin 80 will be released.
• Directional arrows indicate stoke direction.
• Increase the stroke from the minimum until optimum deformation is obtained.
• The scale gives an indication of the current stroke length.
• Stroke indication markings F are shown on the End Cap g. 1A
• Line the rear of the Stroke Setter 19 up with these marks to achieve desired stroke length.
• Each Recess I on the Stroke Setter 19 is equal to +- 0.1mm of stroke.
• Close the Stroke Slider 20B before using in the application environment.
• The Stroke Lock will activate when the Stroke Slider 20B is closed when the tool is in the upright position
• The tool is now ready to operate.
4.3.2. Pressure Adjustment (see Fig. 1B & 3).
To use this tool in pressure set operation, wind the Stroke Setter 19 to 7mm, then screw the
Pressure Regulator 30 fully out to achieve minimum pressure then adjust to the desired pressure:
• Initially the Blind Rivet Nut will not deform and the tool will spin o.
• Screw in the Pressure Regulator 30 by 1 groove on the regulator body and test.
• Repeat the operation with the Pressure Regulator 30 until optimum deformation is obtained.
• 1 notch on the Pressure Regulator 30 is equivalent to approximately 20N of pulling force.
• After a successful Blind Rivet Nut deformation, check the Blind Rivet Nut and increase the force if
necessary.
• Increase by 1-2 notches extra to allow for variation in the Blind Rivet Nuts.
• The tool is now ready to operate.
5. Operating Procedure
Installing a Blind Rivet Nut (see Fig. 3).
To install a Blind Rivet Nut.
• Check that the correct Blind Rivet Nut has been selected.
• Push Blind Rivet Nut into the application.
• Check Nose Assembly is at right angle (90°) to the work.
• Push onto the Blind Rivet Nut with the tool to spin on.
• Once fully and correctly inserted, depress tool Trigger 12 switch to start installation cycle.
• Hold the Trigger 12 until the Blind Rivet Nut is completely set and the tool has disengaged completely.
In the event a Blind Rivet Nut becomes jammed in an application press the Manual Reverse Trigger 22 to
reverse the Mandrel A and spin o the Blind Rivet Nut. Alternately disconnect from the air supply and use the
4mm Pin Punch K supplied in the Maintenance Kit to wind o the Mandrel through the Nose Casing 13 shown
in the gure 1.
CAUTION - do not attempt to force the installation of an insert as this will cause damage to the tool and/or
application.
15
ENGLISH

 Loading...