To set the range of the mark detection zone, select the eleventh item in the settings menu. Then,
using buttons
icon-short-2.png
Image not found or type unknown
and
icon-short-3.png
Image not found or type unknown
, set the desired value from 1 to 8.
1 — minimum range, 8 — maximum range.
Setting the Communication Check Period with the Remote Key
To set the communication check period with the remote key, select the twelfth item in the settings
menu. Then, using buttons
icon-short-2.png
Image not found or type unknown
and
icon-short-3.png
Image not found or type unknown
, select the value 0 or
1.
Description of configuration options:
0 — communication check disabled;
1 — communication check occurs every 3 minutes.
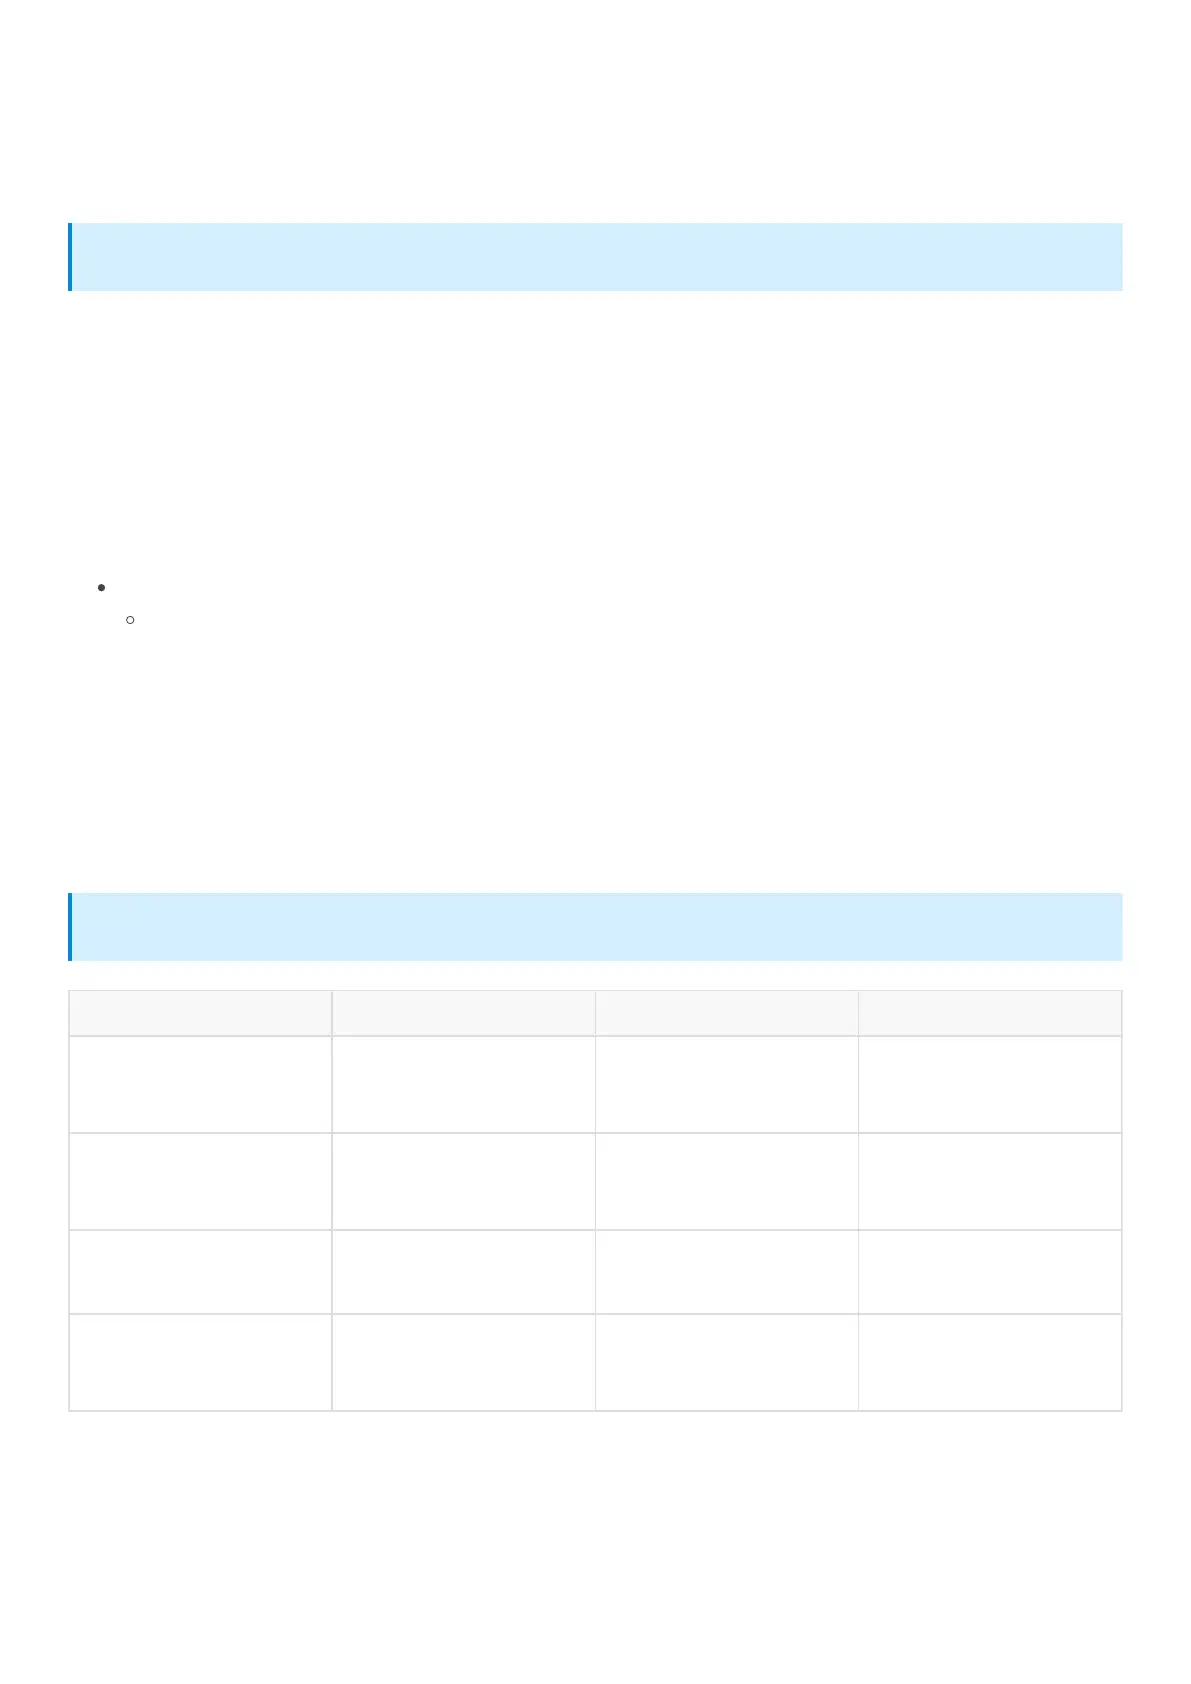
Remote Sound Profile Menu
The menu offers 4 sound profiles with settings for various types of remote signals: command
confirmation, alarm, and button press. Profile selection is done by pressing buttons on the remote.
№ Profile Name Button Combination Description
1 SOUND 2
icon-long-3.png
Image not found or type unknown
icon-note-1.png
Image not found or type unknown
icon-short-1.png
Image not found or type unknown
Maximum volume with all
signals, vibration signal
enabled.
2 SOUND1
icon-long-3.png
Image not found or type unknown
icon-note-1.png
Image not found or type unknown
icon-short-2.png
Image not found or type unknown
Minimum volume with all
signals, vibration signal
enabled.
3 SOUND 0
icon-long-3.png
Image not found or type unknown
icon-note-1.png
Image not found or type unknown
icon-short-3.png
Image not found or type unknown
Vibration signal only, sound
volume disabled.
4 SOUND --
icon-long-3.png
Image not found or type unknown
icon-note-1.png
Image not found or type unknown
icon-short-4.png
Image not found or type unknown
Silent mode, sound volume
and vibration signal
disabled.
Adjusting Sound Profile Settings:
The detection zone should be smaller than the mark loss zone range.
The sound profile settings shown in the table are set by default.