4
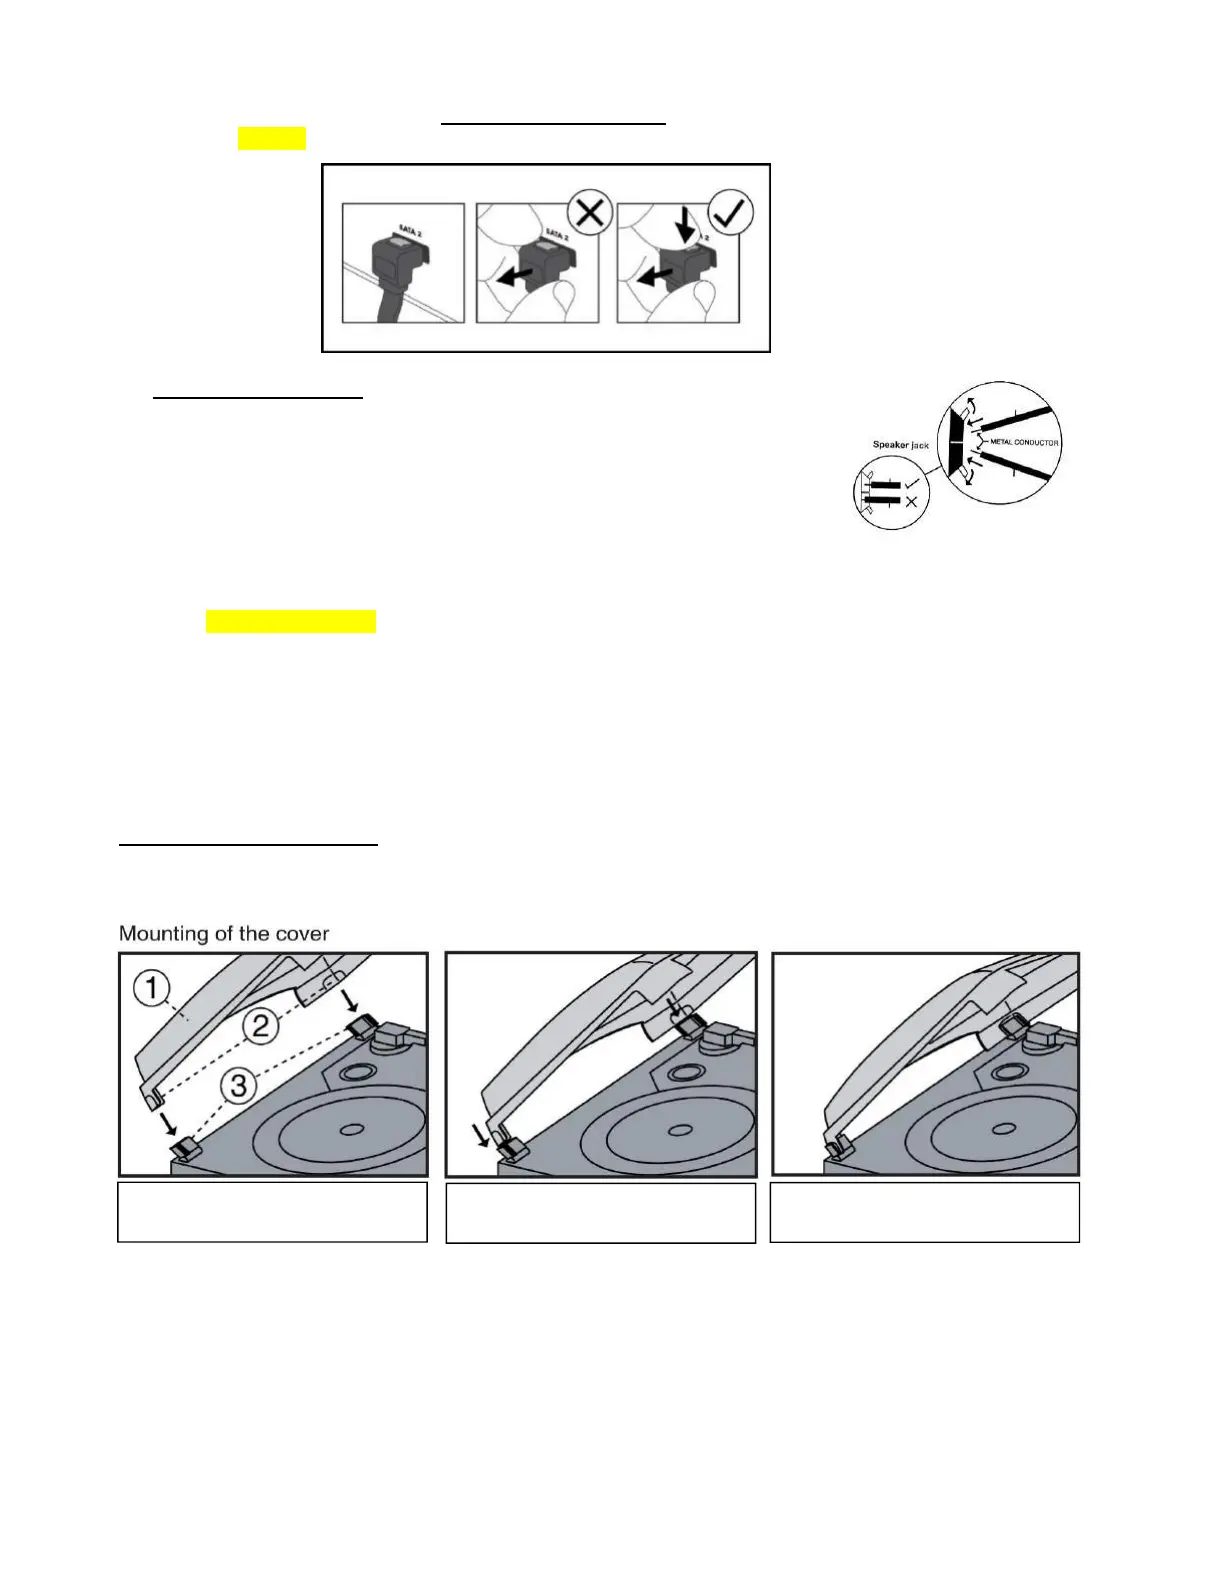
INSERT THE PLASTIC COVER BRACKETS
INTO
THE BLACK HINGE SLOTS
PUSH BOTH TURNTABLE DECK BLACK
HINGES BACKWARDS
PUSH THEM DOWN FIRMLY INTO THE
HINGES TO COMPLETE THE
INSTALLATION
CAUTION:
- DONOTcrossthecableswhenconnectingthese!
- Todisconnectthecableplug,first
pushthetopoftheplugintoreleaseitandthenpullitoutwhilstkeeping
thetopPRESSEDin–refertothelinedrawingbelow.
3. Connectthespeakerwiresto thecorrespondingspeakerterminals(41)locatedonthe
rearoftheunit:
a. Push the right Red socket switch upwardsto expose the hole in which to insert the
Redspeakercable wire
–insertjust themetal part ofthecable‐thenrelease the
switch.
b. PushdowntherightBlacksocketswitchandinserttheBlackcablewire.
Repeatthisprocessfortheotherspeaker.
4. ConnecttheACmainspowercord(48)toa230VACMainswalloutlet.
5. SlidethePOWERON/OFFSwitch
(50)totheONposition,ifthePOWERLEDindicator(4),theLCDDISPLAY(2),theBlueLED
of the CD 2 GO/PLAY/PAUSE (22) button, theRed LED of theREC(21) buttons light up and sound is coming out fromthe
speakers,thismeansthepowersupplyiscorrectandyoursystemisreadyforuse.
IMPORTANTNOTE:Ifyoufindtheunitswitchesitselfoffregularly,thisisnotafault.DuetotheErPstage2requirements
for the Protection of the Environment, when the unit is connected to the mains power, as a power saving measure, it will
switchitself offautomaticallyif nomusichas been playing for over15 minutes.To re‐activate
the unit, switchtheunitoff
withtheOn/Offswitchandafterafewsecondson again(50).Alternat ively,if for anyreasonthis ispreferred,there isthe
optiontoswitchtheErP2over‐rideswitch(46)ontherearpaneltoOfftodisablethispowersavingfeature.
DUSTCOVERASSEMBLY
ThePerspexDustCover(1)isfactoryfitted,butjustincaseitneedstoberemovedandthenrefitted,theinstructionsonhowto
dosoareasfollows: