CI2 Operation Manual 21
Try it out
English
8. When you finish recording the track,
press the [Action Pad] button.
Recording will stop since “Stop” has been exe-
cuted on the Interactive Recording panel.
9. Press the [Action Pad] button.
The project cursor will return to start position
since “Return to Start Position” has been exe-
cuted on the Interactive Recording panel.
To hear playback of the track you have just re-
corded, click the Transport panel [Play] button.
Recording operation is now complete.
TIP
You can also operate in the Interactive Re-
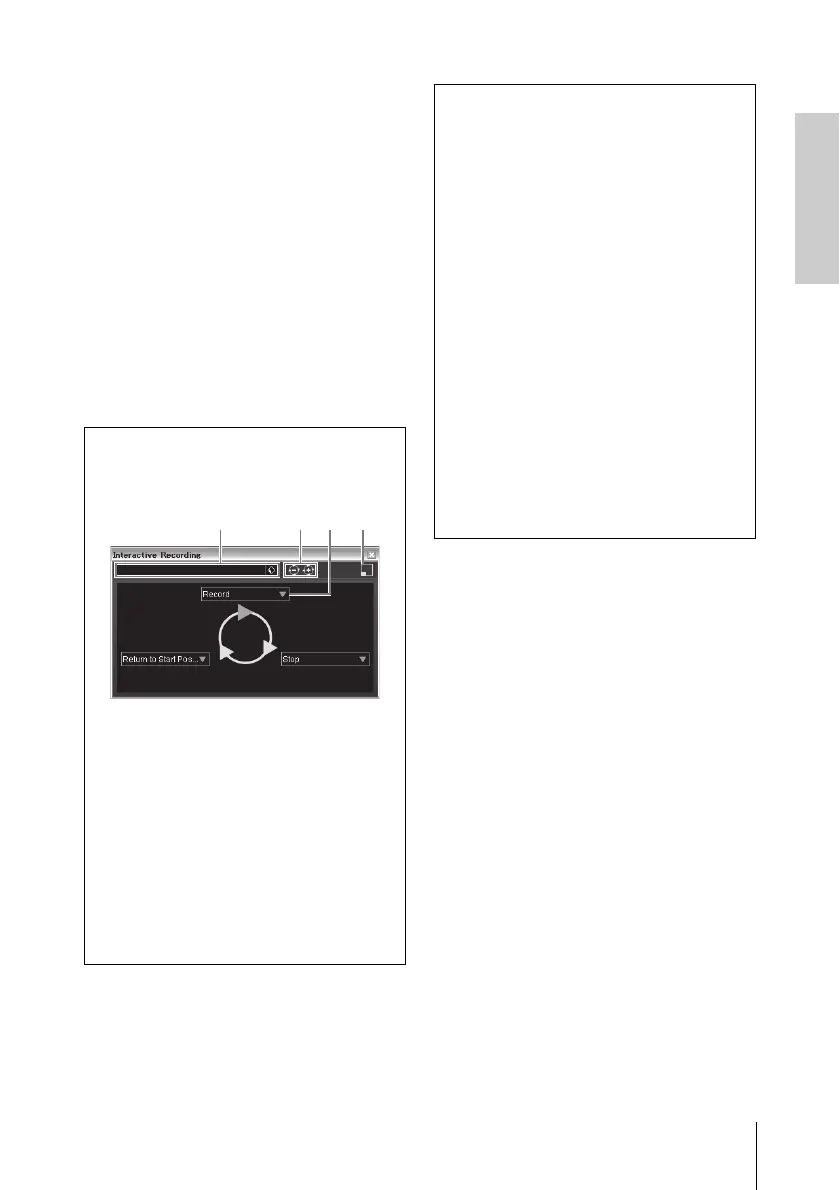
cording panel as shown below.
1 Saves and loads the sequence of
actions.
2 Increases and decreases the number of
actions. The available number of actions
is two through six.
3 Changes the action to another action.
4 Switches the panel to the small
Interactive Recording panel. In the small
panel, you can only load the sequence of
actions.
TIP
Setting the audio driver buffer size
Noise produced when using applications such
as DAW software can affect audio recording
and/or playback. In most cases, you can solve
these problems by adjusting the audio buffer
size (Audio Buffer Size). The buffer size can
usually be adjusted via the audio driver setup
window in the application. (When using ASIO
compatible software for Windows, the buffer
size can be adjusted in the ASIO Buffer Size
parameter via the Control Panel of the Yamaha
Steinberg USB Driver.) While the higher buffer
size reduces load to the computer CPU but
produces latency (time lag) during recording/
playback, the smaller buffer size may result in
noise or the sound cutting off. Make sure to set
the buffer size to an appropriate value depend-
ing on the performance of your computer, the
number of audio/MIDI tracks being recorded/
played back on the DAW software, the number
of plug-in software, and so on.