CI2 Operation Manual 17
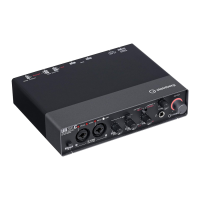
The Controls and Connectors
English
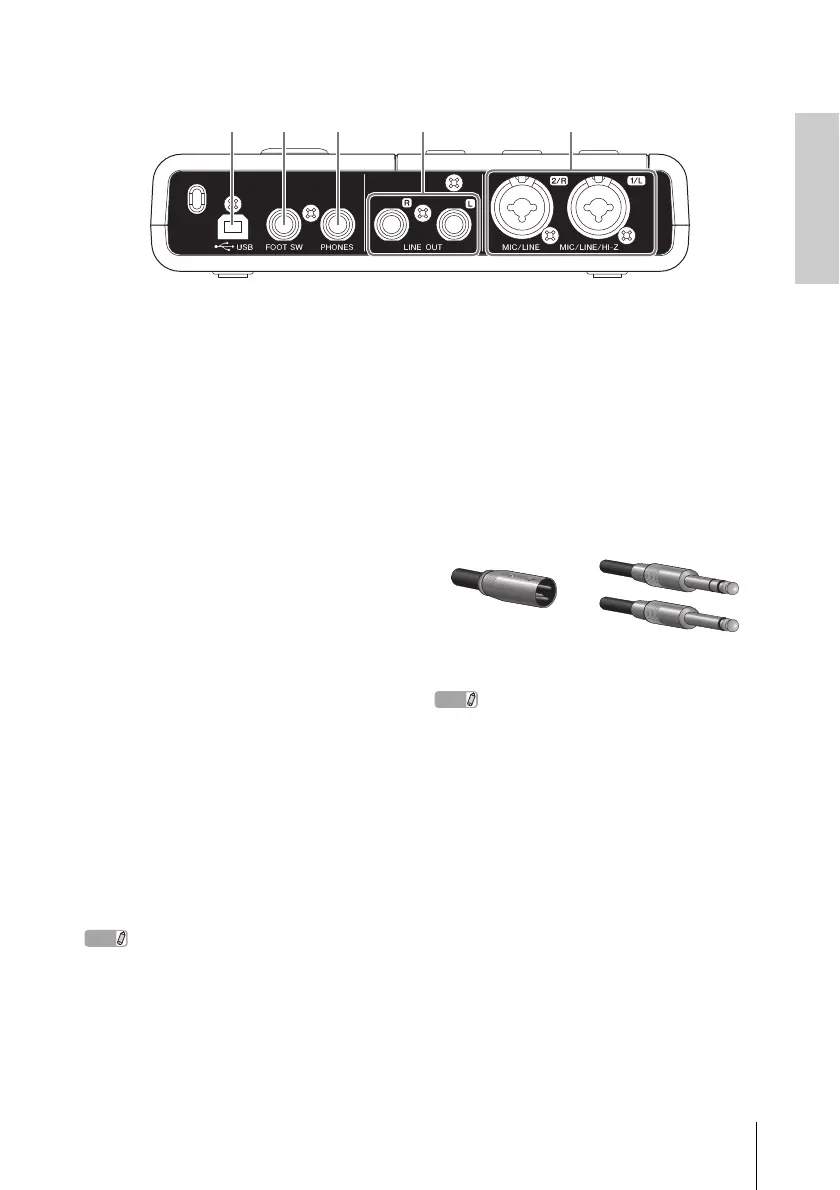
Rear Panel
1 USB terminal
This terminal is used to connect the CI2 and the
computer by using the included USB cable.
2 FOOT SW jack
Connect an optional Yamaha FC5 foot switch to
this jack. The connected foot switch operates
the same as the [Action Pad] button.
3 PHONES jack
A pair of headphones can be plugged in here.
This jack outputs the mixed signal from the ana-
log input jacks and the signal from a DAW or
other audio software. The output level can be
adjusted using the PHONES control. This out-
put signal is not affected by the MASTER con-
trol.
4 LINE OUT jacks L/R
These jacks would typically be connected to
monitor speakers (powered speakers). These
jacks output the mixed signal from the analog
input jacks and the signal from a DAW or other
audio software. The output level can be ad-
justed using the MASTER control.
The volume balance between the analog input signal
and the application software like DAW output signal
can be adjusted using the MIX control.
5 MIC/LINE/HI-Z jack 1/L
(analog input jack 1)/
MIC/LINE jack 2/R
(analog input jack 2)
Microphones and instruments such as guitars
can be connected here using XLR or phone
jack cables. The signal received by these jacks
is sent to the LINE OUT jacks and computer.
NOTE
You can directly connect an electric guitar or electric
bass without the need for a separate DI box or amp
simulator to analog input jack 1. In this case, turn on
(O) the [HI-Z] button on the front panel. Make sure to
use an unbalanced phone cable when you connect an
electric guitar or electric bass. If you use a balanced
cable, it will not work correctly.
XLR-type Phone-type
(1/4" TS or 1/4" TRS)