16
13406 SE 32nd St, BELLEVUE WA, 98005 WWW.CONSUMER.STEPPIR.COM TEL: (425)-453-1910
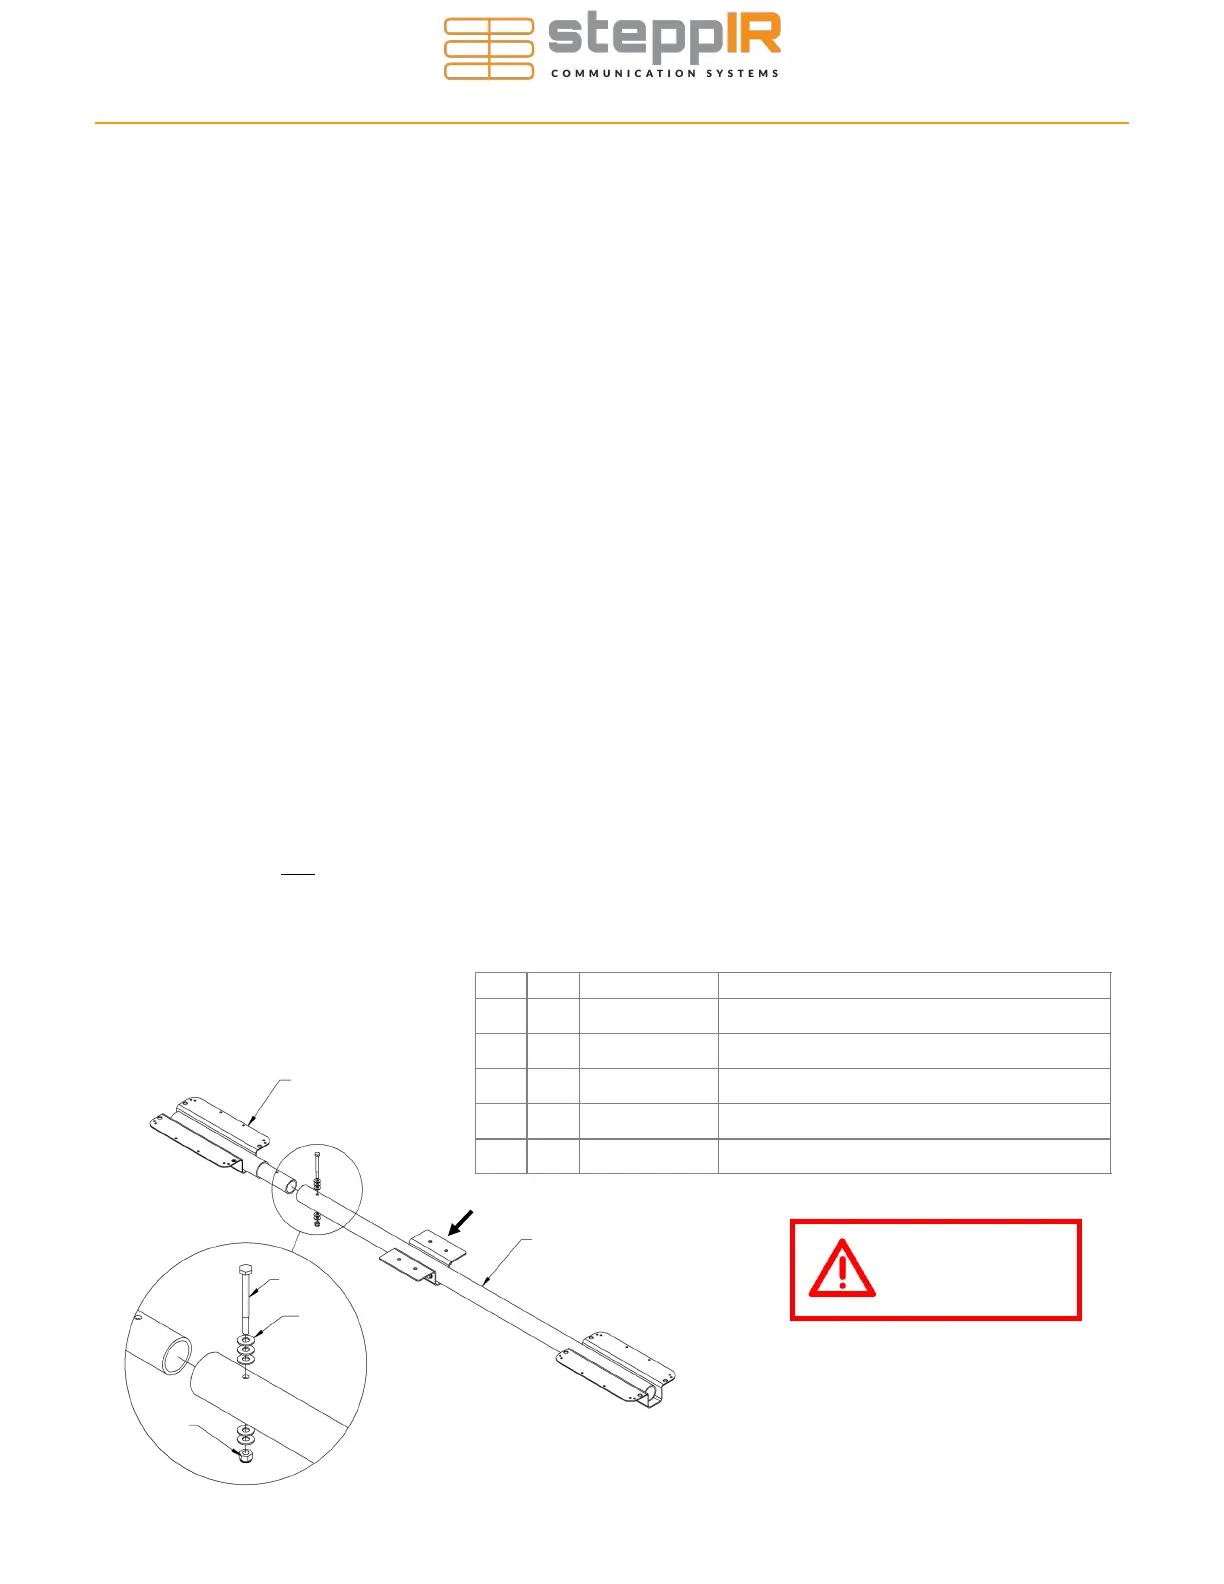
The 2 element SteppIR Yagi boom consists of two sections of aluminum tubing that are 60 inch-
es long x 1-3/4” OD x 1/8” wall, along with two aluminum antenna housing brackets as shown in
Figure 1.11. The element housing brackets are pre-installed at the factory. To assemble your
antenna, you will need a 1/2” (13 mm) and 7/16” (11 mm) wrench and / or socket drive. We
double check the fasteners for proper tightness before shipping but it is always a good idea to
check them yourself before installing the antenna. Put anti-seize grease on all bolts, especially
on the U-bolts because it greatly increases their gripping power. Anti-seize grease (molybdenum
based) is available at most auto part stores and is included in the package.
The boom is completely assembled and drilled at the factory to assure precision element align-
ment. Pre-drilled holes are quite snug to align almost perfectly. In some cases you may find it
necessary to assist the bolts with a tap of a hammer, or “thread” them in by turning with a
wrench. The bolts, washers, and nuts are shipped in the high wind kit (PN 09607).
Connect the boom by sliding the two sections together and align the pre-drilled holes. Refer to
the diagram below for correct configuration. It is advisable to spray a small amount of WD-40 on
the male sleeve before sliding the female section onto it. Do not twist the aluminum excessively,
as this can cause binding - the WD-40 will help keep the two pieces lubricated.
Note: The boom bolts need to have a total of “5” flat washers on each bolt to prevent the nut
from bottoming out at the end of the threads before it is tight.
Insert the included bolts into the pre-drilled hole, and tighten the Nylock nut securely as seen in
the detail view on Figure 1.11.
Note: If you are not installing the 40m-30m dipole kit you can remove the return bracket if you
want to, but it is not necessary. If you do remove the bracket it is a good idea to mark
both the boom and the bracket so that it can be reinstalled correctly later if needed and to
re-install the bolts into the boom.
Driven
Director
40/30m Return Bracket
Key Qty Part # Description
A 1 10-1017-22 Element Bracket, 1-3/4” (already mounted)
B 1 10-1201-01 Aluminum tube, 1.75” OD x 48” Length
C 1 60-0062 Bolt, 1/4”-20 2-3/4”, SS
D 5 60-0041 Washer, 1/4”, flat
E 1 60-0030 Nut, 1/4”-20, Nylock
Use anti-seize on
all stainless
hardware!
Figure 1.11
Section 1.1: Assemble the Boom
2 ELEMENT YAGI BOOM ASSEMBLY
A
B
C
D
E