45
13406 SE 32nd St, BELLEVUE WA, 98005 WWW.CONSUMER.STEPPIR.COM TEL: (425)-453-1910
40/30 ELEMENT TRUSS KIT
Section 7.6: Leveling the elements
SKIP TO NEXT PAGE IF YOU DO NOT HAVE THE 40/30 LOOP
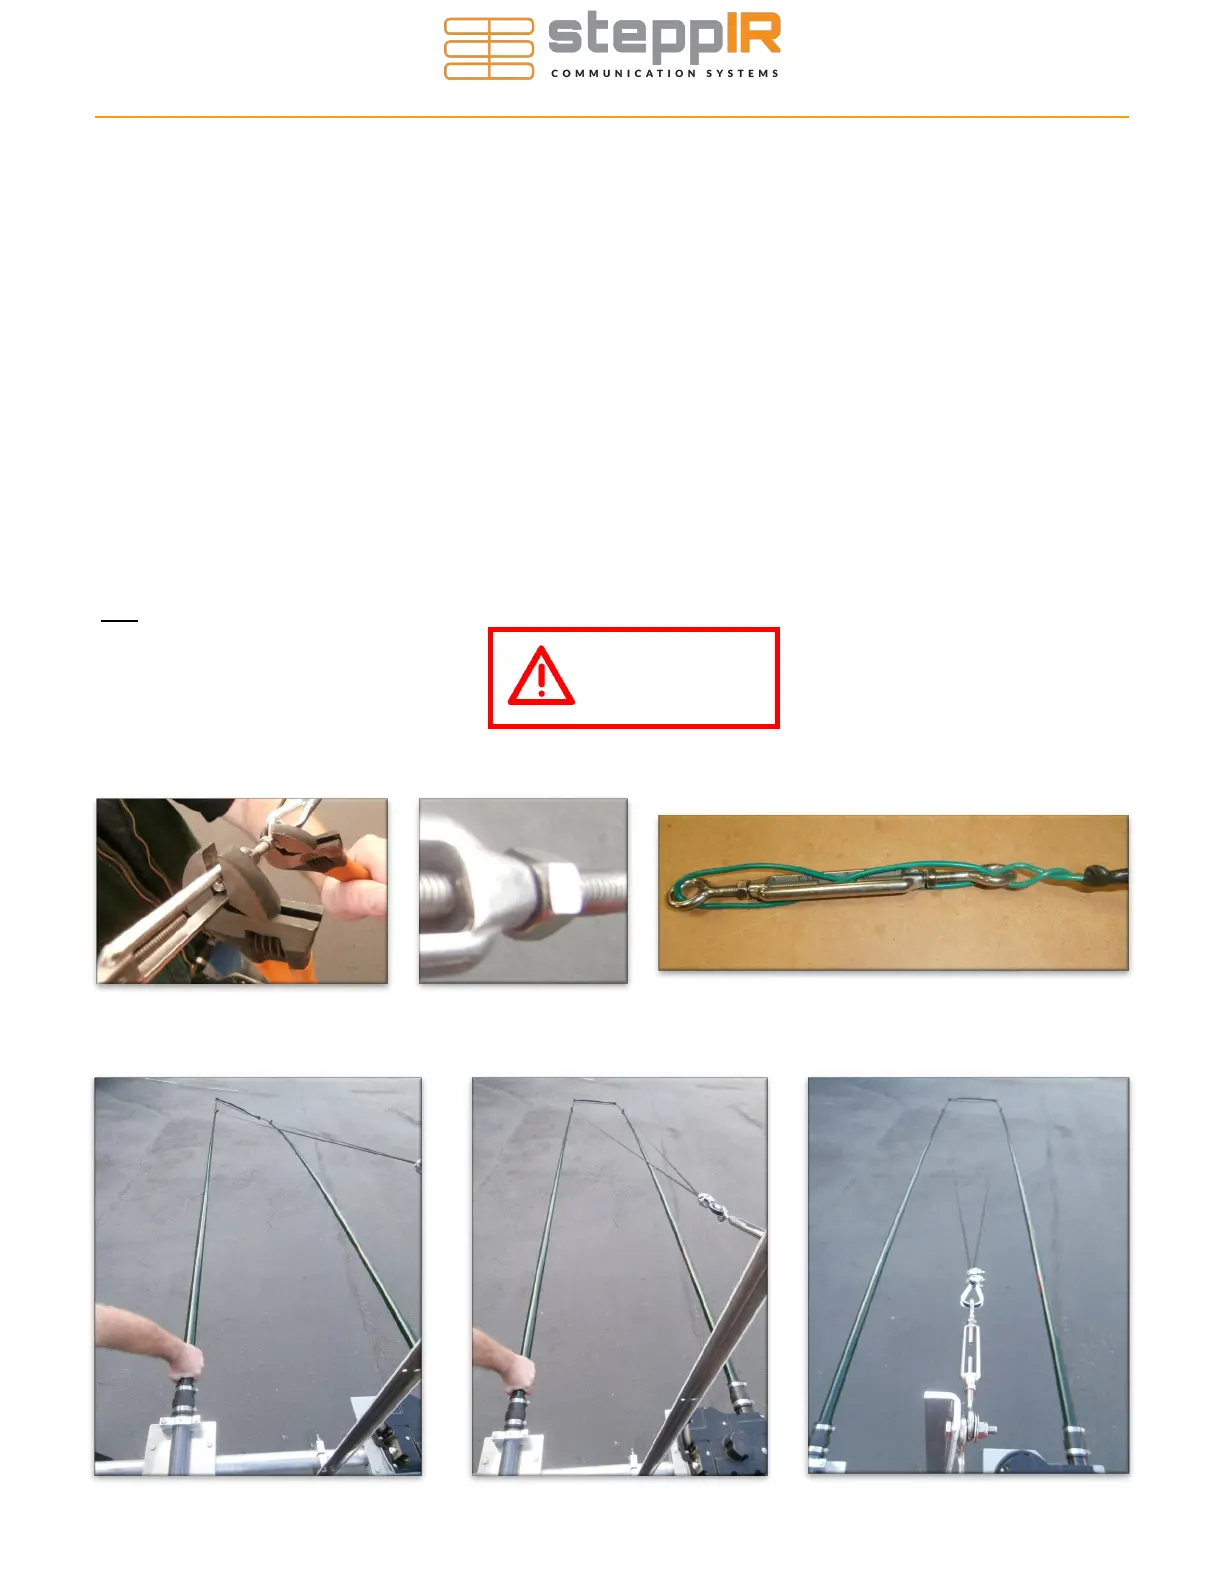
When leveling the elements, use two adjustable wrenches as shown in Figure 7.61. Be sure to apply
anti-seize to the threads of the eyebolts in the turnbuckle otherwise they may seize! The wrench
that is placed on the thimble is held stationary, while the wrench that is on the frame of the turnbuckle is
rotated. Adjust each turnbuckle a few turns at a time until the elements are level.
Be careful not to raise the elements so that the loops are above the profile of the straight ele-
ments—some droop is necessary so that water will not accumulate in the poles. When the ele-
ments are at the desired position, tighten the lock nuts on each end of the turnbuckle frame as shown in
Figure 7.62. Be sure to do this with ALL turnbuckles, as this will prevent the turnbuckle from unwinding.
As a secondary measure, we recommend looping insulated copper wire or SS safety lock wire through
the eye and frame of the turnbuckle as shown in Figure 7.63.
In addition to the leveling of the elements, it is also important to ensure that the fiberglass spreader on
the loops are parallel to the boom. The best method for this is to loosen the quick disconnect boots on
the telescoping poles and twist the base of the pole until the loops are parallel to the boom. Figure 7.64
shows a loop that is not parallel. Figure 7.65 shows the loop being adjusted. Figure 7.66 shows the level
and parallel half of the 40/30 element.
Figure 7.62
Figure 7.61
Figure 7.63
Figure 7.64 Figure 7.65 Figure 7.66
Use anti-seize on
all stainless
hardware!