9
835.2
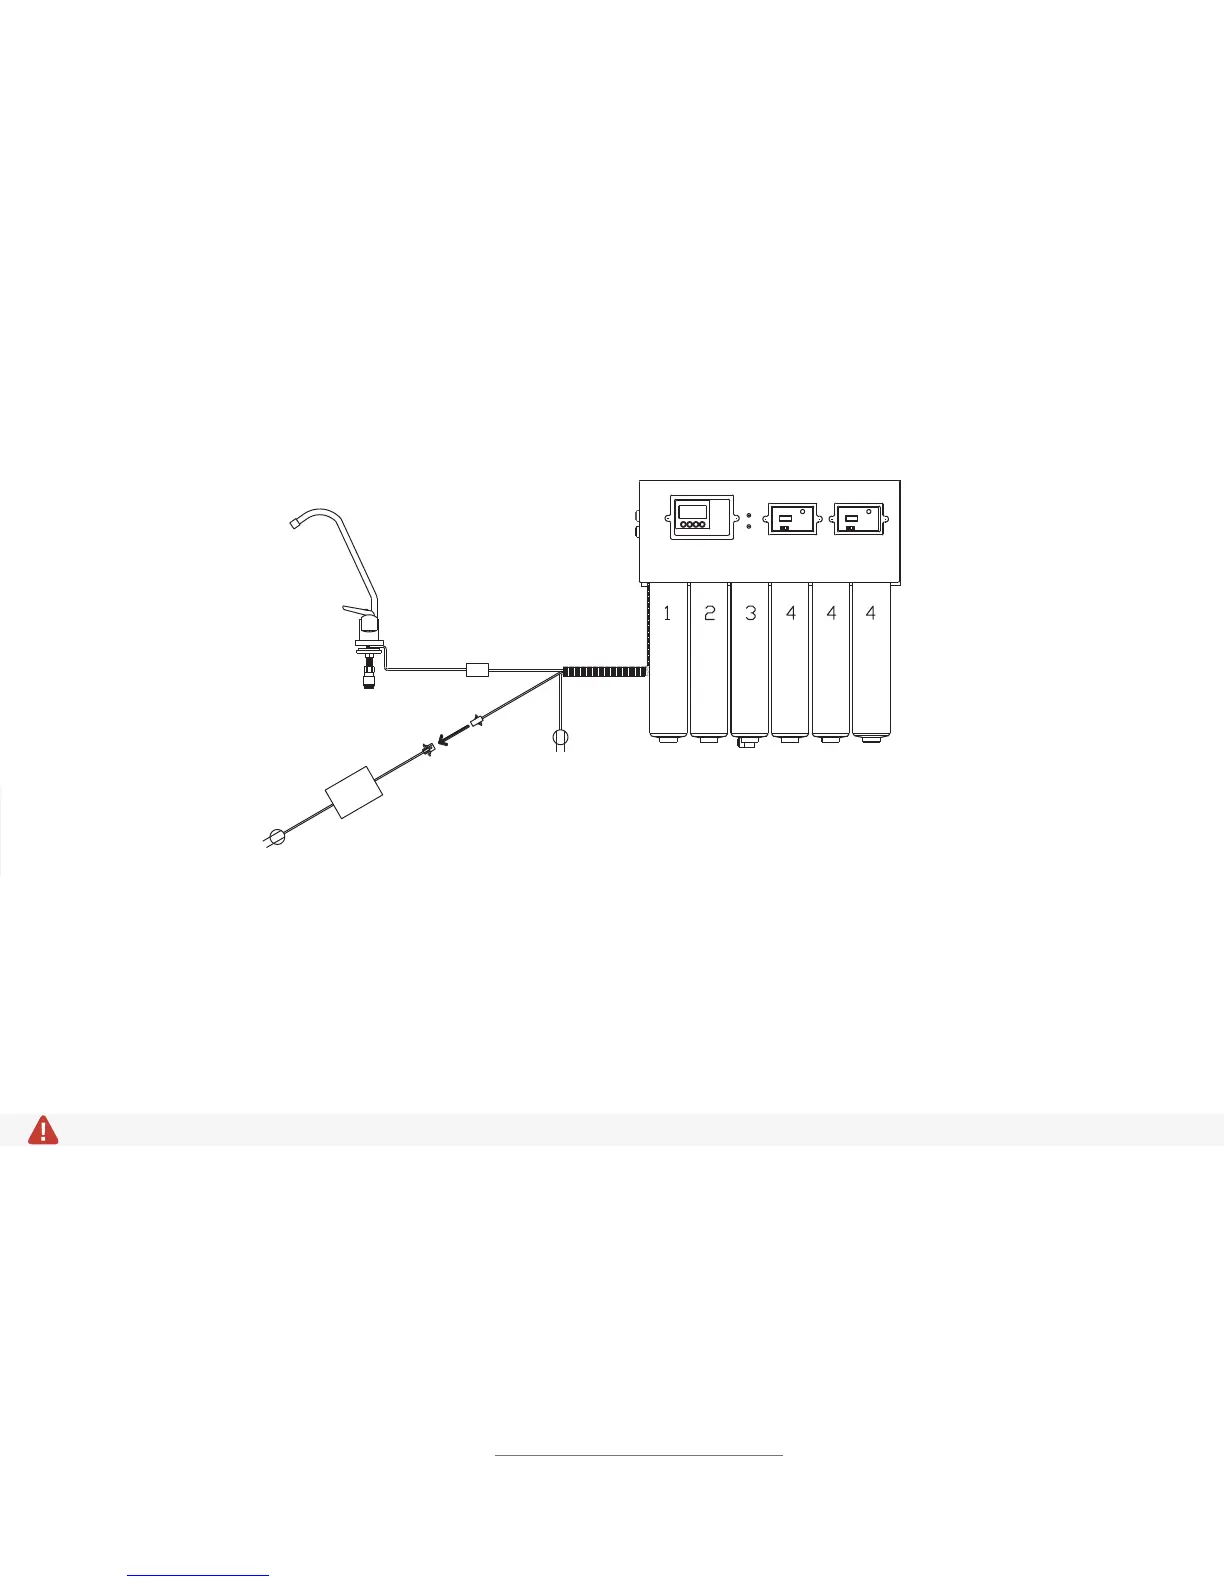
• Run 1/4” line from “BRINE OUT” on the Permeate Pump to the DSV.
Reserve Port: (Yellow fitting indicator)
OPTIONAL ADD-ONS: Pressure switch from Booster Pump, see page 11.
• Run a 3/8” line from the yellow “RESERVE” port on the system to the 3/8” Tank Ball Valve on the
Reserve Water Storage Tank.
• Cut the tubing and insert the 3/8” pressure gauge, as close to the tank as possible.
PHASE 5: ELECTRICAL AND OPERATIONAL TEST
ELECTRICAL
Connect all flat, 4-wire data standard power cords using color code and labels attached to the wires.
OPERATIONAL TEST
At this point, the Storage Tank Valve should be closed; meaning the ball valve knob is turned
perpendicular with the tubing going in.
• Plug in the UV Light Transformer and verify the light is functional. There will be a slight blue/purple glow.
• Open the Source Water Valve at your municipal supply.
• Confirm source water pressure is above 65 PSI and below 85 PSI.
• Leave tank closed.
• Turn on the Autoclave Faucet, and wait for water. Check for leaks, then turn off the faucet.
• Open the Reserve by turning the tank ball valve knob in line with the tubing. The tank will slowly
begin to fill. Allow at least four hours for pressurization.
• After four hours, open the valve at the white Autoclave Faucet, and start running water. At this point,
you should be looking for leaks anywhere in the system and connecting tubing. Once you have water
at the faucet and confirmed there are no leaks, run for 2–3 minutes, then close the faucet.
• Allow at least 8–12 hours for the tanks to completely fill.
• Check RO Quality Monitor and DI Quality Monitor readings.
• Ensure the Filter Monitor is set properly. Refer to the Maintenance Manual, pg. 12, and the Ideal
Readings and Operation document at www.sterisil.com/ac-acplus.
Autoclave
Modular Coupler
Sterisil® System
Power Cord
UV Lamp Power
Cord and
Transformer
(black)