7
835.2
PERIPHERAL COMPONENTS
Peripheral components - No more than 50 feet from the system.
WATER STORAGE TANK
Storage tank size may differ with customer specifications and needs. Note: tank sizes will vary
depending on pre-install requirements. The tank must be mounted within 50 feet of the system to
maintain optimal water pressure. Set the storage tank in the desired location. A common location is
under a sterilization center sink.
• Locate the tank and wrap the threads on top of the tank with thread tape (included).. Install the 3/8”
valve and hand tighten it to the tank. Do not over tighten this valve.
• Ensure the pressure of the tanks is between 8–10 psi using a Schrader valved pressure gauge.
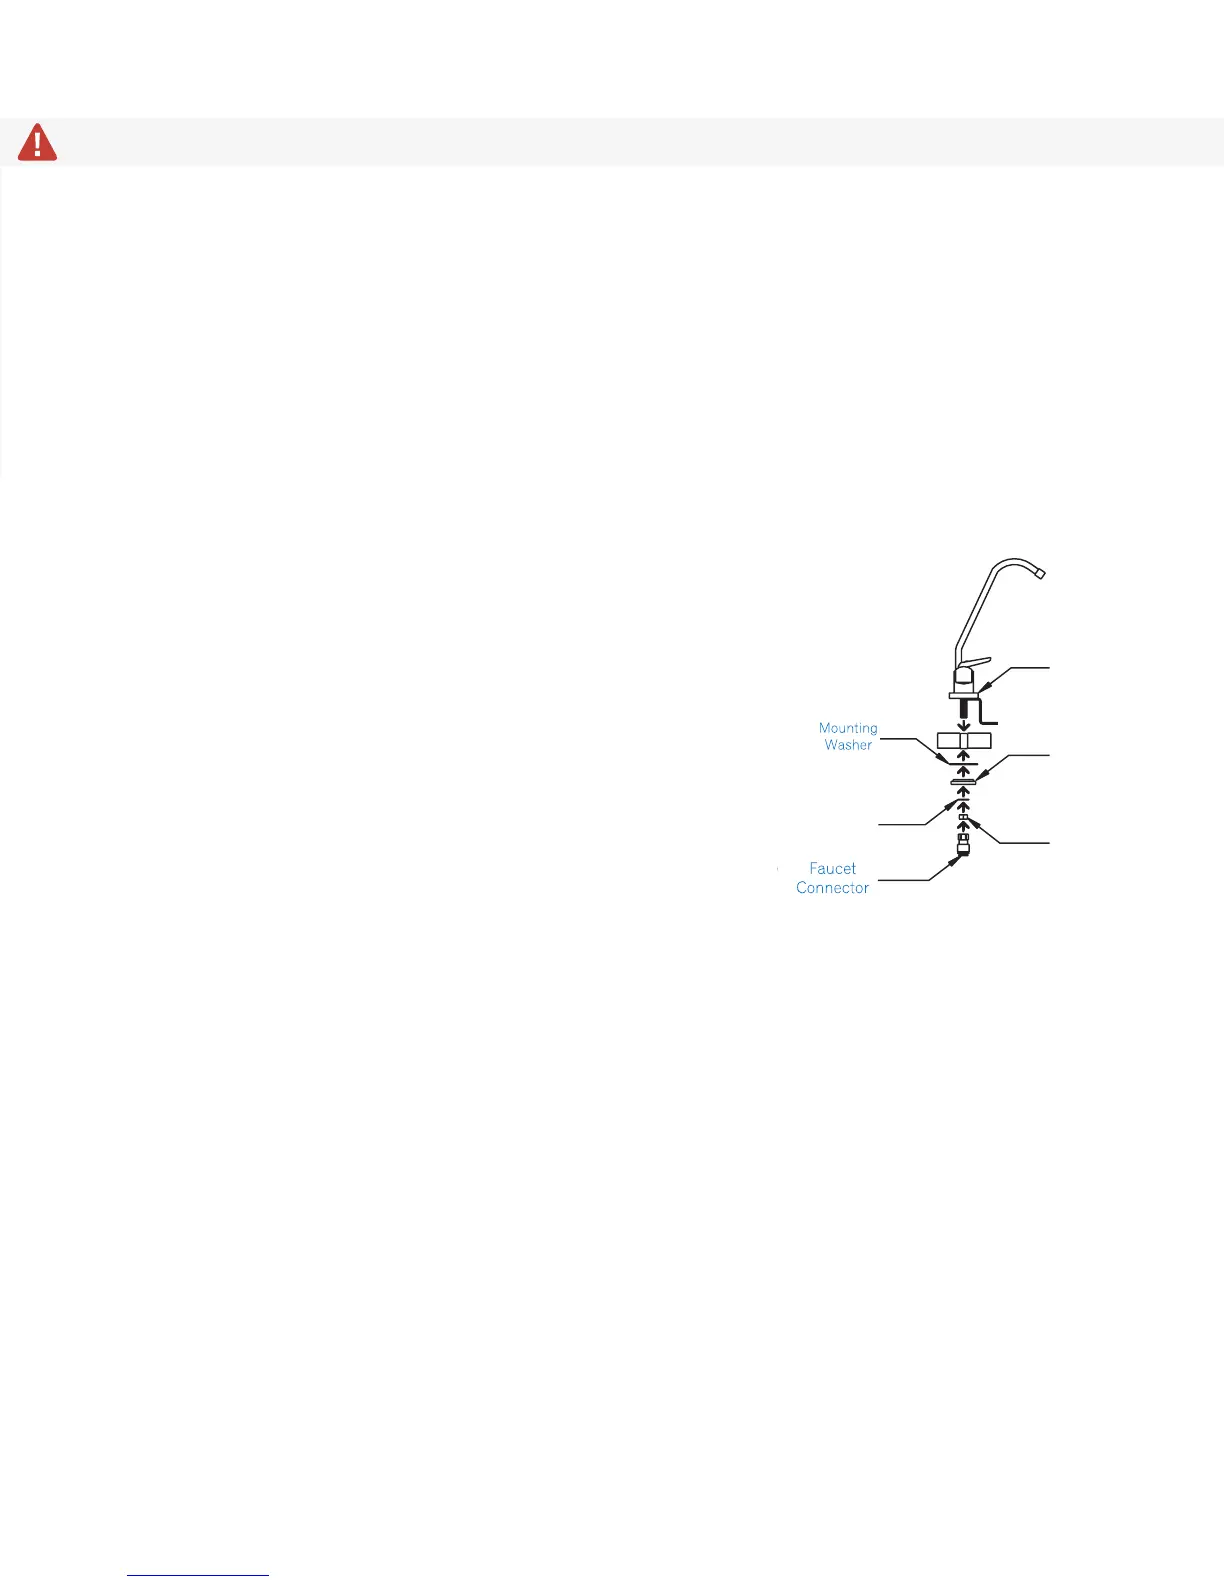
FAUCET INSTALLATION
The system includes a white Autoclave Faucet. Typical mounting location is on a counter-top extended
over a sink.
COUNTER-TOP MOUNT
Faucet assembly instructions are located on the back of the faucet
box.
• Do not use the compression fittings provided. Instead, use the
provided push-fit 1/4” to 7/16” faucet connectors.
• Drill a 5/8” hole at the desired location.
• Place the faucet through the hole and mount using the hardware
(included).
• Place the under-sink mounting washer, plastic gasket, lock
washer, and install the nut (included in box) and hand tighten.
• Wrap the threads with thread tape, and install faucet connectors.
PHASE 3: CARTRIDGES
• Remove the yellow cap from the top of the cartridges, and write the install date with a permanent
marker.
• Start by inserting the cartridges into the system from left to right beginning with Stage 1. Please
note, there are three Stage 4 Cartridges. They will all be positioned interchangeably in ports 4
through 6.
• Once all cartridges are installed, remove the brine plug from the bottom of the Stage 3 Cartridge.
• Install the stem elbow.
• The bottom of Stage 3 will be used in future installation steps.
• Mount the Blank Cartridge clip on the wall near the system and place the Blank Cartridge in the clip.
• Please note, the Blank Cartridge is essential for troubleshooting possible blockages inside the system.
PHASE 4: SOURCE WATER AND TUBING
Ensure the source water to the Sterisil® Ac+ System remains closed until the procedure calls for it to
be turned on.
Faucet Alarm
Disk (optional)
Washer
Lock Washer
Quick Connect
Fitting
Plastic Gasket
Nut