12 www.stiebel-eltron.com
10. Installation
Note
The device is designed in such a way that it can be po-
sitioned and connected without removing the cover or
side panels.
10.1 Transport
When transporting the appliance, be aware of its centre of
gravity.
- The centre of gravity is in the area where the compressor is
located.
Protect the appliance against heavy impact during transport.
Use the recessed grips provided at the sides.
D0000071298
- If the appliance needs to be tilted during transport, this must
only be for a short time and it must only be tilted on one of
its longitudinal sides. When transporting the appliance, en-
sure the compressor is on the upper appliance side.
- The longer the appliance is tilted, the greater the distribution
of refrigerant oil inside the system.
Wait approximately 30minutes before starting the appliance
after it has been tilted.
10.2 Heating water connection
!
Material losses
The heating system to which the heat pump is connected
must be installed by a qualified contractor in accordance
with the water installation drawings that are part of the
technical guide.
To facilitate connection to the heating system, push-fit connectors
are enclosed with the appliance (see chapter "Fitting the push-fit
connectors").
Before connecting the heat pump, flush the pipework thor-
oughly with suitable water. Foreign bodies, such as welding
pearls, rust, sand or sealant can impair the operational relia-
bility of the heat pump.
Connect the heat pump on the heating side. Check for
tightness.
Ensure that the heating flow and return are connected
correctly.
Provide thermal insulation in accordance with applicable
regulations.
When sizing the heating circuit, observe the internal pressure
differential (see chapter "Specification/ Data table").
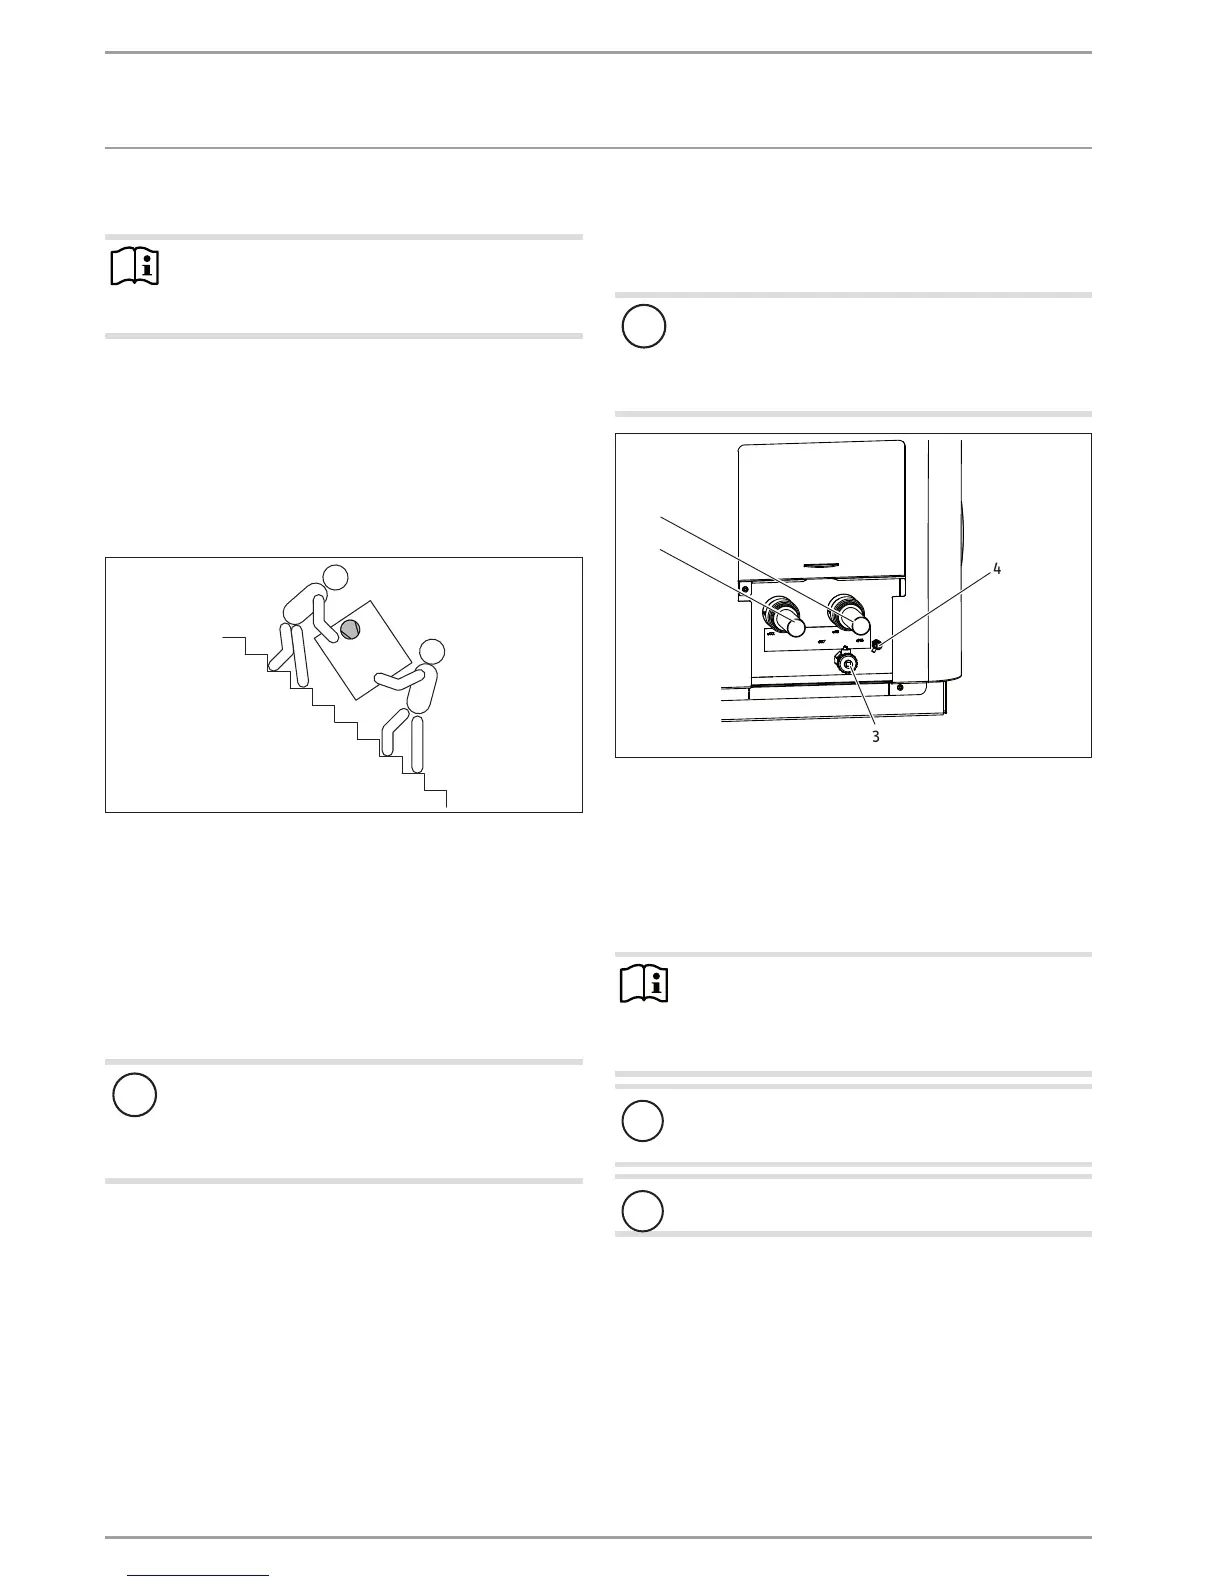
10.3 Flow and return connection
!
Material losses
In cooling mode, condensate can form when the dew
point temperature is undershot.
Take suitable measures to prevent the formation of
condensate.
26_03_01_1871
2
1
3
4
1 Heating flow
2 Heating return
3 Drain
4 Ventilation
Connect the heat pump to the heating circuit. Check for
tightness.
10.4 Fitting the push-fit connectors
Note
The plastic push-fit connectors are not suitable for instal-
lation in the DHW line or the solar circuit.
Install the push-fit connectors only in the heating
circuit.
!
Material losses
Tighten the screw cap of the push-fit connector by hand.
Never use a tool.
!
Material losses
Support sleeves are required when using plastic pipes.
How the push-fit connectors work
The push-fit connectors are equipped with a retainer with stain-
less steel serrations and an O-ring for sealing. The push-fit con-
nectors also have a "twist and secure" function. Simply turning
the screw cap by hand will secure the pipe in the connector and
push the O-ring against the pipe to seal it.

 Loading...


