SETTING UP OF THE PERIMETER WIRE
Before installing the perimeter wire, it is necessary to check the
entire surface of the lawn. Make any necessary adjustments to the
grassy surface during the laying of the perimeter wire in order to
allow the robot to function correctly.
1. Evaluate whether a special installation of the perimeter wire
is necessary according to the instructions described in the
chapter “SET-UP OF THE ROBOT’S QUICK RE-ENTRY TO
THE CHARGING STATION”.
2. Preparation and dening of the work areas.
3. Installation of the perimeter wire.
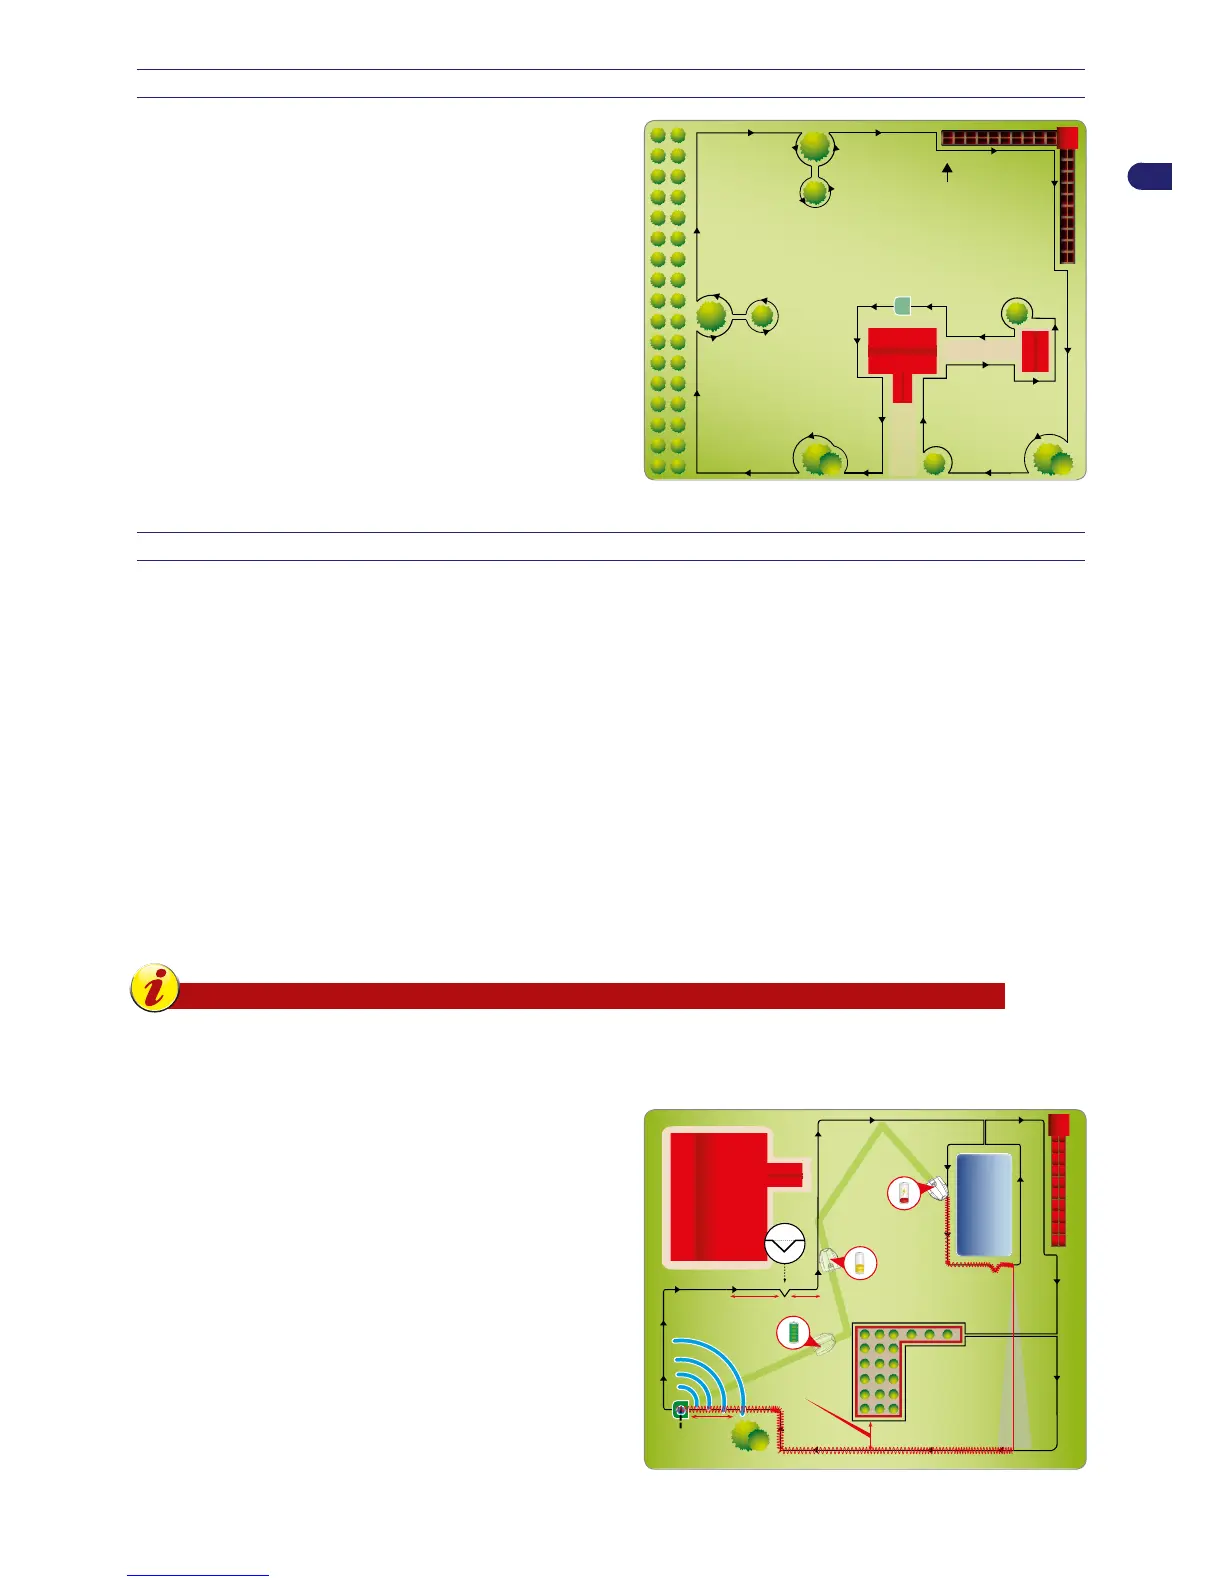
4. Installation of the charging station and power supply unit. When
laying the perimeter wire, respect the installation direction
(clockwise) and the rotation direction around the owerbeds
(counter-clockwise), As shown in the gure.
SETUP OF THE ROBOT’S QUICK RE-ENTRY TO THE CHARGING STATION
(Only for some models, see “Technical Specications"). Quick re-entry requires a special installation of the perimeter wire that
allows the robot to reduce the re-entry path to the charging station. This special installation of the perimeter wire should only be
used for gardens where quick re-entry signicantly reduces the path and where the perimeter length is greater than 200 meters.
To setup the quick re-entry, position the perimeter wire on the ground so that it forms a triangle with one side of 50 cm (19.7 ")
and the other two sides of 40 cm (15.75 ") each, as shown in the gure.
As the robot heads back to the charging station with the two wheels on either side of the wire, it intercepts this triangle and stops
moving. It then turns approximately 90° towards the inside of the garden and starts moving in the new direction until running into
the perimeter wire on the opposite side.
Arrange the wire for quick re-entry in a point where there is at least 200 cm (78.74 ") of straight wire in front of the station, and
at least 150 cm (59.05 ") of straight wire behind it.
Do not set up the wire along the straight section immediately in front of the charging station or near any obstacles. Make sure
there are no obstacles along the re-entry path that may obstruct the quick re-entry.
Do not set up the wire along excessive slope, so that the robot can recognizes easy it. The maximum slope depends on the lawn
conditions. It should be remain under approximately 20%.
Important
An incorrect setup of the robot’s quick re-entry may prevent the robot from returning to the charging station
quickly. When the robot travels along the perimeter to reach a secondary area, it may not detect the quick
re-entry setup.
The illustration provides some useful tips on how to correctly setup
the robot for a quick re-entry.

 Loading...