9
Figure
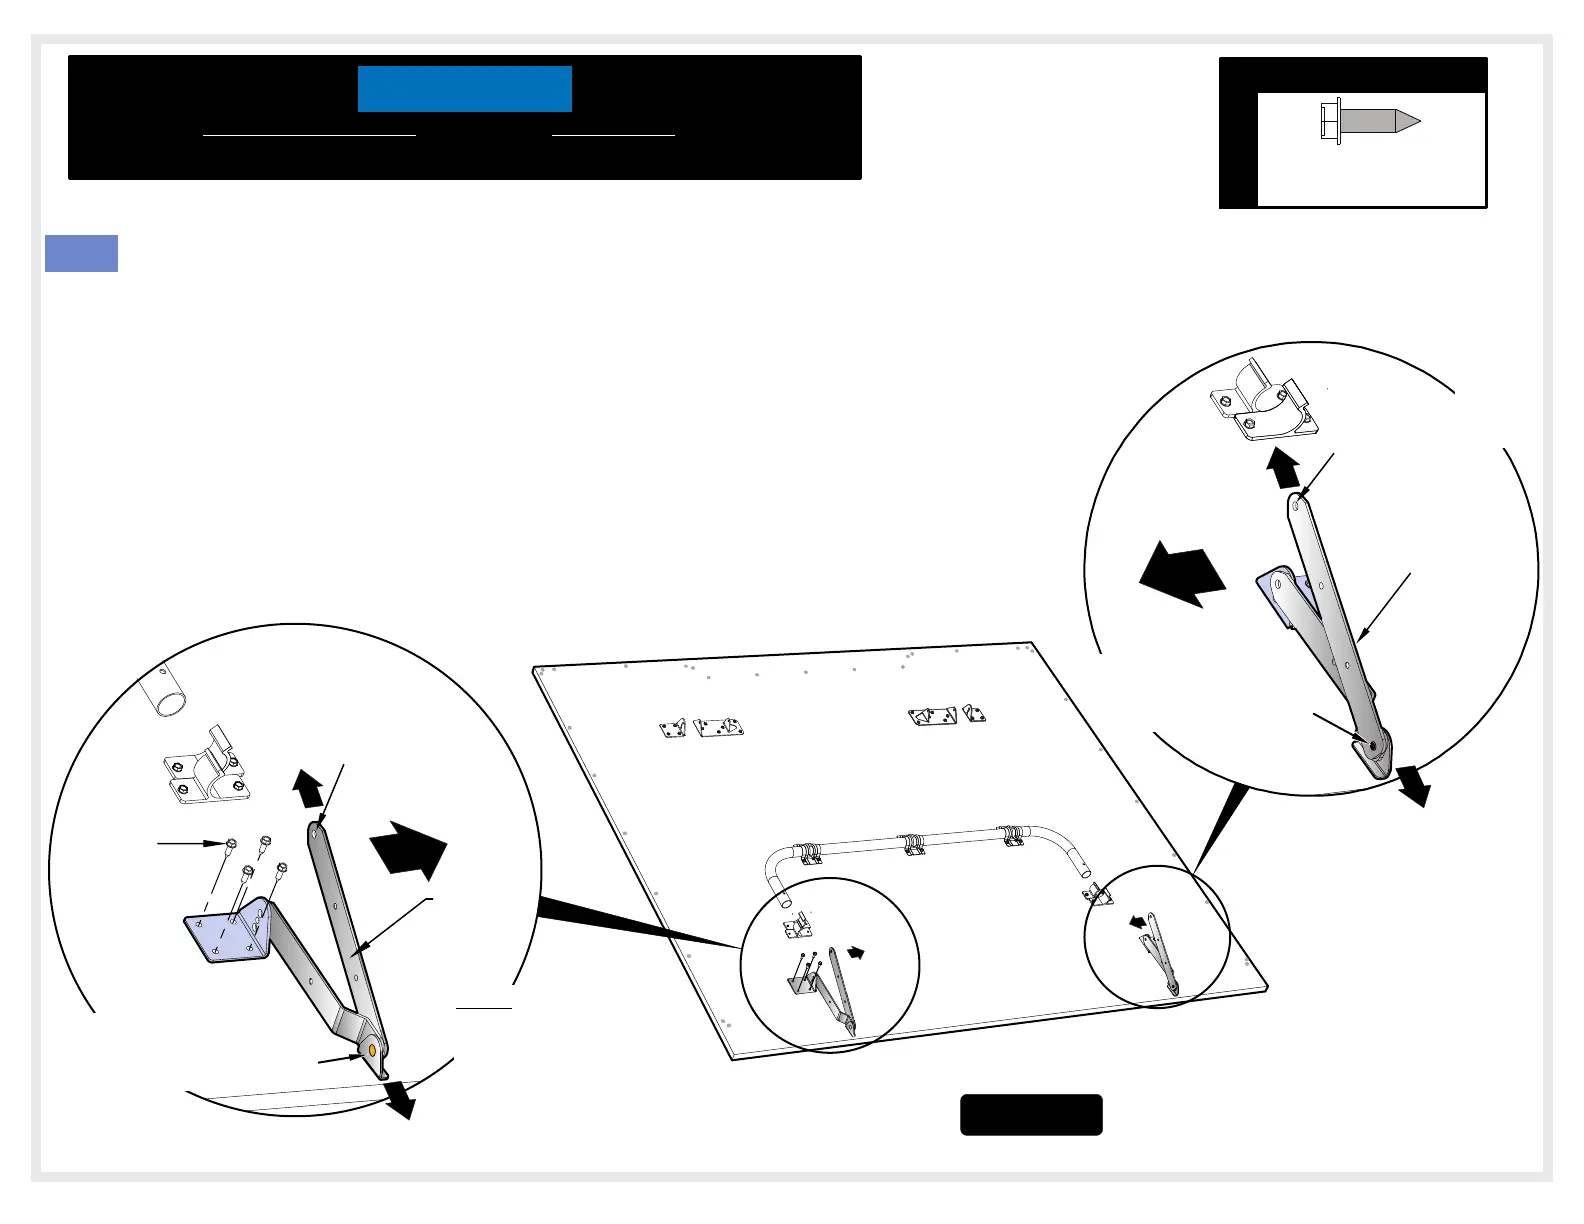
Note: Hinges must always be positioned as shown, with the “elbow” of the hinge pointing
toward the bottom of the table. In the correct position hinge will look like a “V“,
rotate hinges into position if necessary.
IF USING AN ELECTRIC SCREWDRIVER PLEASE SET AT LOW TORQUE AND USE CAUTION
BECAUSE YOU COULD OVER-TIGHTEN THE HARDWARE AND STRIP SCREWS IN WOOD
DOING IRREPARABLE DAMAGE TO THE TABLE. DO NOT OVER TIGHTEN SCREWS!
11. Align the holes in the Hinge Bracket Assembly (#18) with indentations in table
top. Be sure that the straight part of the hinge is facing toward the middle of
the table and placed exactly as shown in Figure 9, Detail E1 & E2.
NOTE:
5
HARDWARE NEEDED
#8 X 9/16 Screw
(Qty. 8)
Detail E1
Detail E2
NOTICE
18
5
Hole on the straight
leg of hinge should
be facing up
18
NOTE: If using electric
screwdriver set at low
torque. Do not over
tighten screws.
The “elbow“
of the hinge should
be pointing towards the
bottom of the table
Hole on the straight
leg of hinge should
be facing up
The “elbow“
of the hinge should
be pointing towards
the bottom of the table
(Position A)
(Position C)
The straight leg on
both hinges should
be facing toward the
middle of the table
12
 Loading...