IF USING AN ELECTRIC SCREWDRIVER PLEASE SET AT LOW TORQUE AND USE CAUTION
BECAUSE YOU COULD OVER-TIGHTEN THE HARDWARE AND STRIP SCREWS IN WOOD
DOING IRREPARABLE DAMAGE TO THE TABLE. DO NOT OVER TIGHTEN SCREWS!
NOTICE
5
HARDWARE NEEDED
#8 X 9/16 Screw
(Qty. 29)
14
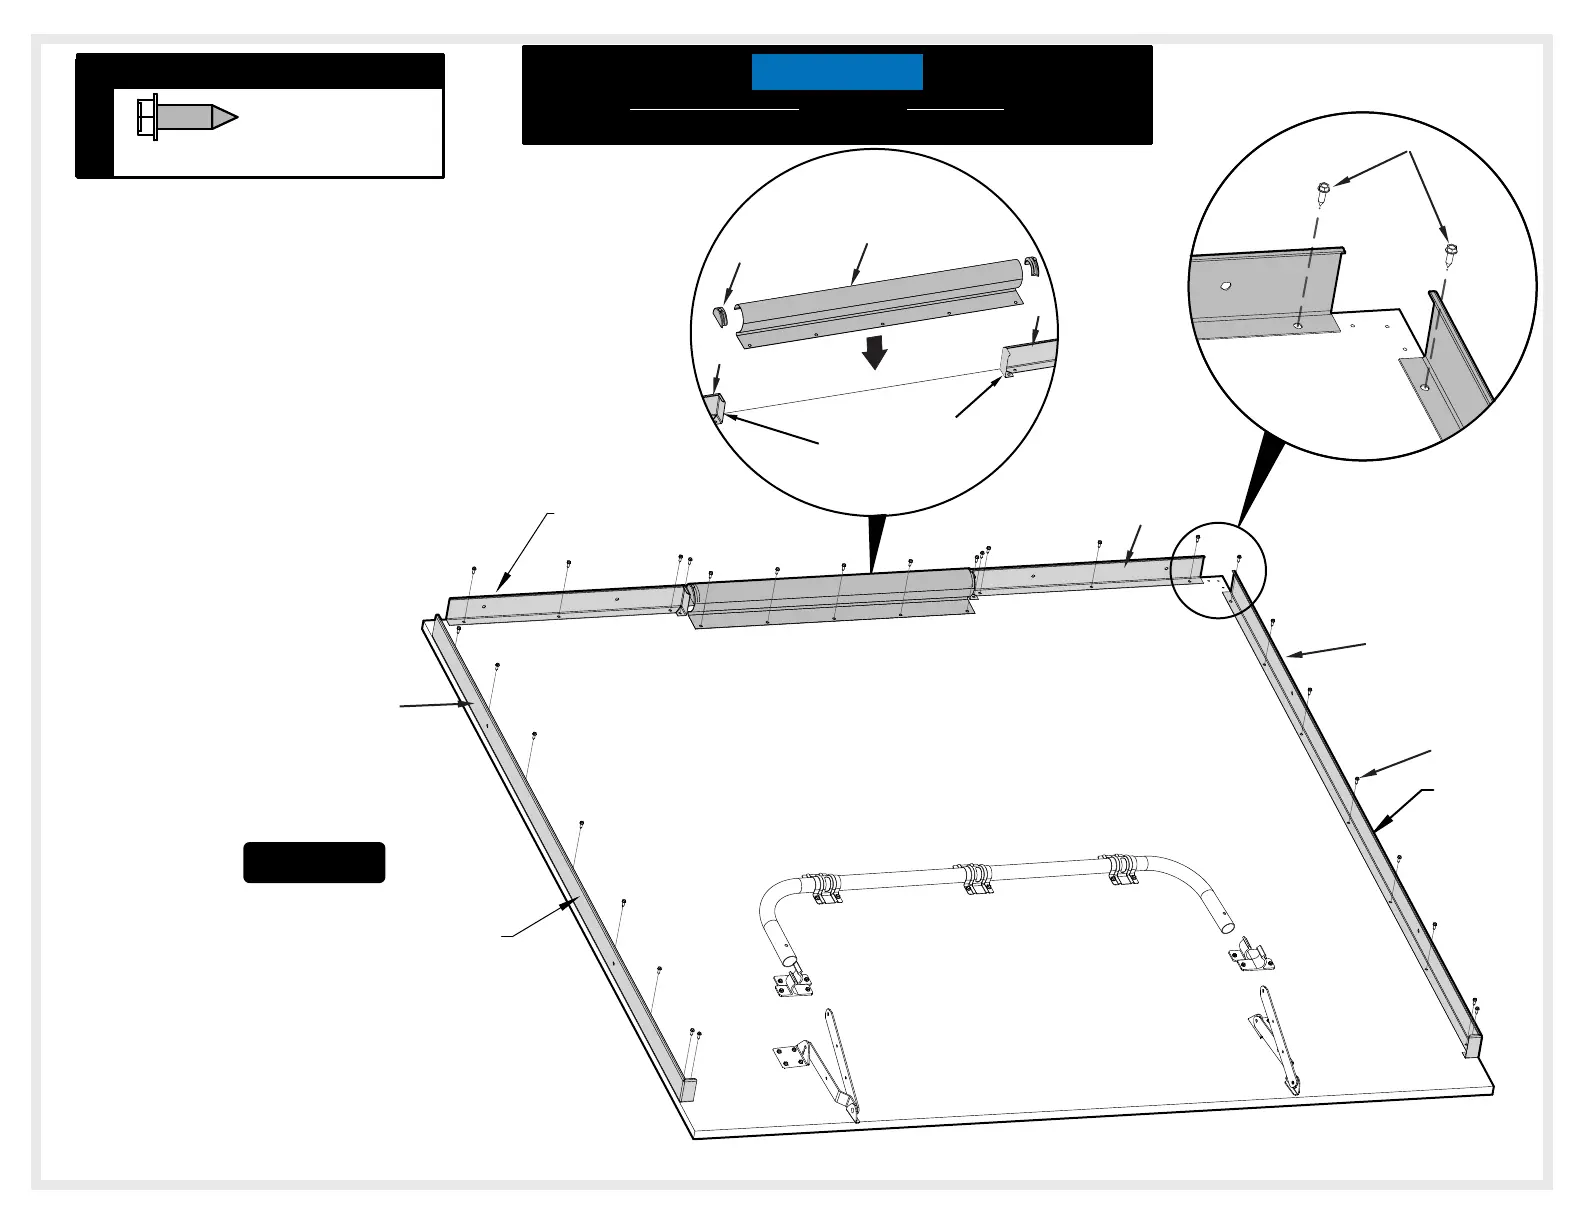
14. Lay out Rails (#2, #3, #23 & #44) around
edges of table top. See Figure 11.
16. Line up holes in rails with Indentations in table top and
secure using Screws (#5). See Figure 11 & Detail H.
2
*NOTE
: Legs not
shown for clarity.
Note: All Indentations
guides in table top are
small so look closely.
Detail G
15. Place Ball Holder end Plugs (#7) in both ends of Ball
Holder End Rail (#4). See Figure 11 & Detail G.
23
3
5
7
4
44
44
23
Stiga logo
on this side
Stiga logo
on this side
Bends on Rails
face each other
5
Detail H
11
Figure
 Loading...