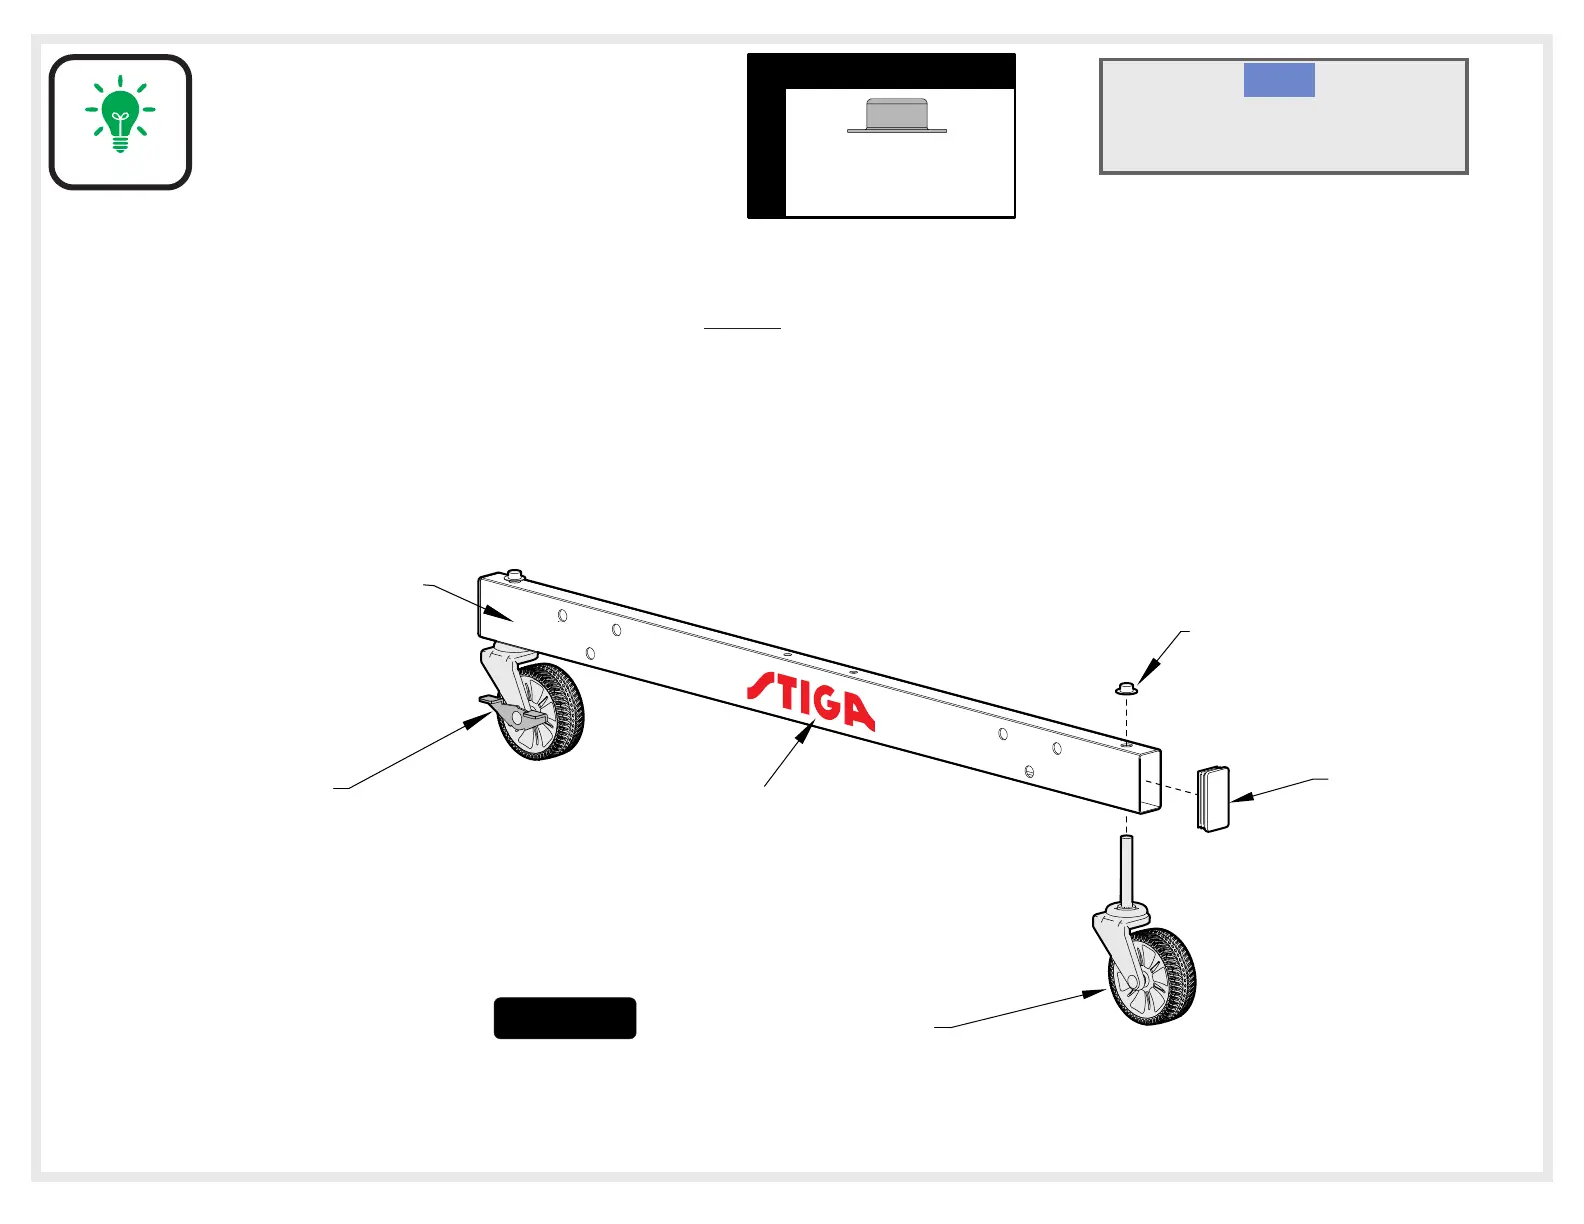
1A. Attach Caster Wheels (#9 & #10) to Caster Beam. Slide a Caster Wheel with Lock (#10) through Caster Beam (#8) and
secure it with a Push Nut (#11) as shown in Figure 1. Gently tap the Push Nut (#11) with a hammer or rubber mallet to
secure it in place. On the other end of the Caster Beam attach a Caster Wheel without Lock (#9). Make sure you have one
Caster Wheel with Lock and a Caster Wheel without Lock for each Caster Beam. Repeat step for second Caster Beam.
1B. Attach Tube Plugs (#14) to Caster Beams (#8) as shown in Figure 1. Repeat step for second Caster Beam.
8
11
9
10
14
Caster
with
Lock
Caster
without
Lock
11
HARDWARE NEEDED
3/8 Push Nut
(Qty. 4)
NOTE: Make sure logo is
right side up and
facing as shown.
1
Figure
4
ASSEMBLY TIP
On the top of each page you will find a picture of the
Hardware Needed (to scale) along with the Quantity,
Key# and Description. You can lay the hardware on
the picture to identify and sort the hardware.
Having a second person sort hardware and
hold parts will speed up assembly time
and make it easier to assemble your table.
NOTE:
 Loading...