28 EN
4. INSTALLATION
O
9.
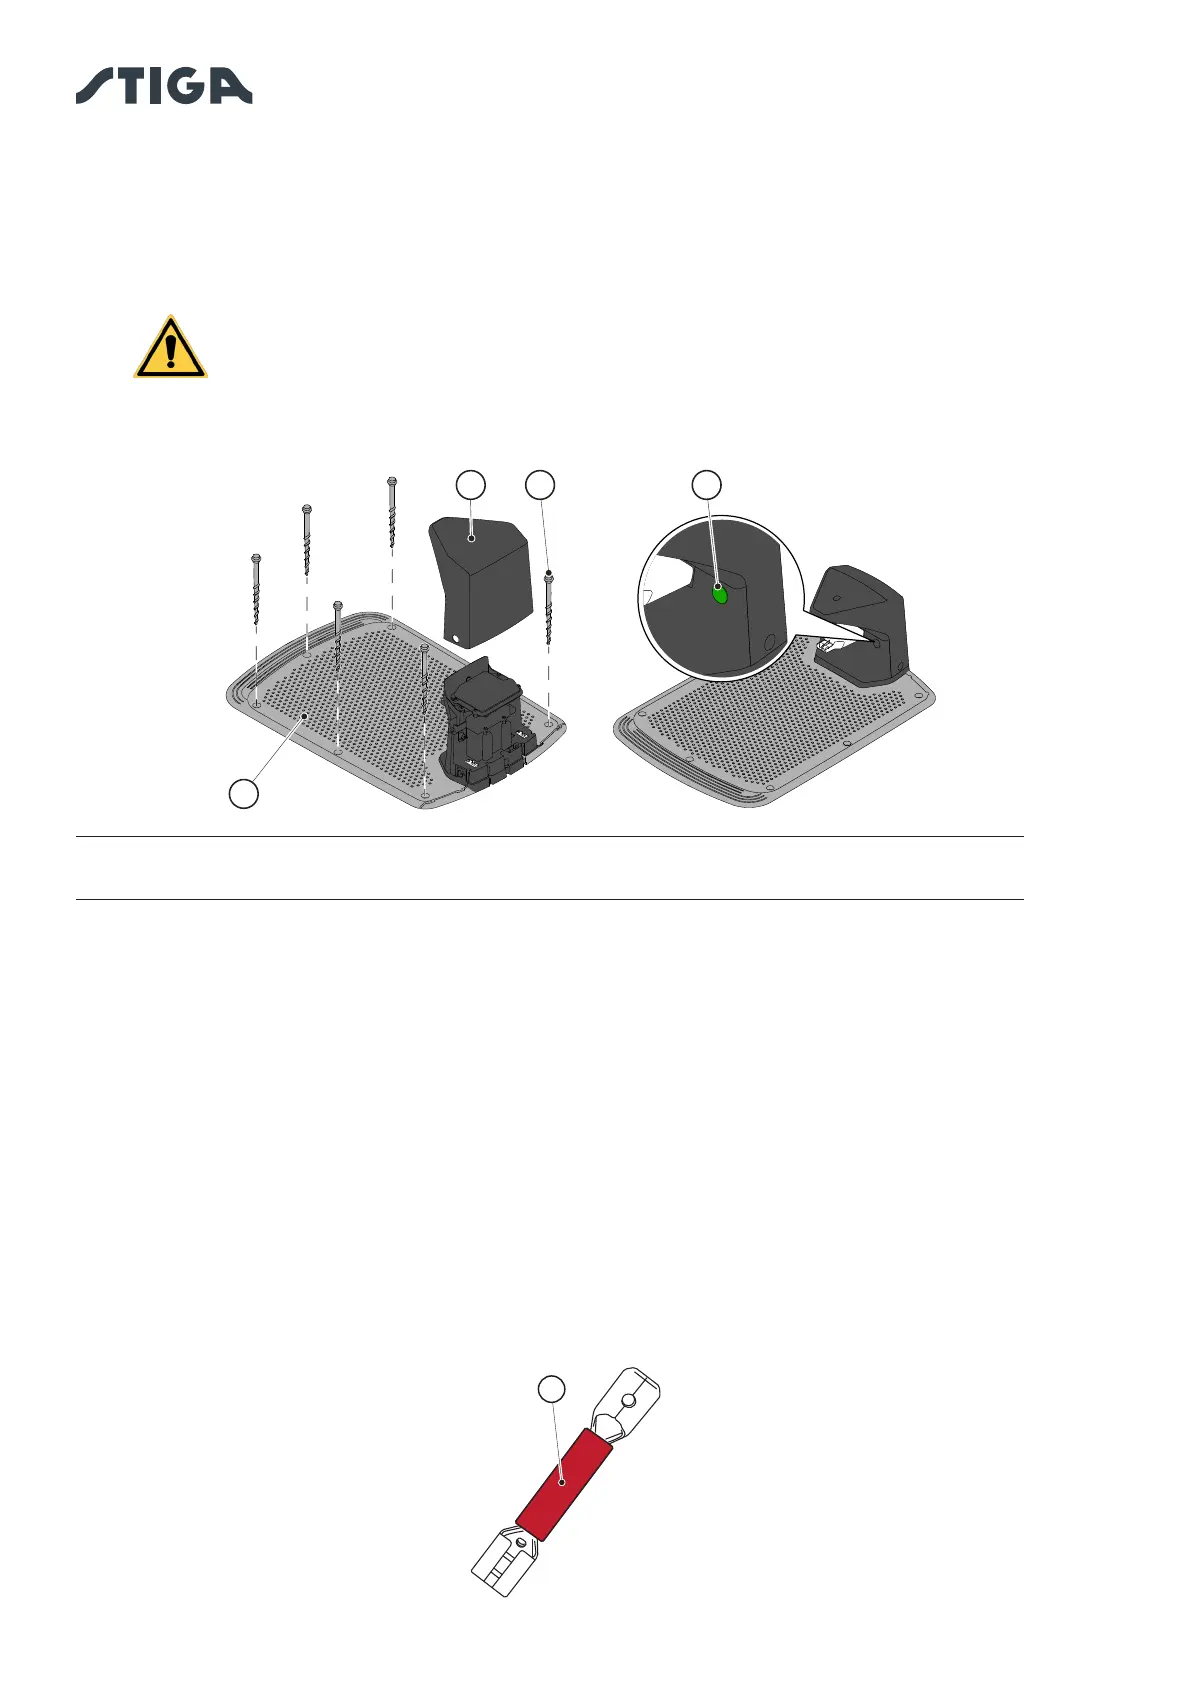
10. Reposition the cover (C).
11. Connect the power supply connector to the charging base and then insert the power supply plug into
the electrical outlet.
12. When the robot lawn mower is not in the charging base, make sure that the indicator light on the
NOTE: If necessary, it is possible to extend the power cable to the charging base by using the
extension cables. Use a maximum of two 5-meters extension cables (see Chap. 9 “Accessories”).
4.5.4. RESISTOR INSTALLATION FOR SMALL PERIMETERS
The perimeter cable used for the installation of the robot lawn mower must be at least 40 m. long. If the
cable length is shorter, it is necessary to connect in series the resistor (see Chap. 9 “Accessories”) with the
perimeter cable.
After having positioned and secured the charging base correctly (see par. 4.5.3), proceed as follows:
1. Remove the cover (C).
2. Cut the ends of the cables to the exact length.
3.
4. Connect the resistor (O) to the terminal (I) of the charging base.
5. Connect the respective perimeter cable to the resistor (O).
6. Connect the other perimeter cable directly to the other terminal of the charging base.
M NC
L



 To Next Page