STIHL 029, 039 80
11.9 Replacing the
Fuel Tank
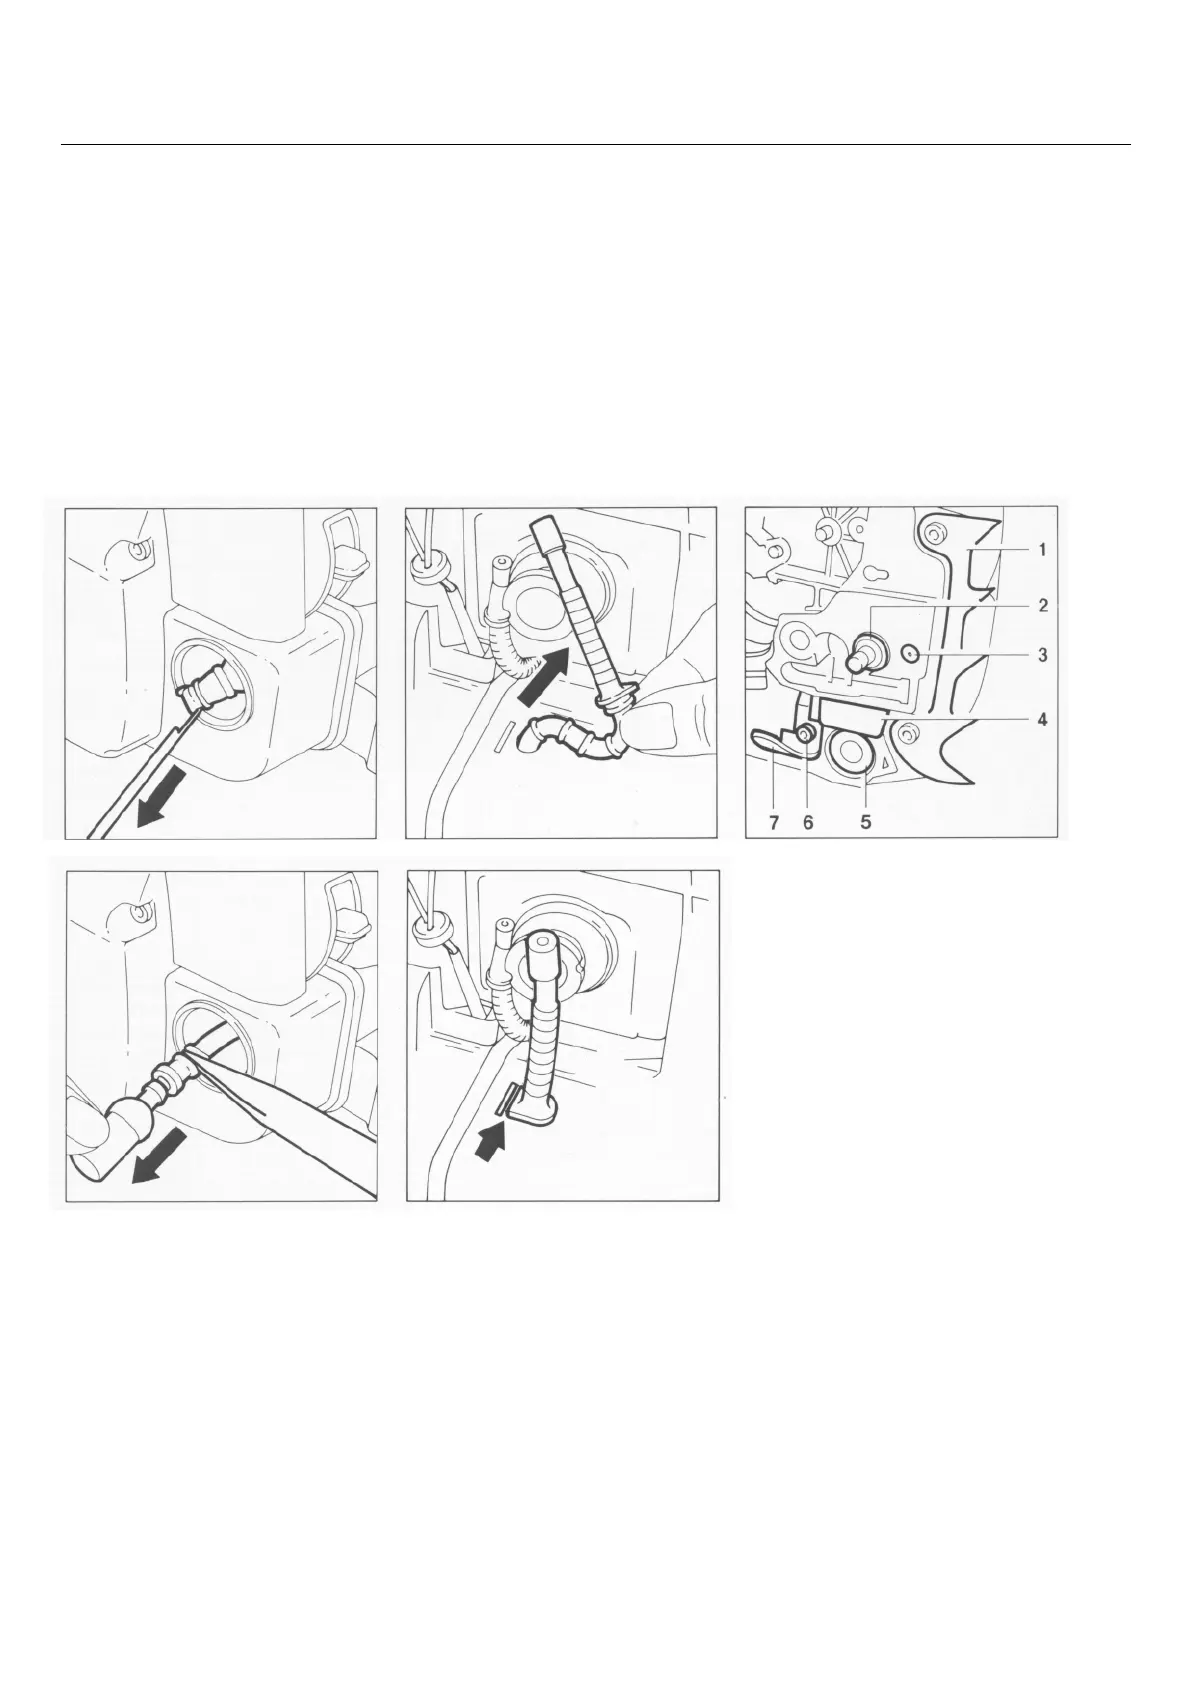
Top:
Withdrawing the pickup body
Bottom:
Disconnecting pickup body
Top:
Removing suction hose
Bottom:
Correct position of hose flange
The fuel tank and engine housing are
one piece.
- Remove the engine - see 4.4.
- Remove the chain tensioner –
see 3.4 or 3.5.
- Remove the chain brake - see 3.3.1.
- Remove the fuel suction hose –
see 11.8.
- Remove the oil suction hose –
see 10.1.
- Remove the mounting screws from
the spiked bumper and take the
spiked bumper away.
- Remove the vent valve - see 10.2.
- Unscrew the collar stud - see 3.6.
- Pry the bumper strip out of its seat.
- Remove the rubber buffer - see 7.1.
- Remove the mounting screw from
the chain catcher and take away the
chain catcher.
Removing the suction hose:
- Remove the handle housing –
see 8.1.1.
- Pull off the pickup body.
- Pry the suction hose out of the
tank. Remove the hose.
Installation is a reversal of the
removal sequence.
Coat the hose flange with a little oil
to simplify installation. The straight
side of the hose flange must locate
against the rib on the tank housing.
Removing and installing
the pickup body:
- Use the assembly hook to pull the
pickup body out through the fuel
tank filler opening.
Note: Do not over-stretch the
suction hose while pulling out the
pickup body.
- Pull the pickup body off the suction
hose and fit a new pickup body.
Installation is a reversal of the
removal sequence.
1 = Spiked bumper
2 = Collar stud
3 = Valve
4 = Bumper strip
5 = Rubber buffer
6 = Mounting screw
7 = Chain catcher
 Loading...