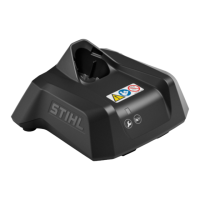
ADG 1
English
7
The CD-ROM with the STIHL diagnostic
software is only included with the MDG 1
engine analyzer.
Sequence
It is essential to observe the sequence of
the steps described. Only then will the
STIHL diagnostic software be properly
installed on the computer and the
analyzer connected to the computer.
1 Check system requirements – see
"Diagnostic Software".
2 Place CD-ROM in the computer's
CD-ROM or DVD drive and start the
setup program – see "Installation of
STIHL Diagnostic Software".
3 Connect analyzer to power supply –
see "Connecting Analyzer to Power
Supply".
4 Plug in and connect the USB cable
– see "Connecting Analyzer to
Computer".
5 Start STIHL diagnostic software –
see "Connecting Analyzer to
Computer".
Installation of STIHL Diagnostic
Software
Place CD-ROM in computer's CD-ROM
or DVD drive.
Automatic Start
The automatic start works only if the
computer supports automatic starting of
a program from a CD-ROM
(AUTORUN). If the setup program is not
started automatically, start it manually.
Manual Start
Open My Computer and select CD-ROM
or DVD-ROM drive. Start installation by
double click on "SDSSetup.exe".
Installation via Internet
The diagnostic software can also be
downloaded –
https://download.stihl.com/sds/sdssetup
.exe
Login data
User name: stihl\_stihl_sds_user
Password: STIHL_diagnose_download!
Connect the analyzer to the computer
only after installing the STIHL diagnostic
software.
A USB cable is used to connect the
analyzer to the computer. The USB
cable is included with the analyzer.
N Connect analyzer to the computer
with the USB cable.
The operating system installs the drivers
automatically – providing the function
has not been deactivated. Otherwise the
driver has to be installed manually and
the hardware assistant appears.
N Check – "No, not this time" – click
"Next".
N Check – "Install software from a list
or other source" – click "Next".
N Check – "Also search following
source" – click "Search".
The following directory must be selected
for drivers: Installation
Directory\STIHL\SDS\ Driver\ ADG1\
N Select installation directory, e.g.
Microsoft
®
Windows
®
XP Standard
Installation Directory:
C:\Programs\STIHL\SDS\Driver\AD
G1\ – click "OK"
N ADG 1 driver is installed. Exit
assistant with "Finish".
N Restart the computer.
N Start STIHL diagnostic software.
The status bar shows
Installing Diagnostic
Software
Connecting Analyzer to
Computer
ADG 1 connected
 Loading...