1312
6.1 Getting Started 6.1 Getting Started
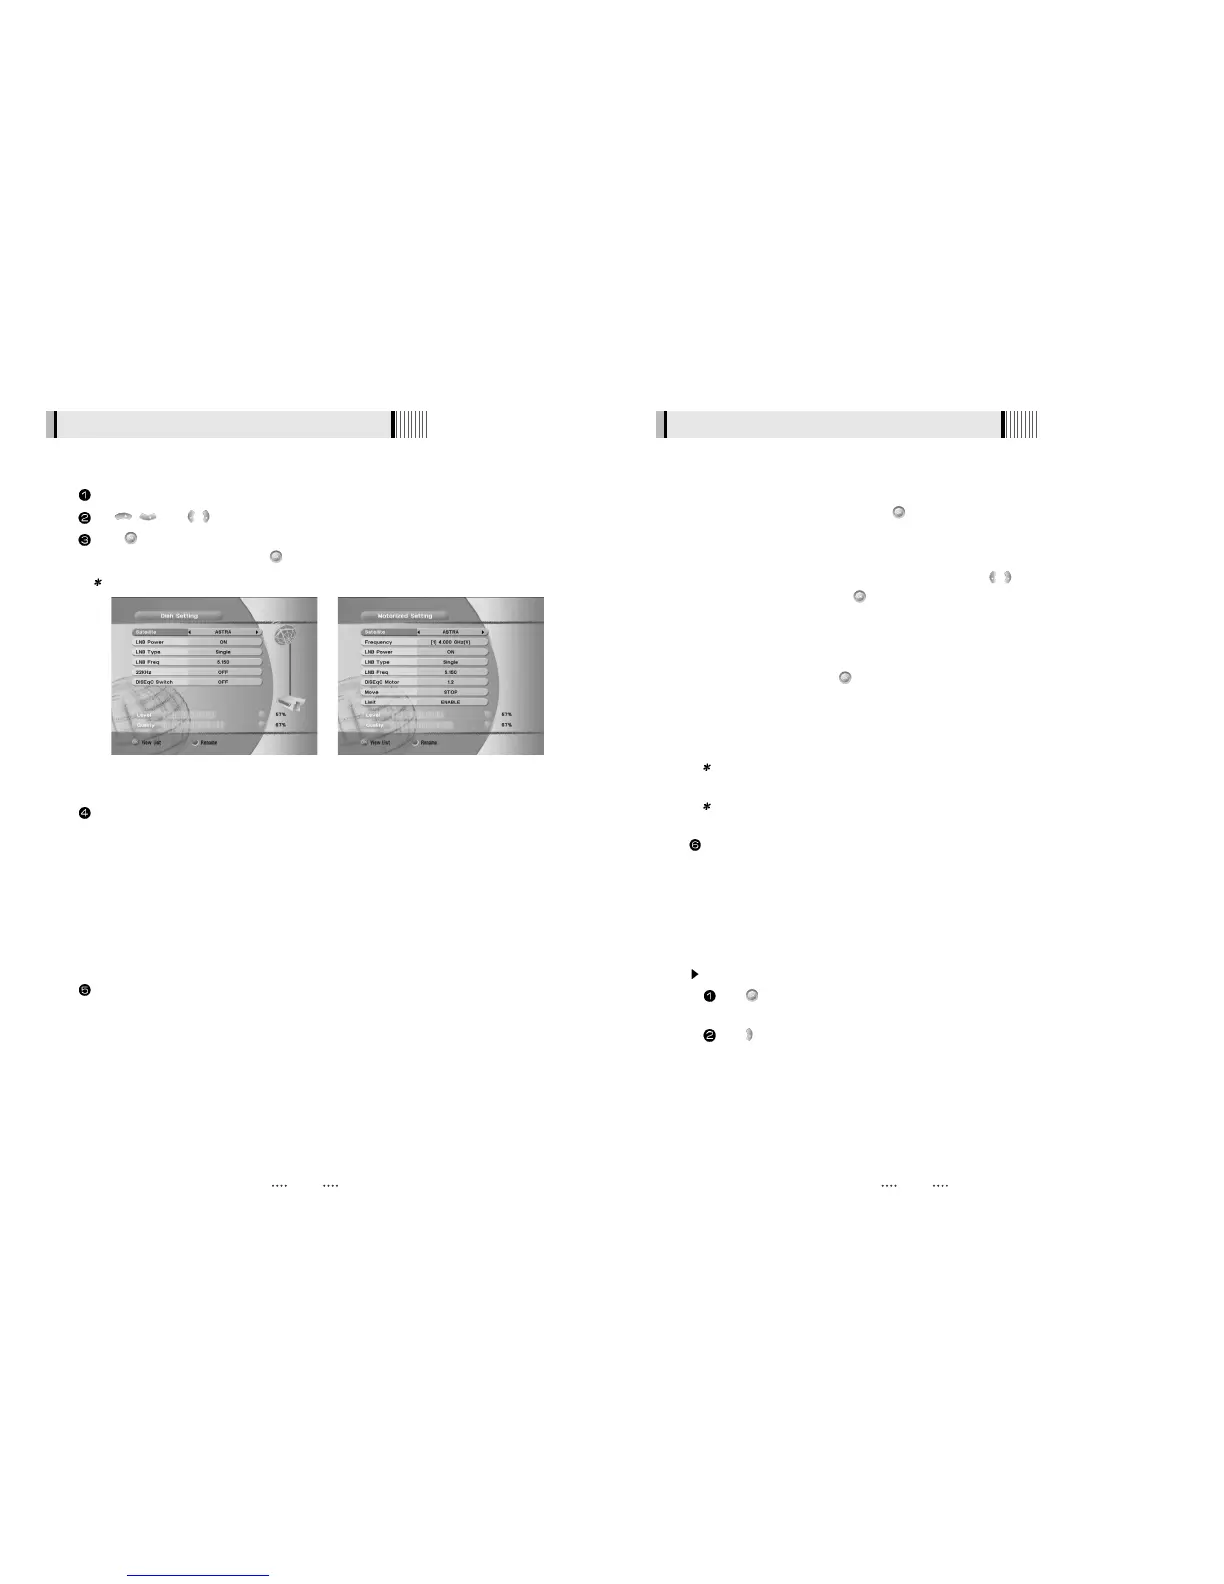
Select the item that you want to edit, and set its parameters as desired. <Dish Setting>
- LNB Power : Select among ON/OFF/13V/18V.
- LNB Type : Select among Single/Universal/OCS.
- LNB Freq : Set the frequency of the LNB oscillator.
- 22KHz : When not AUTO, set the signal path from LNB or switch by selecting a control signal
among 0/22KHz.
- DiSEqC switch : Select DiSEqC protocol among OFF/1.0/1.1 as appropriate for your
configuration.
- Committed/Uncommitted : Select the DiSEqC port.
Select the item that you want to edit and set its parameters as desired. <Motorized Setting>
- Frequency : If the default TP frequency is not appropriate, you can select another TP
frequency at which to check for signal.
- DiSEqC Motor : Select DiSEqC protocol among OFF/1.2/USALS as appropriate for your
Motor.
(
When the DiSEqC Motor parameter is set as 1.2
)
- Move : You can move the dish to the West/East.
- Limit : If you want to set limits, press .
- Disable Limit : You can disable the East and West limits.
- Goto Center : Move the dish to the initial 0 position.
- Set East / West Limit : Move the dish East or West using / .
Press to set East or West limit.
(
When the DiSEqC Motor parameter is set as USALS
)
- Sat Degree : Satellite location.
- Antenna Position : Press .
- Goto Reference : Move the dish to the reference 0 position.
- Antenna Longitude : Your longitude at present.
- Antenna Latitude : Your latitude at present.
Note : You need to know what LNB you are using to correctly set the L.O. (local
oscillator) frequency.
Note : You need to understand how your receiver is connected to properly set the
22KHz and DiSEqC.
When you are done, press the EXIT button.
<Figure 6-2> <Figure 6-3>
Press the MENU button to display the main menu.
Use / and / to move in the menu.
Press on ‘Dish Setting’. The following window will appear. <Figure 6-2>
If you have a motorized dish, press on ‘Motorized Setting’. < Figure 6-3>
Note : Enter a 4-Digit password if need arise. The default password is ‘0000’.
2) Antenna Setup
Through this function, the receiver searches for all the available channels and saves them in
memory.
Auto Scan <Figure 6-4>
Press on the names of the satellites that you want to scan under ‘Satellite List’. You
can select more than one satellite.
Press and set the ‘Search Type’ and ‘Network Search’ parameters.
- Search Type : Decide for which channels to search (All channels/ Free channels only/ TV
channels only).
- Network Search : Set ON to find more transponders (frequencies) through a Network
Information Table (NIT) scan. That is, when the broadcaster is sending
a NIT through a given transponder, the receiver will also scan for
transponders listed in the NIT and not otherwise recognized. (this can
happen when a transponder is new)