11
5.0 USING LIVE TV
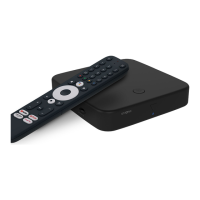
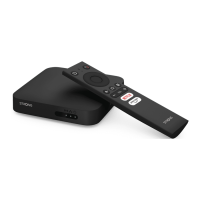
To start watching the TV channels, select on home screen the Live TV application and press OK.
If the TV channels are found in the rst installation steps, it will start to play on a channel.
When no channels are found during this rst installation, then it will show the screen Scan channels. In this case press the button
and select Channels and inputs to open the channel scan menu. Check if the correct country is selected. Select Scan menu and
follow the instructions on screen to (re) install the TV channels.
When you use Live TV for the rst time, the explanation from navigation buttons appears on screen. Use these buttons or press
the OK button to go through these steps to conrm the explanations.
p Open the menu For You to select one of the currently running programs. In this menu use tuto select the TV guide,
favorites or preferences.
q Information will show on screen from the currently running program.
In this menu use tu to select Subtitle and Audio menu.
Press OK to start Timeshift function when the USB device is connected.
t Open the channel list All Channels. In this menu use pq to move the highlight to another channel and press OK to select.
Use tu to select Recent the last selected channels, only Radio or TV channels.
u Calling up the EPG information banner on the screen with only information about the current channel with current and
upcoming events. Use tu to scroll to the next events and press OK to see more detailed information. If you want to see
any of the next events, select Watchlist and press OK to add them to your watch list.
Step back in the menu or exit the information.
NOTE: Some TV channels only transmit Dolby sound tracks. In this case, the volume cannot be adjusted via the volume
control of the Android TV box. Instead, use the remote control of the TV screen or the Dolby audio amplier.
Alternatively, you can set up the volume control via the menu "Settings", "Set up remote control buttons" for
control via the HDMI CEC protocol.
6.0 PREFERENCES SETUP LIVE TV
If you want to start a new automatic scan, edit channels, sort channels, set the default start channel or switch the antenna o and
on, select the Preferences menu by clicking p and four times u. Then click q to select Setup and the submenus below.
6.1 Channel scan
This menu allows you to search for channels from all available frequencies for your selected country automatically. Be aware that
all previous installed channels and favorite list(s) will be deleted. The newfound channels will be installed in the channel list and
afterwards you can create a new favorite list if you like. Select Scan and select between Auto, which will install all found channels
or Manual, to scan only on one selected frequency. Highlight Search and press OK to start scanning.
6.2 Channel edit
This menu allows to Skip, Move, Rename, Delete channels from the channel list.
Skip channels: Here you can mark these channels which you don’t like to be shown during channel zapping.
Move channels: Select a channel you would like to move in channel list. Press shortly on OK to select and use pq to
move to new position. Press shortly OK to conrm new position. Long press OK to access the option to
go directly to the beginning or end of the channel list.
Rename Channels: You can change the current channel name to another one.
Delete Channels: You can permanently remove channels from the channel list.
6.3 Default channel
Use this menu item to select which channel to display when the Live TV App is launched.
Set On to enable this, set O to disable it and start with the last channel watched.
6.4 LCN
The LCN (Logical Channel Numbering) option can be switched OFF or ON.
Select Disabled / O if you want to sort the channels freely as you like.
Select Enabled / On if the local transmitter supports this automatic channel sorting.
If you change the LCN selection, a new automatic scan is recommended.