www.stryker.com 3
6390 Angle Position Sensor (APS) Calibration Instructions
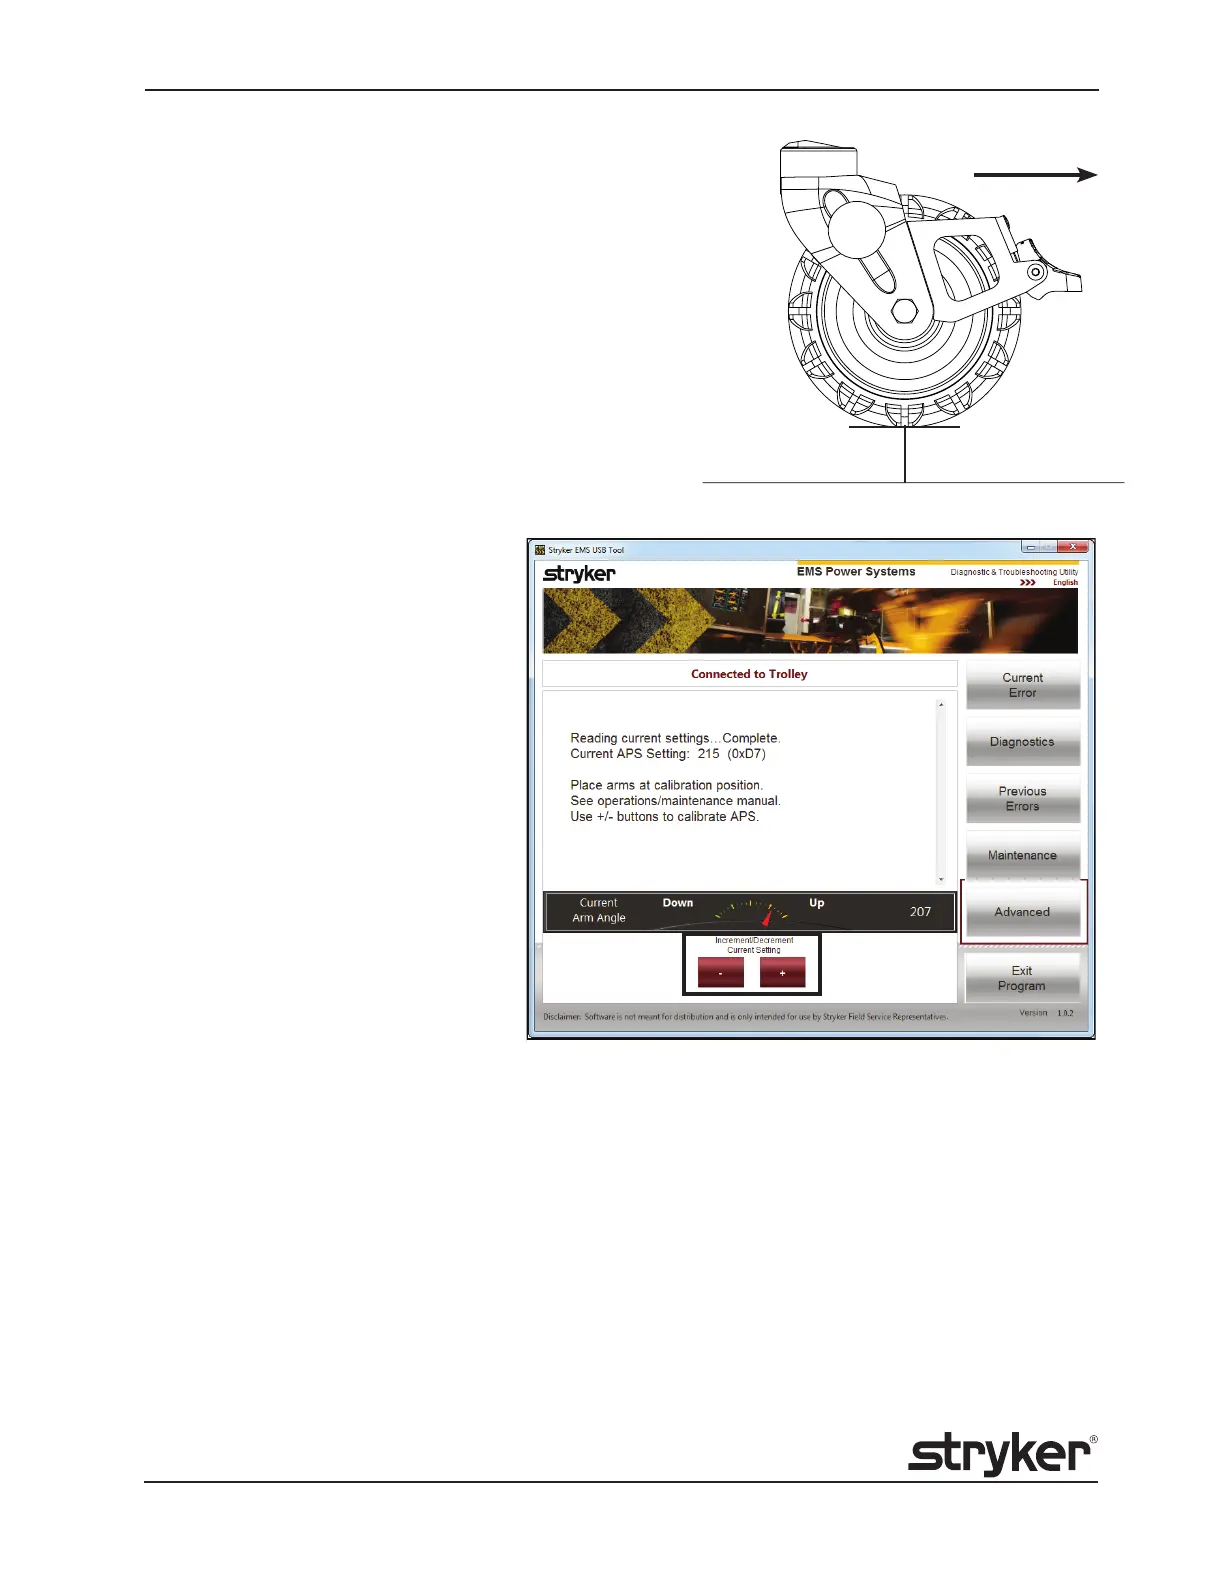
Figure 3
14. Using a tape measure, measure the distance from the
bottomofthefootendcotwheeltothefloorwiththecot
wheelfacingthebackofthevehiclepatientcompartment
(Figure2).Makesurethatthedistancebet weenthebottom
ofthefootendcotwheeltotheflooris2in.
• Ifthemeasurementismorethan2in,clickDecrement
(-) on the Connected to Trolley calibration screen
(Figure3).
• Ifthemeasurementislessthan2in,clickIncrement
(+) on the Connected to Trolley calibration screen
(Figure3).
15. Graspthecotframeatthefootendto
pullthecotoutofthevehiclepatient
compartment.
Note: The head end LED indicators
turn solid green only when the cot is
ready to unload.
16. Unloadthe cotfrom the vehicle(see
steps3-4onpage1).
17. Load the cot into the vehicle (see
steps12-13onpage2).
18. Repeatsteps12-17untilthe distance
between the bottom of the foot end
cotwheeltotheflooris2in.
19. Unplug the male-to-male USB cable
fromthePower-LOADUSBport.
20. Screw the USB port cap back on to
theUSBport.
21. UsingaT25Torxdriver,reinstallthetwoscrews(removedinstep5)tosecurethecovertotheleftwingassembly.
Note: Make sure that the extruded “U” nut does not rotate clockwise when you tighten the bottom right T25
Torx screw on the left wing assembly cover.
22. Verifyproperoperationoftheproductbeforereturningittoservice.
3800E.CentreAve.,Portage,MI49002
1-800-327-0770|2014/01
Figure 2
2”
RearDoor
 Loading...


