ORIGINAL
Introduction
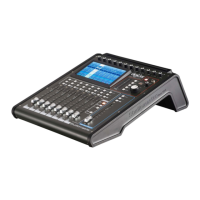
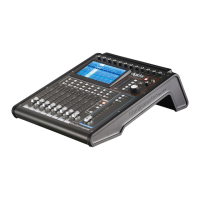
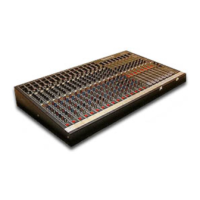
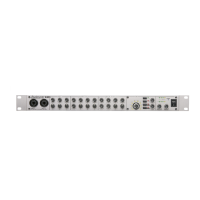
The Fusion is a compact, versatile mixer packed with all the features the modern musician and DJ demands. As the
name suggests Fusion is the combination of three major sound elements. The first is professional mic channels with
smooth and musical E.Q. The second is a high quality DSP processor with studio quality effects to produce
stunning vocals. The third and the most unique feature is the music/D.J. inputs geared to modern club mixing.
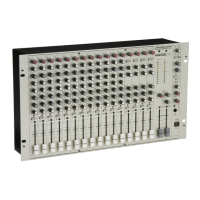
Easy to use, incredibly flexible and backed up by quiet studio quality electronics. It can be used free standing or rack
mounted and the host of internal options make the Fusion adaptable to any situation.
Despite the sophistication behind the control panel, the Fusion is very easy to use, though to get the best from your
new purchase, we recommend you read this operator guide in full at least once before getting down to any serious
work. This opeartor guide contains important safety information as well as practical hints on operating a live sound
system.
Remove your Studiomaster Fusion from its packing and ensure that along with this operator guide you have an AC
power cord/mains lead and a warranty card. Retain the packing carton in the eventuality that the unit needs to be
returned for service or repair and please complete and return your warranty card. Returning the completed warranty
card does not diminish your statutory rights in any way.
WARNING: THIS APPARATUS MUST BE EARTHED (GROUNDED)
1. Make sure the Voltage Selector is set to your local supply Voltage. For supplies between 220 and 240 Volts
use the 230 position. For supplies between 110 and 120 Volts use the 115 position.
2. Only use the A.C. power cord/mains lead supplied with the product.
Replace if it becomes damaged in any way.
3. Never operate without, or remove, the safety ground (earth) from the A.C. power cord/mains lead.
4. Do not attempt to remove screws or panels on your Fusion. There are no user serviceable parts inside.
5. Do not operate the unit next to heat sources such as radiators.
6. The unit should not be operated or stored near rain or moisture.
7. Do not allow objects or liquid to enter the unit.
8. This equipment must not be exposed to dripping or splashing and no objects filled with liquids should be placed on
top of it.
9. Write the serial number in the box provided in the Service Information (page 8) for future reference.
10. If the unit gets damaged, has been dropped or appears to have developed a fault refer to the Service
Information section for details.
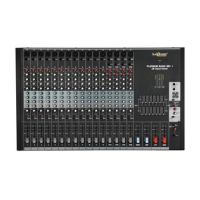
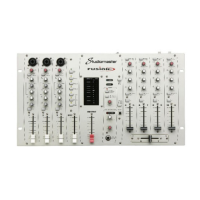
DJs - 4 full featured stereo inputs, 2 with -36dB "kill" facility, and switchable to vinyl (RIAA). Assignable VCA cross fader
with fully adjustable tapers producing smooth mixes.
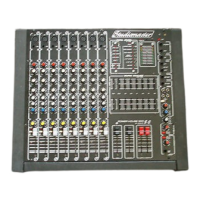
Karaoke - A total of 3 full featured mic channels.
The onboard DSP digital reverb/delay enhance vocal performances and 4 stereo channels - 2 for Karaoke machines
and 2 for background/ back up CD players.
Solo / Duo Performer / Live Music - The 3 professional mic channels can be used for vocals or instruments, the
4 stereo inputs can be used for drum machines, keyboards, etc or CD/mini disk play back. Easy to use onboard
digital reverb for the perfect vocal sound.
Club mixer
-
The 4 stereo channels have all the latest features a DJ needs, including -36dB "kill" controls, with a
flexible Booth output (with selectable mic mute), the VCA cross fader is internally adjustable for cross mix, beat mix,
and cut mix. A separate CUE bus bargraph makes beat and level matching with the main outputs easy.
Night club/entertainment venue - The flexible input arrangement can accommodate all types of performer. Small
bands, background music, disco or a simple announcement/PA system can all be easily handled by the Fusion.
Install - The main outputs are on balanced XLR connectors with level adjustment, mic inputs are on the front panel for
easy access. A 20Hz, 18dB/Octave filter on the main outputs reduces out of band signal (from CDs, records and
instruments) reducing power loss and promoting tighter bass in the sound system.
Read the operator guide
Unpacking
Safety instructions
Applications
(see set-up diagrams page A)