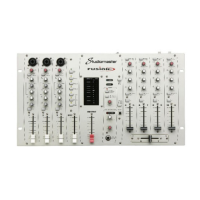
VCA XF1
22
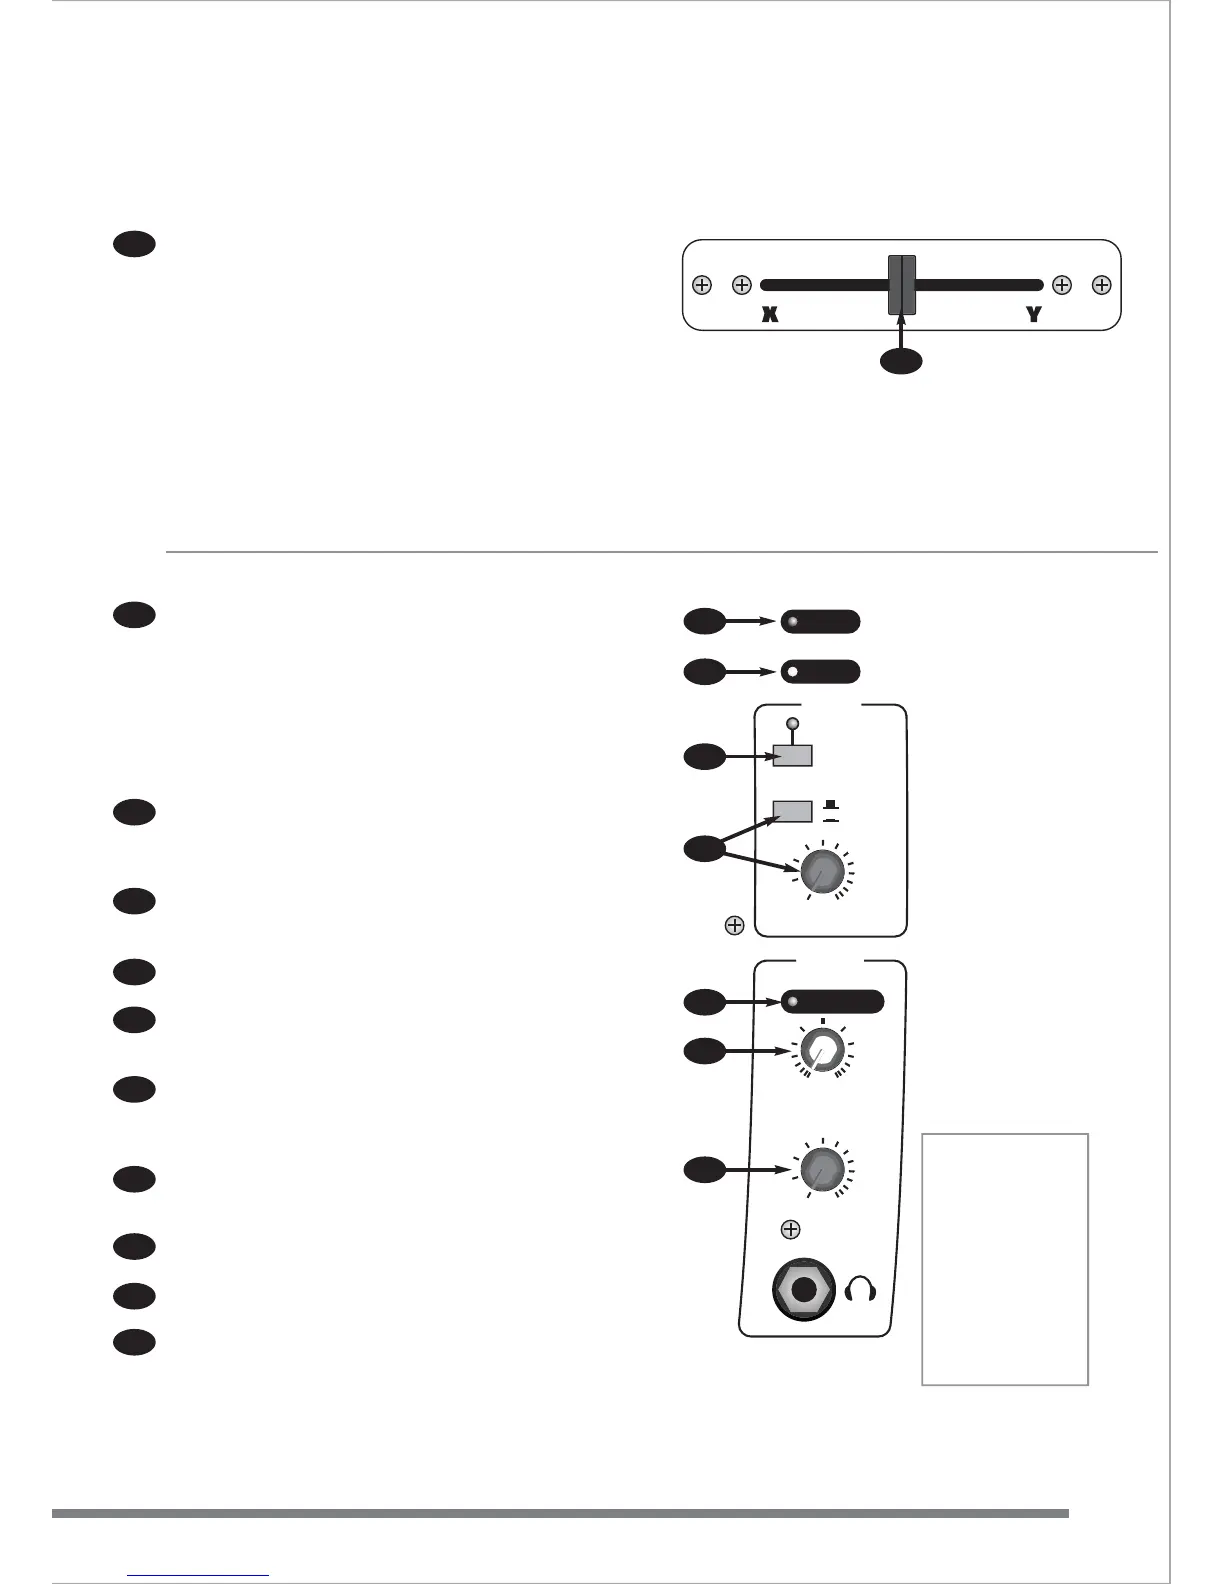
CROSS-FADER
The cross-fader can be used simply to fade from one stereo
channel to another or creatively by the DJ. Two ‘TAPER’ controls
(34 & 35) in the master section of the Fusion allow a number of
effects and mixing tricks. The signal to the cross-fader is assigned
from the stereo channels using the “X” and “Y” switches (13 & 19).
Experimentation is recommended.
Note: this cross-fader is easily removable using the two screws on
the panel. Should your cross-fader become worn or damaged it
can be replaced without lengthy downtime. Contact your dealer for
information about obtaining replacement cross-faders.
The Fusion cross-fader circuit uses VCAs (voltage controlled
amplifiers) to eliminate the operational noise and intermittent
operation that can occur with ‘ conventional’ cross-faders after
extended use.
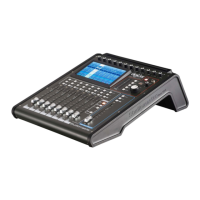
MASTER SECTION
Two 12 segment, 3 colour LED meters display the main Left/Right
output levels.
Note - when any CUE button is pressed the signal source
displayed on the meters changes from the post output fader to
pre-fader. This means that instead of the meters showing the
actual signal level leaving the Fusion it shows the mix of signals
before the output fader. This is very useful as it allows a
comparison between the cue bargraphs signal and the mix
(output) signal.
The Cue meter displays the level of all signals assigned to the cue
bus. It displays cue’d signals from mic channels and the right
channel of the cue’d signal from stereo channels. This allows beat
matching with the right output meter next to it.
The OUTPUT fader is the master volume control, like the volume
control on a HI-FI. Always lower the fader to ‘ ’ before turning on.
This will avoid any ‘ surprises’ from CDs playing or mics left on!
The POWER LED lights when the Fusion is connected to the AC
power supply and switched on.
The MONO LED lights when the MONO switch (on the back
panel) has been selected. The main left-right output signal will
now be in mono.
When the “OUTPU T TO BOOTH MIC CUT” switch is selected, the
associated LED illuminates and all microphone channels are
disconnected from the BOOTH output mix. This helps to avoid
feedback in the DJ booth. Note: the main mix is unchanged.
OUTPUT/PHONES gives you the choice of sending either the
PHONES mix or the main Output mix to the BOOTH output. The
LEVEL control adjusts the volume of the BOOTH output.
The CUE ACTIVE LED illuminates if any CUE buttons are
activated.
CUE/OUTPUT allows a mix between signals being “CUE’d” and
the main output to be heard on the phones output.
LEVEL adjusts the volume of the PHONES output.
22
23
24
25
26
27
28
30
29
31
32
CUE ACTIVE
POWER
MONO
BOOTH
PHONES
OUTPUT
TO BOOTH
MIC CUT
0 10
CUE OUTPUT
0 10
OUTPUT
PHONES
LEVEL
LEVEL
26
27
28
30
31
32
29
Headphones
The best
headphones to use
with Fusion are
studio grade 200 -
400 ohm types,
although most types
can be used but may
not sound as loud.
Headphones are
used mainly for
cueing
8